


Circus
















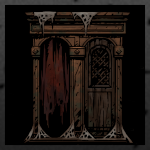
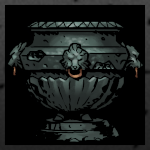

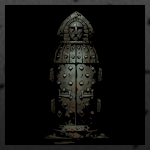
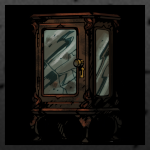
 Increase Light Meter to 100
 Gold / Gems x 2
 50%: Blight (100% Base) 2pts/rd for 3 rds 25%: Gold / Gems x 1
 25%: Nothing
 Buff Hero
+30% DMG (until camp)
Buff Hero +20% DMG (until camp)
 20%: Scouting
 20%: Stress +15
 13.3%: Random Positive Quirk
 6.7%: Random Negative Quirk
 20%: Journal Entry 20%: Nothing
 Stress -30 50%: Stress +15 25%: Gold / Trinkets x 6 + Journal Entry
 25%: Purge Negative Quirk
 Gems / Trinkets x2 + Gems x2 Negative Quirk - Guilty Conscience 44.4%: Gems / Trinkets x 1 + Gems x 2 22.2%: Blight (100% Base) 2pts/rd for 3 rds
 7.4%: Disease - Creeping Cough 3.7%: Random Disease 22.2%: Nothing
Stress -20
Cure Status Effects
Heal 12 HP
50%: Stress -10 Cure Status Effects
Heal 5 HP
50%: Gold / Gems x 2
Any Loot x 2 40%: Any Loot x 2 20%: Negative Quirk - Claustrophobia 13.3%: Disease - Tetanus 6.7%: Disease (Random) 20%: Nothing
 Gold / Heirlooms x 3 + Gold / Gems x 2 Gold / Heirlooms x 2 + Gold / Gems x 2
 50%: Bleed (100% Base) 2pts/rd for 3 rds 50%: Blight (100% Base) 2pts/rd for 3 rds
Gold / Heirlooms x 2 + Gold / Trinket x 1 Gold / Heirlooms x 1 + Gold / Trinket x 1 50%: Bleed (100% Base) 2pts/rd for 3 rds 50%: Blight (100% Base) 2pts/rd for 3 rds
60%: Gold / Heirlooms x 2 20%: Negative Quirk - Thanatophobia 20%: Nothing
75%: Buff Hero
+15% PROT (until camp)
+10 DODGE (until camp)
12.5%: Positive Quirk - Ruins Adventurer 12.5%: Positive Quirk - Ruins Tactician 
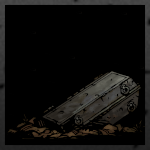
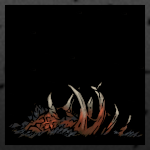
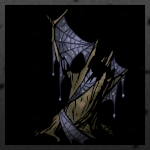
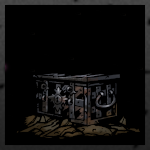
 50%: Gold / Heirlooms x 2 8.35%: Positive Quirk - Weald Adventurer 8.35%: Positive Quirk - Weald Explorer 33.3%: Nothing
Food x 2 42.86%: Food x 1 9.52%: Disease - Rabies 19.04%: Random Disease 14.29%: Negative Quirk - Zoophobia 14.29%: Nothing
 Food x 2 + Gems / Trinkets x 1 40%: Gold / Gems x 1 + Gems / Trinkets x 1 10%: Negative Quirk - Slow Reflexes 10%: Negative Quirk - Slowdraw 40%: Nothing
 Any Loot x 3 Any Loot x 3 50%: Any Loot x 4 + Journal Entry 50%: Blight (100% Base) 2pts/rd for 3 rds
Gold / Trinkets x 2 40%: Gold / Trinket x 1 40%: Blight (100% Base) 2pts/rd for 3 rds 20%: Nothing
Any Loot x 3 50%: Any Loot x 2 25%: Blight (100% Base) 2pts/rd for 3 rds 25%: Nothing
Stress -30 Stress -20
Gems / Heirlooms x 3 50%: Blight (100% Base) 2pts/rd for 3 rds 50%: Random Disease
37.5%: Gold / Supplies x 4 Gold / Heirlooms x 437.5%: Scouting 12.5%: Stress +25 12.5%: Nothing
Random Positive Quirk 18.75%: Random Positive Quirk 18.75%: Random Negative Quirk 18.75%: Bleed (100% Base) 2pts/rd for 3 rds 9.375%: Blight (100% Base) 2pts/rd for 3 rds 9.375%: Stress +15 25%: Nothing
Any Loot x 2
Trinkets x 2 Blight (100% Base) 2pts/rd for 3 rds
Stress +100
 Buff Hero
+15% DMG (until camp)
+10 ACC (until camp)
+5% CRIT (until camp)
Clear Status Effects
Food x 3 + Gold / Trinkets x 1 37.5%: Food x 1 + Gold / Trinket x 1 25%: Blight (100% Base) 2pts/rd for 3 rds 12.5%: Disease - The Black Plague 25%: Nothing
Food x 2 + Gold / Supplies x 1 25%: Food x 1 + Gold / Supplies x 1 25%: Blight (100% Base) 2pts/rd for 3 rds 25%: Disease - Tapeworm 25%: Nothing
Buff Hero +30% DMG (until camp)
33.3%: Food x 1 + Gold / Supplies x 1 33.3%: Blight (100% Base) 2pts/rd for 3 rds 11.15%: Negative Quirk - Tippler 22.25%: Nothing
 Debuff Hero
-20 DODGE (until camp)
33.3%: Random Positive Quirk 16.7%: Random Negative Quirk 25%: Stress +25 25%: Nothing
Any Loot x 2 25%: Any Loot x 2 25%: Random Disease 25%: Negative Quirk - Bloodthirsty 25%: Nothing
Purge Negative Quirk 28.57%: Scouting 14.29%: Stress +15 9.52%: Random Positive Quirk 4.76%: Random Negative Quirk 14.29%: Journal Entry 28.57%: Nothing
Gold / Gems x 2 + Food x 1 40%: Gold / Gems x 1 + Food x 1 40%: Bleed (100% Base) 2pts/rd for 3 rds 20%: Nothing
50%: Stress +50 25%: Purge Negative Quirk 12.5%: Positive Quirk - Warrens Explorer 12.5%: Positive Quirk - Warrens Scrounger 
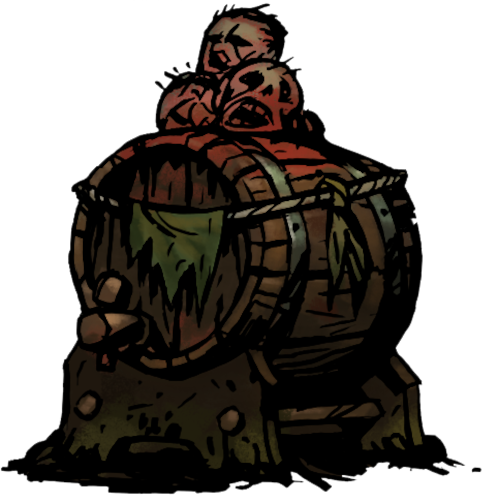
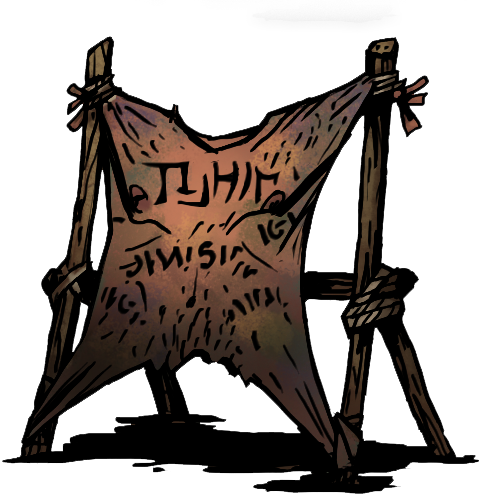
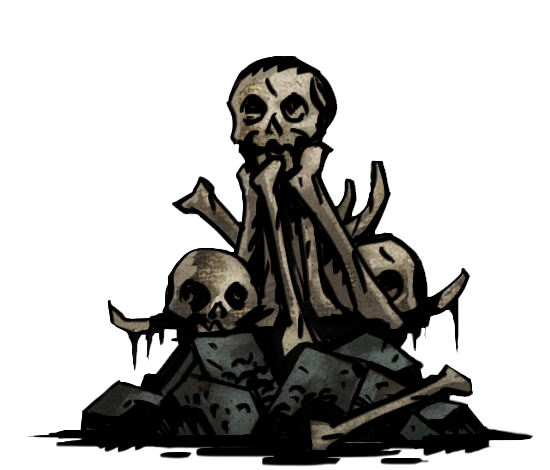
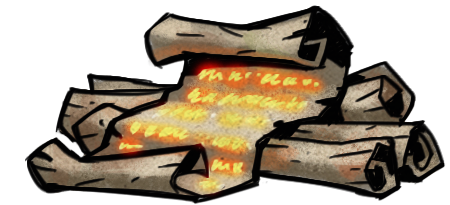
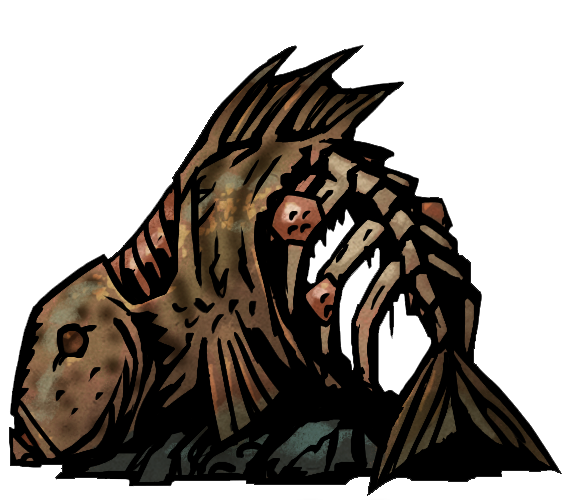
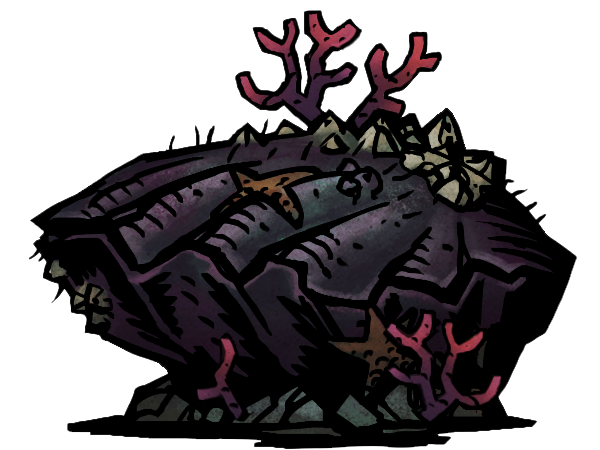
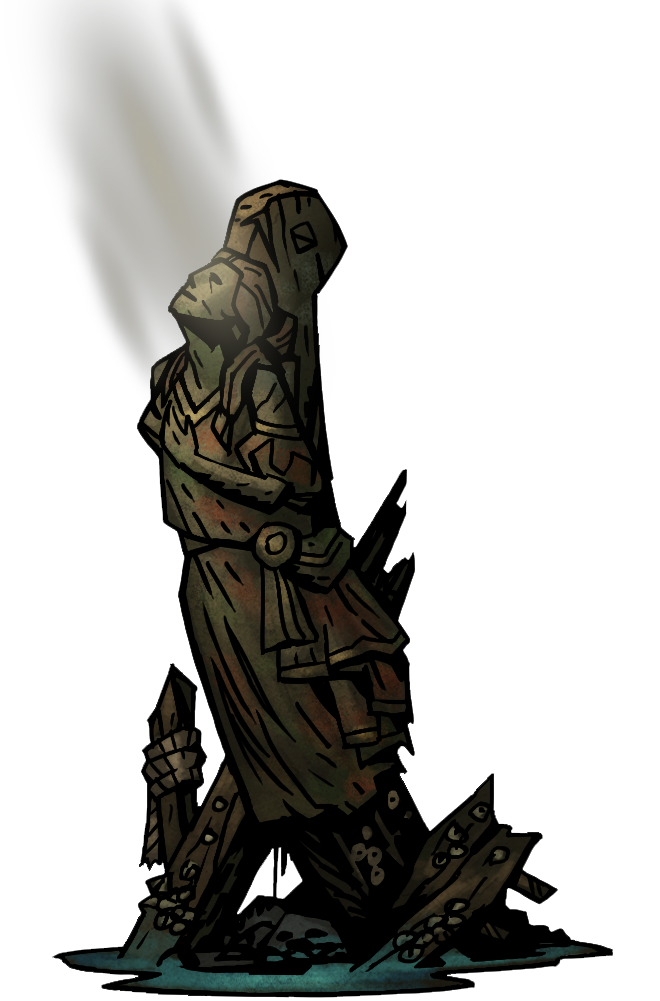
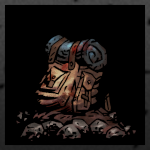
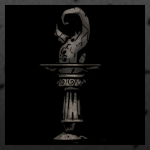
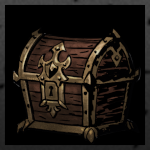
 75%: Heirlooms x 1 25%: Nothing
60%: Any Loot x 2 20%: Scouting 20%: Nothing
Purge Negative Quirk 40%: Stress +25 10%: Purge Negative Quirk 50%: Nothing
Heirlooms x 4 Heirlooms x 3 75%: Heirlooms x 2 12.5%: Bleed (100% Base) 2pts/rd for 3 rds 12.5%: Blight (100% Base) 2pts/rd for 3 rds
Any Loot x 3 66.6%: Any Loot x 2 33.3%: Nothing
50%: Any Loot x 2 25%: Bleed (100% Base) 2pts/rd for 3 rds 25%: Blight (100% Base) 2pts/rd for 3 rds
75%: Gold x 1 25%: Nothing
Torch x 1
 Summon Shambler Nothing
Stress +100 22.2%: Stress +25 22.2%: Random Positive Quirk 11.1%: Random Negative Quirk
 11.1%: Light Meter -25 16.7%: Journal Entry 16.7%: Nothing
75%: Any Loot x 2 25%: Blight (100% Base) 2pts/rd for 3 rds
Collector Trinkets / Puzzling Trapezohedrons x 3 Gold / Gems x 3
Gold / Gems x 5 Ancestral Trinket x 1
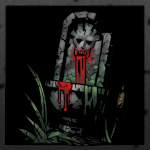
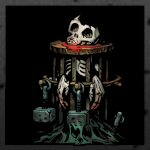
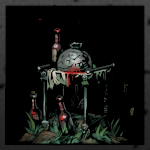
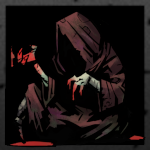
 Nothing Stress +15 66.7%: Gems / Heirlooms x 2 33.3%: Any Loot x 1 38.5%: Stress +15 23.1%: Scouting 15.3%: Any Loot x 2 + 16.7%: The Blood x 15.1%: Disease - Tetanus 2.5%: Random Disease 15.3%: Nothing
Stress -30 Stress +5 60%: Bleed (100% Base) 2pts/rd for 3 rds 20%: Disease - Crimson Curse20%: Any Loot x 2 + 16.7%: The Blood x 1
Heirlooms x 3 40%: Stress +25 15%: Random Positive Quirk 15%: Random Negative Quirk 10%: Any Loot x 2 + 16.7%: The Blood x 220%: Nothing
Food x 2 + Gold / Supplies x 1 20%: Gold / Supplies x 4 + 25%: The Blood x 1 20%: Negative Quirk - Stress Eater 20%: Blight (100% Base) 2pts/rd for 3 rds 13.3%: Disease - Crimson Curse6.7%: Random Disease 20%: Nothing
Trinkets x 2 42.8%: Stress +15 28.5%: Any Loot x 1 7.6%: Random Disease 14.2%: Nothing
Trinkets x 3 7.6%: Random Disease 50%: Scouting 42.4%: Nothing
50%: Any Loot x 1 50%: The Blood (16.7%) x 1 Summon 1 Supplicant , Sycophant, Esquire 50%: Bleed (100% Base) 2pts/rd for 3 rds 20%: Any Loot x 2 + 16.7%: The Blood x 1 10%: Disease - Crimson Curse20%: Nothing
Stress -30 75%: Summon 1 Supplicant , Sycophant, Esquire 12.5%: Any Loot x 3 + 16.7%: The Blood x 112.5%: Nothing
Any Loot x 3 + 20%: The Blood x 175%: Any Loot x 2 + 20%: The Blood x 125%: Bleed (100% Base) 2pts/rd for 3 rds
Stress -30
 Firewood x 1 41.7%: The Blood (33.3%) x 2 + Any Loot x 1 Gold / Supplies x 4 16.7%: Negative Quirk - Tippler 16.7%: Disease - Crimson Curse 8.3%: Scouting 8.3%: Bleed (100% Base) 2pts/rd for 3 rds 8.3%: Nothing
The Blood X 3~5
Summon a Gatekeeper with a mix of Sycophants, Suppplicants , & Manservants
Crimson Court Rarity Trinket x 1
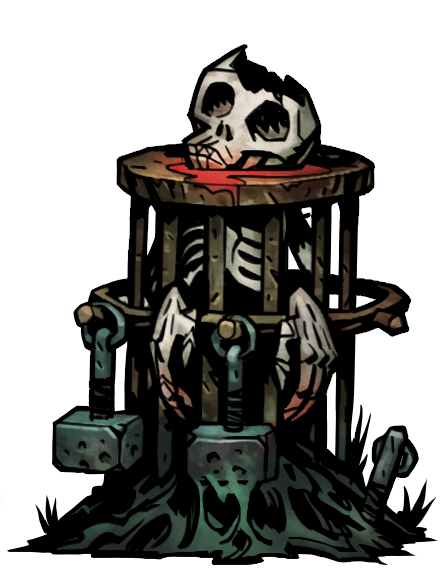
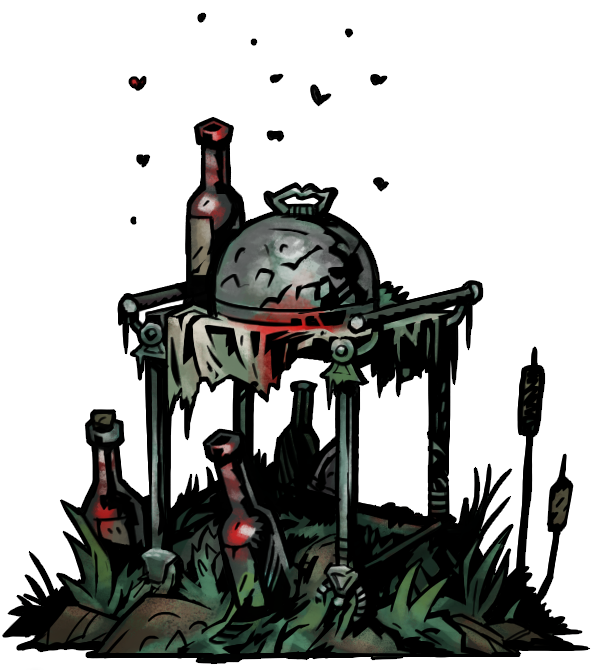
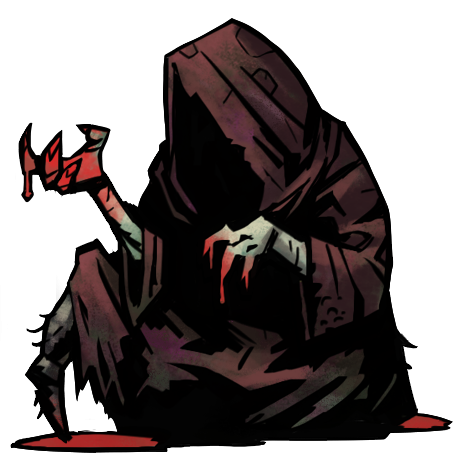
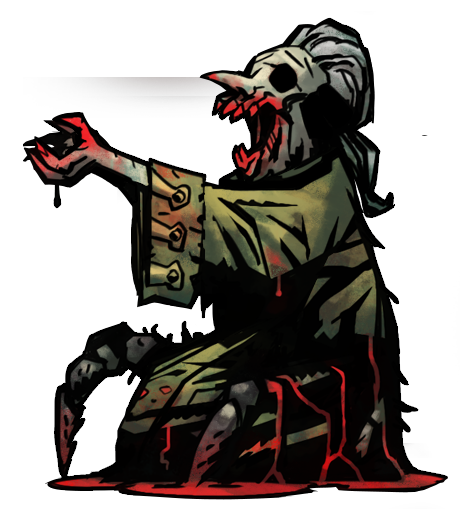
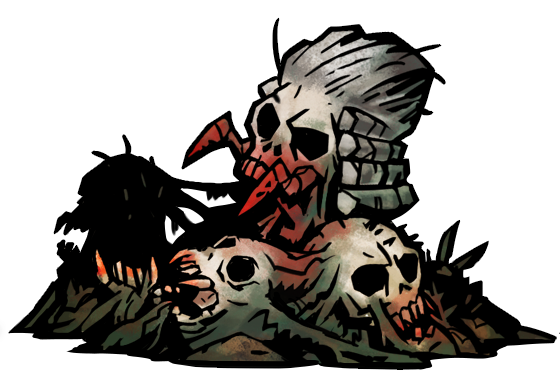
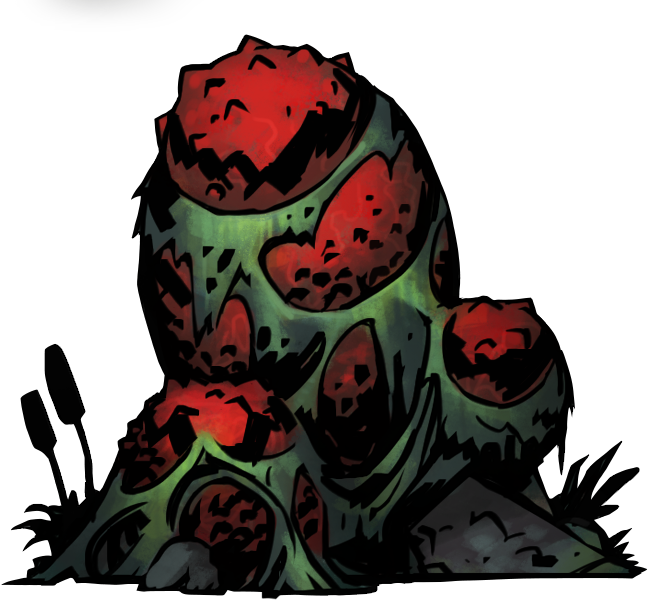
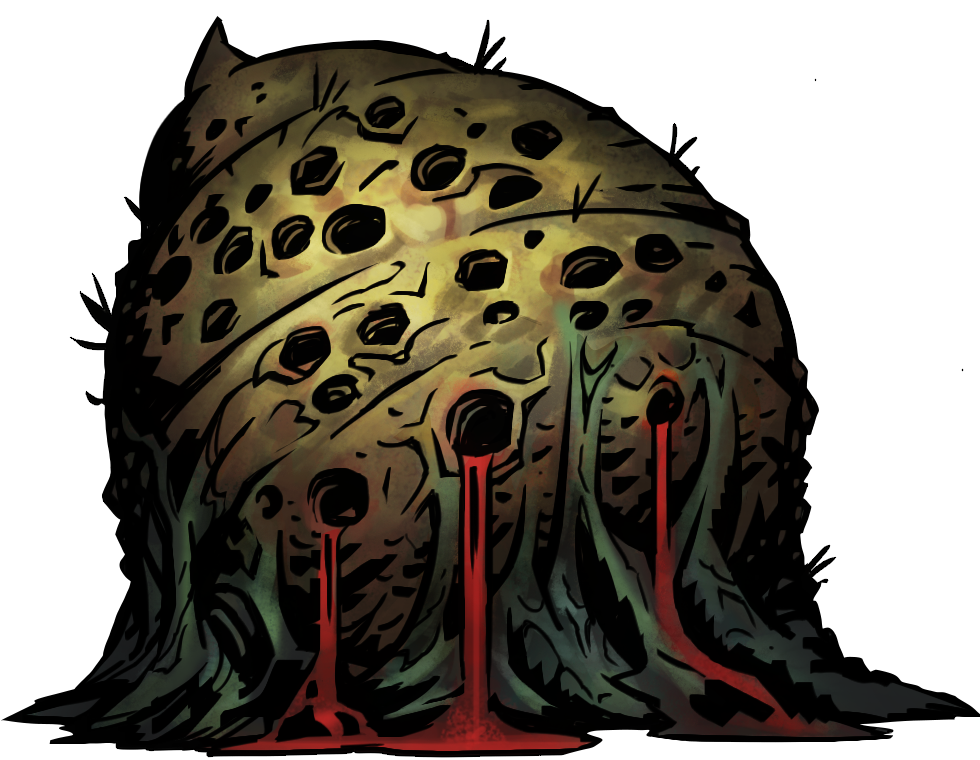
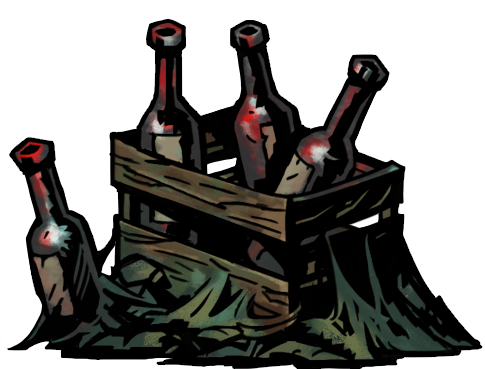
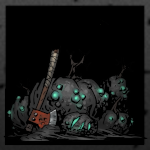
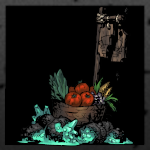
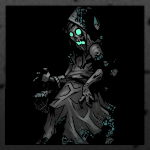 Shards X 5~15
 Heal 90% of MAX HP
Food X 6~12 + Any Supplies x 1 + Trinket x 1 66%: Random Supplies x 3 33%: Nothing
Stress -100
Initiate Camping
Party: Heal 65% of MAX HP
If you do not have one already - Mildred's Locket Trinket / Shards
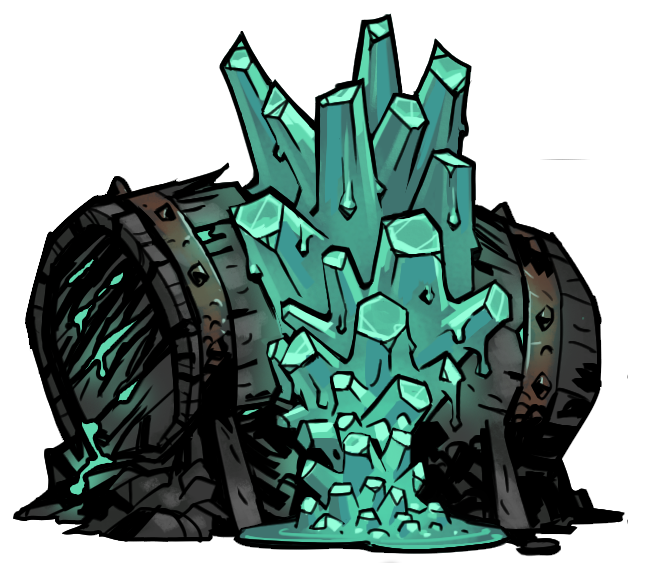
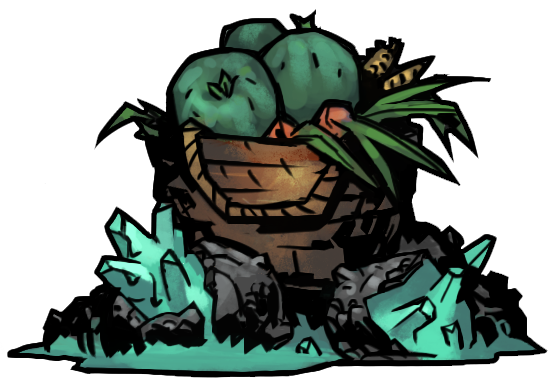
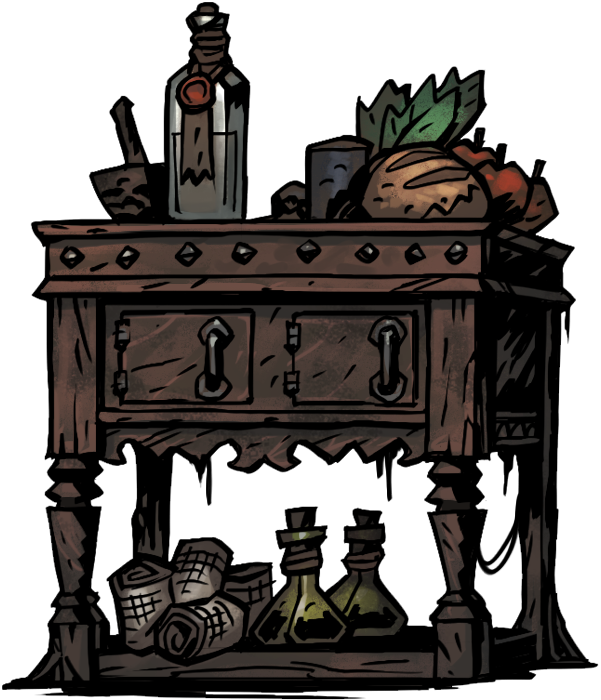
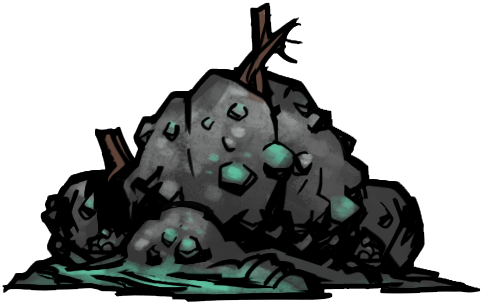
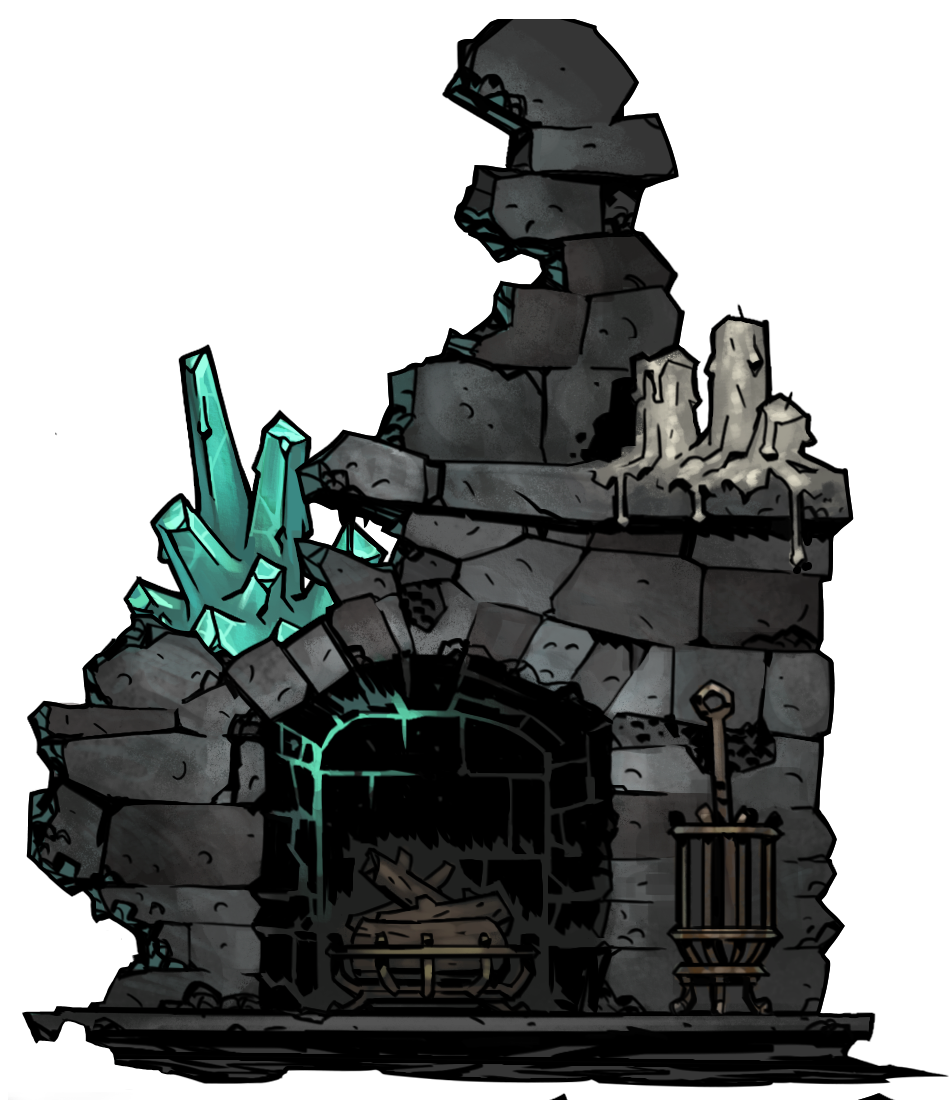

(Does not apply to Room Curios)
Corvid's Curiosity (27.5%)
Compulsive (20%)
Curious (20%)
Irrational (7.5%)
Crimson Curse - Craving (10%)
Crimson Curse - Wasting (25%)
Ruins Enemies
Weald Enemies
Warrens Enemies
Cove Enemies
Crimson Court DLC Enemies
Color of Madness DLC Enemies
Shieldbreaker DLC Enemies
Spoiler Enemies
HP
SPD
DODGE
PROT
Corpse
Blight
Move
Debuff
Stealth


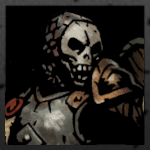
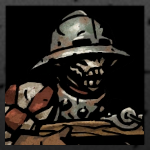

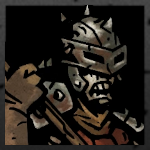
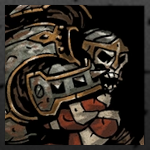
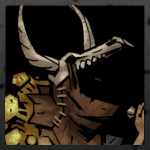
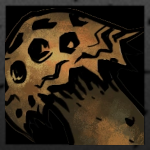
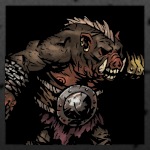
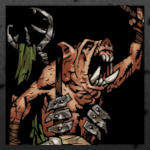
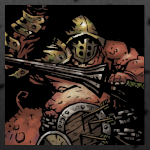
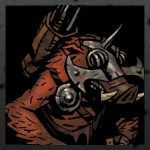
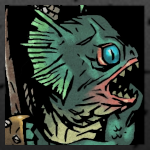
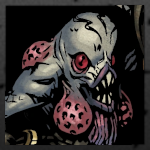


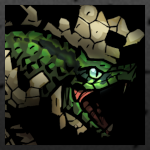
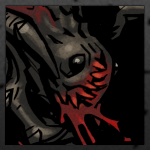
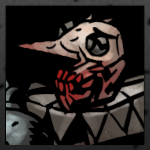
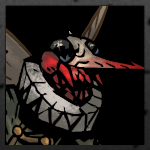
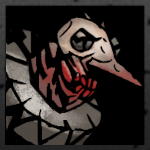
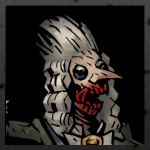
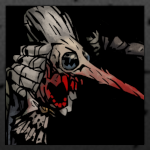
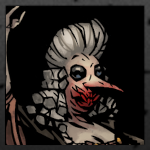
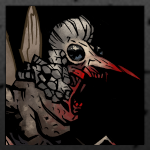
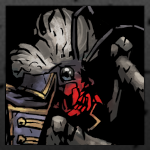

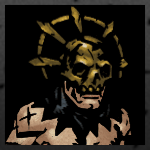
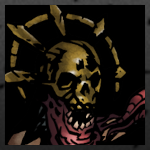
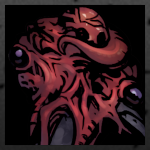
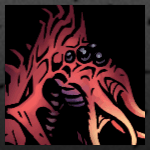
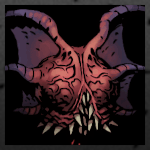
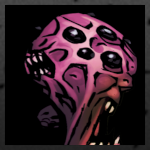
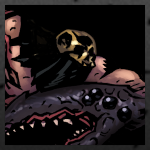




1.0 Base Chance to Target Random Hero / Monster
Apprentice
Graveyard Slash
1.0 Base Chance to be used
Targetting Desire
2.0 Base Chance to Target Marked Hero
66.7% Chance to Target Marked Hero
Graveyard Stumble
1.0 Base Chance to be used
Targetting Desire
2.0 Base Chance to Target Marked Hero
66.7% Chance to Target Marked Hero
Veteran
Graveyard Slash
1.0 Base Chance to be used
Targetting Desire
3.0 Base Chance to Target Marked Hero
75% Chance to Target Marked Hero
Graveyard Stumble
1.0 Base Chance to be used
Targetting Desire
3.0 Base Chance to Target Marked Hero
75% Chance to Target Marked Hero
Champion
Graveyard Slash
1.0 Base Chance to be used
Targetting Desire
4.0 Base Chance to Target Marked Hero
80% Chance to Target Marked Hero
Graveyard Stumble
1.0 Base Chance to be used
Targetting Desire
4.0 Base Chance to Target Marked Hero
80% Chance to Target Marked Hero
Skill Breakdown
Graveyard Slash is a Decently Accurate Single Target Attack usable in the Front 3 Positions that deals Decent Damage to a Hero in the Front 3 Ranks.
The Bone Soldier is a relatively Low HP Frontline Enemy with some Prot that deals Damage using Graveyard Slash.
This Enemy starts every Combat with 2 Turns of Stealth from Veteran Difficulty Onward.
The Bone Soldier isn't much of a threat although Graveyard Slash can deal quite a lot of Damage if it Crits.
Therefore, you will probably want to focus on the more threatening Enemies accompanying the Bone Soldier.
You can use Stuns to shut the Bone Soldier down for a turn or just kill it outright thanks to the Bone Soldier having relatively Low HP.
Moving the Bone Soldier to Position 4 is another way to shut it down since the Bone Soldier will only be able to use Graveyard Stumble, a Weak Repositioning Attack.
Overall Threat Level: Medium Low
Foul Warding - 2 rd Cooldown
All Skills
1.0 Base Chance to Target Random Hero / Monster
Apprentice
Axeblade
1.0 Base Chance to be used
4.0 Base Chance to be used as First Action
Targetting Desire
2.0 Base Chance to be Target Marked Hero
66% Chance to Target Marked Hero
Dead Weight
1.0 Base Chance to be used if there are 2+ Non Stunned Heroes
Targetting Desire
2.0 Base Chance to Target Lowest Move Resist Non Stunned Hero
66% Chance to Target Hero with Lowest Move Resist
Clumsy Axeblade
1.0 Base Chance to be used
Veteran
Axeblade
2.0 Base Chance to be used
5.0 Base Chance to be used as First Action
Targetting Desire
3.0 Base Chance to be Target Marked Hero
75% Chance to Target Marked Hero
Dead Weight
1.0 Base Chance to be used if there are 2+ Non Stunned Heroes
Targetting Desire
3.0 Base Chance to Target Lowest Move Resist Non Stunned Hero
75% Chance to Target Hero with Lowest Move Resist
Clumsy Axeblade
1.0 Base Chance to be used
Foul Warding
4.0 Base Chance unless 2+ Guarded Monsters
Champion
Axeblade
2.0 Base Chance to be used
5.0 Base Chance to be used as First Action
Targetting Desire
4.0 Base Chance to be Target Marked Hero
80% Chance to Target Marked Hero
Dead Weight
1.0 Base Chance to be used if there are 2+ Non Stunned Heroes
Targetting Desire
4.0 Base Chance to Target Lowest Move Resist Non Stunned Hero
80% Chance to Target Hero with Lowest Move Resist
Clumsy Axeblade
1.0 Base Chance to be used
Foul Warding
2.0 Base Chance unless 2+ Guarded Monsters
Skill Breakdown
Axeblade is a Single Target Attack usable from the Front 2 Positions that deals Mediocre Damage to a Hero in the Front 2 Positions.
This Attack gains the ability to inflict a - Stun and Move Resist Debuff to the Target Hero from Veteran Difficulty, synergizing with Dead Weight.
Clumsy Axeblade is a Very Inaccurate Single Target Repositioning Attack used in the Back 2 Positions that deals Low Damage to a Hero in the Front 2 Positions while Moving the Bone Defender Forward.
Dead Weight is a Decently Accurate Single Target Attack usable from the Front 2 Positions that deals Low Damage to a Hero in the Front 2 Ranks.
This Attack can Stun the Target Hero while also Knocking them Back, and is used to disrupt your Frontline Heroes.
Foul Warding is a Support Skill used by the Bone Defender to Guard an Ally while also Buffing its own Prot so it take more hits.Overall Analysis
The Bone Defender is a sturdy frontliner with a Decent HP Pool and High Prot that can disrupt your Heroes with Dead Weight and deal some Damage using Axeblade.
The Bone Defender gains the ability to Guard its Allies using Foul Warding from Veteran Difficulty Onward.
The Bone Defender is of no real threat due to its Attacks not dealing much Damage, which is why you should be dealing with the bigger threats accompanying the Bone Defender first.
Stuns can be very effective for shutting down the Bone Defender for a turn while breaking its Guard.
In addition, Moving the Bone Defender to the Back 2 Positions can effectively Shut down the Bone Defender since it will only be able to use Clumsy Axeblade, a Weak Repositioning Attack.
Overall Threat Level: Low
1.0 Base Chance to Target Random Hero / Monster
Apprentice
Quarrel
1.0 Base Chance to be used
Targetting Desire
2.0 Base Chance to Target Marked Hero
66% Chance to Target Marked Hero
Bayonet Jab
1.0 Base Chance to be used
Veteran
Quarrel
1.0 Base Chance to be used
Targetting Desire
3.0 Base Chance to Target Marked Hero
75% Chance to Target Marked Hero
Bayonet Jab
1.0 Base Chance to be used
Champion
Quarrel
1.0 Base Chance to be used
Targetting Desire
4.0 Base Chance to Target Marked Hero
80% Chance to Target Marked Hero
Bayonet Jab
1.0 Base Chance to be used
Skill Breakdown
Quarrel is a Decently Accurate High Crit Chance Single Target Attack usable from the Back 2 Positions that deals Decent Damage to a Hero in the Back 3 Ranks.
This Attack benefit from a Damage Bonus when Targetting Marked Heroes (+25% on Apprentice // +50% from Veteran Onwards)
Bayonet Jab is a Single Target Repositioning Attack used from the Front 2 Positions which deals Low Damage to a Hero in the Front 2 Positions while Moving the Bone Arbalist Back.Overall Analysis
The Bone Arbalist is a Backline Enemy with Decent Speed and HP that uses Quarrel to deal Damage to your Heroes.
Quarrel can pack a punch with its Decent Damage and High Crit Chance, making it a good idea to get rid of or shut down the Bone Arbalist.
You can easily shut down the Bone Arbalist by Moving it to the Front 2 Positions where it can only use Bayonet Jab, a weak Repositioning Attack. Stuns are also a good way to shut down the Bone Arbalist for a turn.
Overall Threat Level: Medium
1.0 Base Chance to Target Random Hero / Monster
Apprentice
Tempting Goblet
1.0 Base Chance to be used
Targetting Desire
1.0 Base Chance to Target Hero with Most Stress
50% Chance to Target Hero with Most Stress
Knife in the Dark
1.0 Base Chance to be used
Veteran
Tempting Goblet
1.0 Base Chance to be used
Targetting Desire
2.0 Base Chance to Target Hero with Most Stress
66.7% Chance to Target Hero with Most Stress
Knife in the Dark
1.0 Base Chance to be used
Champion
Tempting Goblet
1.0 Base Chance to be used
Targetting Desire
3.0 Base Chance to Target Hero with Most Stress
75% Chance to Target Hero with Most Stress
Knife in the Dark
1.0 Base Chance to be used
Skill Breakdown
Tempting Goblet is a High Accuracy Single Target Attack usable from the Back 3 Positions that deals Low HP Damage and a hefty amount of Stress Damage to a Hero in any Position.
The Bone Courtier is a Low HP Backline Enemy with High Dodge and Speed that uses Tempting Goblet to inflict Stress to your Heroes.
Due to the hefty Amount of Stress the Bone Courtier can inflict, it is a good idea to get rid of it quickly.
You can try to Move the Bone Courtier to Position 1 where it can only use Knife in the Dark, a weak Attack.
Otherwise, Using a Hero with High Speed to outspeed and Stun or Kill the Bone Courtier can be a good option.
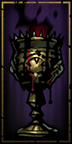
Champion Level Bone Courtier Enemies have a roughly 4.5% Chance to drop the Tempting Goblet Trinket
Overall Threat Level: Medium High
1.0 Base Chance to Target Random Hero / Monster
Veteran
Impale
2.0 Base Chance to be used
Spear Thrust
1.0 Base Chance to be used
Targetting Desire
3.0 Base Chance to Target Marked Hero
75% Chance to Target Marked Hero
Champion
Impale
2.0 Base Chance to be used
Spear Thrust
1.0 Base Chance to be used
Targetting Desire
4.0 Base Chance to Target Marked Hero
80% Chance to Target Marked Hero
Skill Breakdown
Spear Thrust is a Single Target Attack with no Positioning or Targetting Requirements that deals Decently High Damage alongside inflicting Knockback.
The Bone Spearman is an Enemy with Decent HP that deals hefty amounts of Damage using Spear Thrust and Impale.
The main threat the Bone Spearman poses is Impale, which can be spammed every turn if the Bone Spearman is at the Front 2 Positions, dealing Damage to all 4 of your Heroes.
Due to this, it is advised to make sure the Bone Spearman stays in the Back 2 Positions where it can only use Spear Thrust, a relatively less threatening Attack.
Stuns can also be effective in shutting down the Bone Spearman for a turn, giving your Heroes more time to get rid of it or any other threats.
Overall Threat Level: High
1.0 Base Chance to Target Random Hero / Monster
Veteran
Crushing Blow
1.0 Base Chance to be used
6.0 Chance to be used as First Action
Targetting Desire
2.0 Base Chance to Target Marked Hero
66.7% Chance to Target Marked Hero
Ground Pound
1.0 Base Chance to be used
5.0 Base Chance to be used as Second Action
Champion
Crushing Blow
2.0 Base Chance to be used
7.0 Base Chance to be used as First Action
Targetting Desire
3.0 Base Chance to Target Marked Hero
75% Chance to Target Marked Hero
Ground Pound
1.0 Base Chance to be used
5.0 Base Chance to be used as Second Action
Skill Breakdown
Crushing Blow is a Decently Accurate High Crit Chance Single Target Attack usable from the Front 3 Positions that deals Very High Damage to a Hero in the Front 2 Ranks.
This Attack also inflicts a - Stun Resist Debuff to the Target Hero, helping Enemies such as the Bone Defender and itself land their Stuns.
Ground Pound is a Decently Accurate AoE Attack usable from any Position that inflicts Damage to all 4 Heroes alongside a relatively Weak Stun.Overall Analysis
The Bone Captain is a Decently High HP Size 2 Enemy with High Prot that uses Crushing Blow to deal a Large Amount of Damage to a Hero or Ground Pound to Stun your Heroes.
The Bone Captain is a threatening Enemy, being able to deal Very High Damage to your Front Rank Heroes and cause disruption through Stuns.
Even so, due to the Bone Captain being difficult to eliminate quickly, it is usually a better call to deal with the Enemies accompanying the Bone Captain.
Stuns and Debuffs are effective for shutting down the Bone Captain and limiting its Damage Output while dealing with the Bone Captain or the Enemies accompanying it.
Crushing Blow only being able to Target Heroes in the Front 2 Ranks can be taken advantage of by having Heroes with High Prot or Dodge in the Front Ranks to tank the hits.
Overall Threat Level: High
All Skills
1.0 Base Chance to Target Random Hero / Monster
Defend the Icon
3.0 Base Chance to be Used
Wicked Surge
1.0 Base Chance to be Used
Unholy Rally
Requires Ally Corpse
Skill Breakdown
Wicked Surge is a Support Skill used by the Bone Bearer to Buff an Ally's Damage and Accuracy greatly, making them much more of a threat.
Defend the Icon is a Single Target Repositioning Attack used from the Front 2 Positions that deals Mediocre Damage to a Hero in the Front 2 Positions while Moving the Bone Bearer Back.
Unholy Rally is an Auto Action that is performed by the Bone Bearer at the end of a round if any Corpses of its Allies are Present.
This Skill is used to Revive a Fallen Monster, replenishing it to Full HP and removing any Bleed or Blight applied to the Corpse.
It should be noted that this Skill can only revive 1 Enemy at a time.
Alongside being able to use these Skills, the Bone Bearer also gives all of its Allies a + 25% Damage Buff just by existing.Overall Analysis
The Bone Bearer is a Backline Enemy with High HP, Speed, and Dodge on top of some Prot and a Sky High Stun Resist Stat that uses its Skills to greatly Buff its Allies using Wicked Surge and is able to Revive them using Unholy Rally.
The many Buffs the Bone Bearer gives its Allies makes it a significant threat, not to mention its ability to Revive its fallen Allies.
You want to make sure there are no Enemy Corpses remaining at the end of a round if the Bone Bearer is present so Unholy Rally Cannot be used.
When dealing with the Bone Bearer, you can either try to eliminate all Enemies accompanying the Bone Bearer first or attempt to focus down the Bone Bearer itself.
In either case, you can somewhat hinder the Bone Bearer by pulling it to the Front Ranks, where it is very likely to use Defend the Icon in order to return to the Back Ranks.
Overall Threat Level: High
Rend the Marked
100.0 Base Chance to be used if Marked Hero in Front Ranks
Targetting Desire
Always Targets Marked Hero
Groping Swipe
1.0 Base Chance to be used
Targetting Desire
1.0 Base Chance to Target Random Hero / Monster
Harmless Swipe
1.0 Base Chance to be used
Targetting Desire
1.0 Base Chance to Target Random Hero / Monster
Skill Breakdown
Groping Swipe is a Single Target Attack usable from the Front 2 Positions that deals Mediocre Damage to a Hero in the Front 2 Ranks, also inflicting Blight on Veteran Difficulty Onward.
Rend the Marked is a Decently Accurate Single Target Attack usable from the Front 2 Positions that deals Mediocre Damage to a Hero in the Front 2 Ranks alongside benefitting from a +50% Damage Buff when Targetting Marked Heroes.
Harmless Swipe is a Very Inaccurate Single Target Repositioning Attack used from the Back 2 Positions that deals Low Damage while Moving the Fungal Scratcher Forward.Overall Analysis
The Fungal Scratcher is a durable Frontline Enemy with a Decent HP Pool and High Prot that uses Groping Swipe and Rend the Marked to deal Damage to your Front Rank Heroes.
Since the Fungal Scratcher doesn't deal much Direct Hp Damage, it can be preferrable to take hits from Rend the Marked rather than take Blight Damage from Groping Swipe.
This can be achieved by having a Hero in the Front 2 Positions use Skills such as Bulwark of Faith to Mark themselves while boosting their Prot to tank Attacks from the Fungal Scratcher.
The Fungal Scratcher can be shut down easily by using Stuns or Moving it to the Back 2 Ranks where it can only use Harmless Swipe.
Due to the Fungal Scratcher being quite durable and it posing little threat to your Heroes, you should be getting rid of all of the other threats accompanying the Fungal Scratcher before trying to kill it.
Overall Threat Level: Low
1.0 Base Chance to Target Random Hero / Monster
Apprentice
Mark Prey
Not used if 3+ Heroes are Marked
1.0 Base Chance to be used.
6.0 Base Chance to be used as First Action.
Targetting Desire
2.0 Base Chance to Target Marked Hero
1.0 Base Chance to Target Hero with Lowest Blight Resist
50% Chance to Target Marked Hero
25% Chance to Target Hero with Lowest Blight Resist
Rain of Blight
1.0 Base Chance to be used
Escape Cloud
1.0 Base Chance to be used
Veteran
Mark Prey
Not used if 3+ Heroes are Marked
1.0 Base Chance to be used.
6.0 Base Chance to be used as First Action.
Targetting Desire
3.0 Base Chance to Target Marked Hero
1.0 Base Chance to Target Hero with Lowest Blight Resist
60% Chance to Target Marked Hero
20% Chance to Target Hero with Lowest Blight Resist
Rain of Blight
2.0 Base Chance to be used
Escape Cloud
2.0 Base Chance to be used
Champion
All Skills
Mark Prey
Not used if 3+ Heroes are Marked
1.0 Base Chance to be used.
6.0 Base Chance to be used as First Action.
Targetting Desire
4.0 Base Chance to Target Marked Hero
1.0 Base Chance to Target Hero with Lowest Blight Resist
66.7% Chance to Target Marked Hero
16.5% Chance to Target Hero with Lowest Blight Resist
Rain of Blight
1.0 Base Chance to be used
Escape Cloud
1.0 Base Chance to be used
Skill Breakdown
Mark Prey is a High Accuracy Single Target Attack usable from the Back 2 Positions that deals Minimal Damage to a Hero in the Front 2 Positions alongside Marking them.
This Attack also inflicts a - Dodge Debuff to the Target Hero, helping Enemies that prioritize Targetting Marked Targets focus down the Marked Hero.
Rain of Blight is a High Accuracy AoE Attack usable from the Back 2 Positions that deals Minimal Damage to both Heroes in the Back 2 Positions alongside inflicting Blight.
This Attack also has a hefty 15% Chance to Disease Heroes which can prove to be troublesome.
Escape Cloud is a High Accuracy AoE Attack with minimal Damage used from the Front 2 Positions that deals Minimal Damage and inflicts Blight to both Heroes in the Front 2 Ranks while Moving the Fungal Artillery to the Back Ranks.Overall Analysis
The Fungal Artillery is a Backline Enemy with some Prot that uses Mark Prey to Mark your Heroes alongside inflicting Blight with Rain of Blight and Escape Cloud.
The Fungal Artillery itself isn't all that threatening outside of Rain of Blight having a hefty 15% Disease application Chance.
Unlike many other Backline Enemies, Moving the Fungal Artillery to the Front Ranks isn't a very good idea due to Escape Cloud having a nasty habit of Critting your Heroes.
On the other hand, it can sometimes be worth taking the hit from Escape Cloud to prevent the usage of Mark Prey or Rain of Blight.
That being said Moving the Fungal Artillery to the Front 2 Ranks while Stunned can be a good call, stranding it in the Front Positions where it can be more easily dispatched.
This can be achieved by using Skills such as Flashbang or Disorienting Blast or Moving the Fungal Artillery Forwards with one Hero and Stunning it with another.
Although the Fungal Artillery is usually not much of a threat, due to it being able to use Mark Prey to help its Allies land their Attacks and the Fungal Artillery being able to Disease your Heroes, it can be a good call to get rid of them early.
Overall Threat Level: Medium
Hamlet
Apprentice
1.0 Base Chance to Target Random Hero / Monster
Veteran // Champion
1.0 Base Chance to Target Random Hero / Monster
2.0 Base Chance to Target Marked Hero
66.7% Chance to Target Marked Hero
Skill Breakdown
Rabid Rush is a Decently Accurate High Crit Chance Single Target Attack with no Positioning or Targetting Requirements that deals Very Low Damage alongside inflicting Bleed while Moving the Rabid Gnasher Forward.
The Rabid Gnasher is a Low HP Enemy with High Speed and Dodge that inflicts Bleed and Disease using Rabid Rush.
Due to the Rabid Gnasher having High Dodge, it can be a problem early on when you have minimal methods of boosting the Accuracy of your Heroes.
Although the Rabid Gnasher poses little threat in terms of Damage, the Disease it can spread alongside Rabid Rush having a High Crit Chance can be troublesome, making it a good call to eliminate them early.
Stuns are useful for shutting down the Rabid Gnasher for a turn, and you can take advantage of the Rabid Gnasher having Low HP and try to kill them outright.
Overall Threat Level: Medium Low
Slime
4.0 Base Chance to be used
Targetting Desire
1.0 Base Chance to Target Marked Hero
1.0 Base Chance to Target Random Hero / Monster
50% Chance to Target Marked Hero
Cytokinesis
2.0 Base Chance to be used if 1+ Empty Enemy Position Present
(Corpses Count as Empty Positions)
Targetting Desire
1.0 Base Chance to Target Marked Hero
1.0 Base Chance to Target Random Hero / Monster
50% Chance to Target Marked Hero
Ectoplasmic Profusion
1.0 Base Chance to be used if 2+ Empty Enemy Position Present
(Corpses Count as Empty Positions)
Skill Breakdown
Slime is a Decently Accurate Single Target Attack with no Positioning or Targetting Requirements that deals Mediocre Damage.
This Attack gains the ability to inflict a Minor - Speed Debuff to the Target Hero from Veteran Difficulty Onwards.
Cytokinesis is a Decently Accurate Single Target Attack with no Positioning or Targetting Requirements that deals minimal Damage.
This Attack is only usable by the Ectoplasm if 1 or more Enemy Positions are Empty or filled with Corpses.
An Ectoplasm Enemy is Summoned at Position 1 regardless of whether the Attack hits or not.
Ectoplasmic Profusion is a Decently Accurate AoE Attack usable from all Positions that deals Very Low HP Damage and some Stress Damage to all 4 of your Heroes.
This Attack is only usable by the Ectoplasm if 2 or more Enemy Positions are Empty or filled with Corpses.
A Large Ectoplasm is Summoned at Position 1 regardless of whether the Attack hits or not.Overall Analysis
The Ectoplasm is a Low HP Enemy with High Overall Resists that uses attacks such as Cytokinesis and Ectoplasmic Profusion to prolong the Battle and wear your Heroes down.
It should be a priority to prevent the Ectoplasm from using Ectoplasmic Profusion due to it often unecessarily prolonging the Battle.
A good way to achieve this is to, try to get all Ectoplasm Enemies to Low HP with your Attacks so that your Heroes can easily dispatch them all in quick succession.
Due to the Ectoplasm having High Resists but Low HP, Direct Damage Attacks are best for getting rid of them easily.
Overall Threat Level: Low
Big Slime
1.0 Base Chance to be used
Targetting Desire
1.0 Base Chance to Target Marked Hero
2.0 Base Chance to Target Random Hero / Monster
66.7% Chance to Target Marked Hero
Cytokinesis
1.0 Base Chance to be used if 1+ Empty Enemy Position Present
(Corpses Count as Empty Positions)
Targetting Desire
1.0 Base Chance to Target Marked Hero
2.0 Base Chance to Target Random Hero / Monster
66.7% Chance to Target Marked Hero
Slime Smack
1.0 Base Chance to be used
Skill Breakdown
Big Slime is a Decently Accurate Single Target Attack with no Positioning or Targetting Requirements that deals Decent Damage.
This Attack gains the ability to inflict a Minor - Speed Debuff to the Target Hero from Veteran Difficulty Onwards.
Cytokinesis is a Decently Accurate Single Target Attack with no Positioning or Targetting Requirements that deals minimal Damage.
This Attack is only usable by the Large Ectoplasm if 1 or more Enemy Positions are Empty or filled with Corpses.
Slime Smack is a Decently Accurate AoE Attack usable from any Position that deals Low Damage to both Heroes in the Front 2 Positions alongside a relatively Weak Stun.Overall Analysis
The Large Ectoplasm is a Size 2 Enemy with some Prot and High Overall Resists that can disrupt your Heroes using Slime Smack or use Cytokinesis to Summon additional Ectoplasm Enemies.
The Large Ectoplasm lacks much Damage output with it only being able to deal Decent Damage with Slime Smack, making it generally a non threat.
Overall Threat Level: Medium Low
Curse of Vulnerability - 2 rd Cooldown
All Skills
1.0 Base Chance to Target Random Hero / Monster
Veteran
Curse of Vulnerability
Not used if 2+ Heroes are Marked
1.0 Base Chance to be used.
6.0 Base Chance to be used as First Action.
Fetid Censer
2.0 Base Chance to be used
Embrace the Dark
2.0 Base Chance to be used
Champion
Curse of Vulnerability
Not used if 2+ Heroes are Marked
1.0 Base Chance to be used.
7.0 Base Chance to be used as First Action.
Fetid Censer
2.0 Base Chance to be used
Embrace the Dark
3.0 Base Chance to be used
Skill Breakdown
Curse of Vulnerability is a Decently Accurate Attack with no Positioning or Targetting Requirements that deals Minimal Damage to 1 or 2 Heroes alongside Marking them.
This Attack also inflicts a hefty - Dodge and - Accuracy Debuff to the Heroes, helping Enemies that prioritize Targetting Marked Targets focus down the Marked Hero.
Fetid Censer is a Decently Accurate AoE Attack usable from the Front 2 Positions that deals Very Low HP Damage and some Stress Damage to both Heroes in the Front 2 Ranks alongside inflicting Blight.
This Attack also has a Chance to Disease Heroes (7% on Veteran // 9% on Champion) which can prove to be troublesome.
Embrace the Dark is a Decently Accurate Attack with no Positioning or Targetting Requirements that deals Stress Damage to 1 or 2 Heroes alongside Lowering the Light Level.Overall Analysis
The Crone is a Backline Enemy with High Speed and Dodge which deals Stress Damage with its Attacks alongside Debuffing and Marking Heroes.
This Enemy always starts every Combat with 2 turns of Stealth, making them harder to eliminate quickly.
Unlike many other Backline Enemies, Moving the Crone to the Front Ranks isn't a very good idea due to Fetid Censer dealing Stress Damage, inflicting Blight, and most importantly being able to Disease your Front Rank Heroes.
Due to the Crone not being too much of a threat alongside its Stealth making it harder to eliminate, it can be better to ignore it entirely and deal with the other threats accompanying the Crone.
That being said, you should get rid of the Crone early on if you have the tools to eliminate it quickly, stopping the Crone from Marking or dealing Stress to your Heroes
Overall Threat Level: Medium
Confusion Spores - 2 rd Cooldown
Poison Spores - 2 rd Cooldown
All Skills
1.0 Base Chance to Target Random Hero / Monster
Veteran
Treebranch Smackdown
2.0 Base Chance to be used
Targetting Desire
2.0 Base Chance to Target Marked Hero
66.7% Chance to Target Marked Hero
Poison Spores
2.0 Base Chance to be used
Targetting Desire
2.0 Base Chance to Target Marked Hero
1.0 Base Chance to Target Hero with lowest HP %
50% Chance to Target Marked Hero
25% Chance to Target Hero with lowest HP %
Confusion Spores
1.0 Base Chance to be used.
4.0 Base Chance to be used as First Action.
Champion
Treebranch Smackdown
2.0 Base Chance to be used
Targetting Desire
2.0 Base Chance to Target Marked Hero
66.7% Chance to Target Marked Hero
Poison Spores
2.0 Base Chance to be used
Targetting Desire
2.0 Base Chance to Target Marked Hero
1.0 Base Chance to Target Hero with lowest HP %
50% Chance to Target Marked Hero
25% Chance to Target Hero with lowest HP %
Confusion Spores
1.0 Base Chance to be used.
5.0 Base Chance to be used as First Action.
Skill Breakdown
Treebranch Smackdown is a Single Target Attack usable from any Position with a Decent Crit Chance that deals Extremely High Damage to a Hero in the Front 2 Positions alongside Knocking them Back.
Confusion Spores is a Decently Accurate AoE Attack usable from any Position that deals Minimal Damage to all 4 of your Heroes, Shuffling them and causing major disruption.
This Attack also inflicts a - Accuracy Debuff to your Heroes and has a High Chance to used as the Unclean Giant's First Action.
Poison Spores is a Decently Accurate Single Target Attack with no Positioning or Targetting Requirements that deals Minimal Damage to a Hero alongside inflicting Blight.
This Attack has a 25% Chance to Target the Hero with the lowest HP %, likely so it could be used to finish off a Hero on Death's Door.Overall Analysis
The Unclean Giant is an Extremely High HP Size 2 Enemy that can deal Extremely High Damage with Treebrach Smackdown and cause major disruption using Confusion Spores.
Due to the Unclean Giant posing a Huge threat thanks to Treebranch Smackdown, it can be a good call to focus it down first before it can do serious Damage.
If you are confident you can keep the Unclean Giant at bay using Debuffs and/or Stuns, it can be a good idea to get rid of the Enemies accompanying the Unclean Giant since it cannot threaten to kill a Hero if by itself.
In any case, Stuns and Debuffs are very useful for keeping the Unclean Giant in check by limiting its damage output.
Treebranch Smackdown only being able to Target Heroes in the Front 2 Ranks can be taken advantage of by having Heroes with High Prot or Dodge in the Front Ranks to tank the hits.
Overall Threat Level: High
All Skills
1.0 Base Chance to Target Random Hero / Monster
Ruinous Hex
4.0 Base Chance to be used if 2+ Non Marked Heroes Present
Putrefying Breath
2.0 Base Chance to be used
From Death Comes Life
Requires Ally Corpse
Skill Breakdown
Ruinous Hex is an Attack with no Positioning or Targetting Requirements which deals Low Damage to 1 or 2 Heroes alongside Marking them.
This Attack inflicts a hefty Dodge and Accuracy Debuff to the Target Hero Hero on top of Marking them, helping the many Enemies who have a bias towards Targetting Marked Heroes or have a Bonus vs Marked Targets focus down the Marked Hero.
Putrefying Breath is a Single Target Attack usable from any Position that deals Decent Damage to a Hero in the Front 3 Positions alongside inflicting a relatively Weak Blight and causing Knockback.
From Death Comes Life is an Auto Action that is performed by the Hateful Virago at the end of a round if any Enemy Corpses are Present.
This Skill is used to consume the Corpse and Summon a Necrotic Fungus which disables all Healing Skills for your Heroes.Overall Analysis
The Hateful Virago is a High HP Backline Enemy with High Speed and Dodge alongside overall High Resists across the board, notable ones being its Very High Stun Resist Stat.
The Virago can Mark and Debuff your Heroes using Ruinous Hex, deal Decent Damage using Putrefying Breath, or Summon a Necrotic Fungus using From Death Comes Life to deny your Heroes from being able to use any Healing Skills.
The Virago doesn't pose much of a threat by itself, dealing middling at best Damage with its Attacks.
However, it can become a great threat if you allow there to be an Enemy Corpse at the end of the round, in which case the Virago will automatically use From Death Comes Life and consume the Corpse to Summon a Necrotic Fungus Enemy which Disables all Healing Skills for your Heroes.
It is preferrable to eliminate the Hateful Virago quickly to stop this from happening, which is most easily done using Mark Based Heroes to burst the Hateful Virago down.
In addition, although Moving the Virago to the Front Ranks won't hinder it at all, it can be a good idea to do so if it helps your Damage Dealers get rid of the Hateful Virago more easily.
Since From Death Comes Life can only be used if there is an Enemy Corpse present, simply making sure there are none present at the end of a round will prevent the Skill from being used.
Overall Threat Level: High
The Necrotic Fungus can be encountered when the Hateful Virago uses From Death Comes Life to Summon it.
It has no actions and cannot directly threaten your Heroes but disables all Healing Skills by existing, which can prove to be lethal.
It is usually better to get rid of it quickly although it may more preferrable to deal with the Hateful Virago and the other Enemies first if your Heroes aren't in a dire need for Healing.
Overall Threat Level: High
1.0 Base Chance to Target Random Hero / Monster
Apprentice
Butcher Cut
1.0 Base Chance to be used.
2.0 Base Chance to be used as First Action.
Targetting Desire
2.0 Base Chance to Target Marked Hero
2.0 Base Chance to Target Lowest Bleed Resist Hero
40% Chance to Target Marked Hero
40% Chance to Target Lowest Bleed Resist Hero
Ball and Chain
1.0 Base Chance to be used if there are at least 2 Non Stunned Heroes.
Targetting Desire
1.0 Base Chance to Target Highest Stun Resist Non Stunned Hero
50% Chance to Target Highest Stun Resist Non Stunned Hero
Veteran
Butcher Cut
2.0 Base Chance to be used.
3.0 Base Chance to be used as First Action.
Targetting Desire
3.0 Base Chance to Target Marked Hero
2.0 Base Chance to Target Lowest Bleed Resist Hero
50% Chance to Target Marked Hero
33.3% Chance to Target Lowest Bleed Resist Hero
Ball and Chain
1.0 Base Chance to be used.
4.0 Base Chance to be used as First Action.
Targetting Desire
1.0 Base Chance to Target Highest Stun Resist Non Stunned Hero
50% Chance to Target Highest Stun Resist Non Stunned Hero
Champion
Butcher Cut
2.0 Base Chance to be used.
3.0 Base Chance to be used as First Action.
Targetting Desire
4.0 Base Chance to Target Marked Hero
1.0 Base Chance to Target Lowest Bleed Resist Hero
66.7% Chance to Target Marked Hero
16.5% Chance to Target Lowest Bleed Resist Hero
Ball and Chain
1.0 Base Chance to be used.
4.0 Base Chance to be used as First Action.
Targetting Desire
2.0 Base Chance to Target Highest Stun Resist Non Stunned Hero
66.7% Chance to Target Highest Stun Resist Non Stunned Hero
Skill Breakdown
Butcher Cut is a Decently Accurate Decently High Crit Chance Single Target Attack usable from the Front 2 Positions that deals Decent Damage to a Hero in the Front 3 Positions alongside inflicting Bleed.
This Attack gains a nasty - Healing Received Debuff (-33% on Veteran // -50% on Champion) from Veteran Difficulty onward that can prove to be very Troublesome.
Ball and Chain is a Decently Accurate Decently High Crit Chance Single Target Attack usable from all Positions that deals Low Damage to a Hero in the Back 2 Positions.
This Attack can Stun a Hero whilst also causing Knockback.Overall Analysis
The Swine Chopper is a Decently High HP Enemy with Prot that can use its Attacks to inflict Bleeds or cause disruption.
The Swine Chopper is a genuine threat thanks to its decent Damage Dealing capabilities alongside the - Healing Received Debuff Butcher Cut can inflict from Veteran Difficulty especially when paired with the many High Damage threats that are Present within the Warrens.
However, due to the Swine Chopper being quite difficult to get rid of quickly, it is usually a good idea to use Stuns to keep the Swine Chopper in check while your Heroes deal with the other threatening Enemies accompanying the Swine Chopper.
Overall Threat Level: Medium High
1.0 Base Chance to Target Random Hero / Monster
Apprentice
Drums of Doom
2.0 Base Chance to be used
Drums of Debilitation
1.0 Base Chance to be used.
4.0 Base Chance to be used as First Action.
Veteran
Drums of Doom
3.0 Base Chance to be used
Drums of Debilitation
Not used if 3+ Heroes are Marked
1.0 Base Chance to be used
6.0 Base Chance to be used as First Action
Champion
Drums of Doom
4.0 Base Chance to be used
Drums of Debilitation
Not used if 3+ Heroes are Marked
1.0 Base Chance to be used
9.0 Base Chance to be used as First Action
Skill Breakdown
Drums of Debilitation is a Decently Accurate Single Target Attack with no Positioning or Targetting Requirements that deals Minimal Damage to the Target Hero.
This Attack Marks a Hero alongside Debuffing their Dodge, helping the many Enemies who have a bias towards Targetting Marked Heroes or have a Bonus vs Marked Targets focus down the Marked Hero.
Drums of Doom is a Decently Accurate AoE Attack usable from any Position that deals Minimal HP Damage and Minor Stress Damage to all 4 Heroes.Overall Analysis
The Swine Drummer is a Backline Enemy with High Speed that Inflicts Stress to your entire Party with Drums of Doom and Marks Heroes using Drums of Debilitation.
Although the Swine Drummer by itself is of no real threat, it can set up Marks for other Enemies to take advantage of.
Due to this, you want to either get rid of said Enemies that can take advantage of Marks or get rid of the Swine Drummer quickly before it can Mark your Heroes.
Overall Threat LevelMedium Low
High if Enemies with Mark Synergy are Present
All Difficulties
1.0 Base Chance to Target Random Hero / Monster
Apprentice
2.0 Base Chance to Target Marked Hero
66.7% Chance to Target Marked Hero
Veteran
3.0 Base Chance to Target Marked Hero
1.0 Base Chance to Target Lowest Disease Resist Hero
60% Chance to Target Marked Hero
20% Chance to Target Lowest Disease Resist Hero
Champion
4.0 Base Chance to Target Marked Hero
1.0 Base Chance to Target Lowest Disease Resist Hero
66.7% Chance to Target Marked Hero
16.5% Chance to Target Lowest Disease Resist Hero
Skill Breakdown
Vomit is a Decently Accurate High Crit Chance Single Target Attack with no Positioning or Targetting Requirements that deals Minimal HP Damage alongside Stress Damage.
The Swine Wretch is a Low HP Backline Enemy with High Speed & Dodge that uses Vomit to inflict Diseases and spread Stress to your Heroes
Although Stress Damage is troublesome, the main threat the Swine Wretch poses is its 33% Chance to Disease the Target Hero.
The fact that Diseases can worsen a Hero by a significant amount alongside the other drawbacks they can cause makes this High Disease Chance very troublesome
Due to these factors, the Swine Wretch should be eliminated quickly before it can cause you any problems.
It is preferrable to have a Hero who can Outspeed the Swine Wretch and Stun them to shut them down for the turn, giving the others Heroes time to finish them off quickly.
Overall Threat Level: Medium
All Difficulties
1.0 Base Chance to Target Random Hero / Monster
Apprentice
1.0 Base Chance to Target Marked Hero
50% Chance to Target Marked Hero
Veteran
2.0 Base Chance to Target Marked Hero
66% Chance to Target Marked Hero
Champion
3.0 Base Chance to Target Marked Hero
75% Chance to Target Marked Hero
Skill Breakdown
Hook Where It Hurts is a Decently Accurate Very High Crit Chance Single Target Attack usable from all Positions that deals Decent Damage to a Hero in the Front 3 Ranks while Moving the Swine Slasher Back.
The Swine Slasher is a Low HP Enemy with Decent Speed & Dodge alongside High Prot that threatens to dish out High Damage Crits using Hook Where It Hurts.
This Enemy also gains 2 turns of Stealth at the start of any Combat from Veteran Difficulty onwards, making it harder to get rid of.
The Swine Slasher can prove to be a great threat due to the High Burst Damage potential of Hook Where It Hurts.
It should be noted that the Swine Slasher cannot Target Heroes in the 4th Position.
Although the Swine Slasher is quite dangerous, unless you have a good way to Destealth them, it is usually better to deal with the other threatening Warrens Enemies accompanying the Swine Slasher.
Overall Threat Level: Medium High
Courtyard
All Difficulties
1.0 Base Chance to Target Random Hero / Monster
Apprentice
2.0 Base Chance to Target Marked Hero
66.7% Chance to Target Marked Hero
Veteran
3.0 Base Chance to Target Marked Hero
75% Chance to Target Marked Hero
Champion
4.0 Base Chance to Target Marked Hero
80% Chance to Target Marked Hero
Skill Breakdown
Munch is a Decently Accurate High Crit Chance Single Target Attack usable from any Position that deals Low Baseline Damage to a Hero in the Front 3 Ranks alongside inflicting Blight.
The Carrion Eater is a Low HP Enemy with overall High Resistances that can deal Hefty Damage to Marked Targets using Munch.
Although the Carrion Eater by itself is of minor threat, it is usually accompanied by Enemies that can set up Marks for the Carrion Eater.
While the Blight Munch inflicts is relatively weak, it is still a threat due to it being able to finish off a Hero at Death's Door.
If a Hero is getting focused down by Carrion Eater Enemies or is in Danger, remember that Munch cannot Target Heroes in the 4th Rank.
If needed, using a Marked Hero with High Prot or Dodge to Tank or Evade the Attacks of the Carrion Eater is a valid option, although this is a risky tactic in the Warrens alongside the fact that the threat of Disease still persists.
It is in your best interest to eliminate any Enemies accompanying the Carrion Eater that can Mark your Heroes.
In addition, due to the Carrion Eater having Low HP, killing them off before they can do much is a viable option.
Overall Threat Level: Medium High
Courtyard
1.0 Base Chance to Target Random Hero / Monster
Veteran
Tentacle Devour
2.0 Base Chance to be used
Targetting Desire
4.0 Base Chance to Target Marked Hero
80% Chance to Target Marked Hero
Weaken Prey
1.0 Base Chance to be used unless 2+ Heroes are Marked
6.0 Base Chance to be used Turn 1 unless 2+ Heroes are Marked
Champion
Tentacle Devour
3.0 Base Chance to be used
Targetting Desire
5.0 Base Chance to Target Marked Hero
83.5% Chance to Target Marked Hero
Weaken Prey
1.0 Base Chance to be used unless 2+ Heroes are Marked
8.0 Base Chance to be used Turn 1 unless 2+ Heroes are Marked
Skill Breakdown
Tentacle Devour is a Decently Accurate High Crit Chance Attack usable from all Positions that deals Very High Damage to a Hero in the Front 3 Ranks.
This Attack benefits from a +100% Damage Buff when Targetting Marked Heroes, which Skyrockets its Damage up, making it easily able to bring a Hero at Full Health down to Death's Door.
Weaken Prey is a Decently Accurate Attack usable from all Positions that deals Low Damage to a Hero in the Front 3 Positions alongside Marking them. This Attack also inflicts a hefty Debuff to the Target Hero's Damage and Accuracy.
The Large Carrion Eater has a High Chance to use Weaken Prey as its first action.Overall Analysis
The Large Carrion Eater is a Size 2 Enemy with some Prot and overall High Resists that can set up Marks for other Enemies to take advantage of using Weaken Prey, alongside using Tentacle Devour to take advantage of it as well, dealing Massive Damage if the Attack lands.
The Large Carrion Eater can be very threatening, although it should be noted that it greatly appreciates other Enemies supporting it.
With that in mind, it can be a good idea to Stun the Large Carrion Eater to keep it in check while dealing with the Enemies accompanying the Large Carrion Eater.
It should be noted that the Large Carrion Eater cannot Target Heroes in the 4th Position.
If needed, using a Marked Hero with High Prot or Dodge to Tank or Evade the Attacks of the Large Carrion Eater is a valid option, although this is a risky tactic in the Warrens.
Overall Threat Level: Medium High
All Skills
1.0 Base Chance to Target Random Hero / Monster
Pig Spear
1.0 Base Chance to be used
Boar Rush
1.0 Base Chance to be used
Targetting Desire
2.0 Base Chance to Target Bramded Hero
1.0 Base Chance to Target Highest Stun Resist Non Stunned Hero
50% Chance to Target Marked Hero
25% Chance to Target Highest Stun Resist Non Stunned Hero
Trot Retreat
3.0 Base Chance to be used if there is no Ally Swinetaur Present & at least 1 other Monster is Present
Crunching Backhand
1.0 Base Chance to be used
Targetting Desire
2.0 Base Chance to Target Bramded Hero
66.7% Chance to Target Marked Hero
Skill Breakdown
Pig Spear is a Decently Accurate AoE Attack usable from the Back 3 Positions that deals High Damage to all 4 Heroes.
Boar Rush is a Decently Accurate High Crit Chance Single Target Attack usable from the Back 3 Positions that deals Very High Damage to a Hero in the Front 2 Ranks.
This Attack has an Extremely High Chance to inflict a Stun to the Target Hero while causing Knockback, potentially Moving them to Position 4.
Trot Retreat is a Skill used by the Swinetaur to Move itself to the Back Ranks so it can use its 2 very dangerous Back Rank Attacks on its next turn.
This Skill has a High Chance to be used unless there are no other Monsters present and is only usable if the Swinetaur is in the Front 3 Positions.
In addition, the Skill will not be used if there is another Swinetaur present, preventing an endless loop of 2 Swinetaurs using Trot Retreat.
Crunching Backhand is an Attack usable from Position 1 that deals Decent Damage to 1 or 2 Heroes in the Front 3 Positions alongside a Weak Stun.Overall Analysis
The Swinetaur is a Very High HP Size 2 Enemy with High Prot alongside a High Stun and Move Resist Stat.
The Swinetaur relies on being in the Back 2 Ranks in order to use its 2 highly threatening Attacks - Pig Spear and Boar Rush reliably.
The best way to stop the Swinetaur from getting to the Back 2 Positions is to eliminate the Enemies accompanying it.
Considering that the Swinetaur is very difficult to kill quickly and poses very little threat if on its own, it is in your best interest to prioritize getting rid of the Enemies accompanying the Swinetaur
Overall Threat Level: Medium
Cooldowns
Spit to Roast - 1 rd Cooldown
Spit to Roast
1.0 Base Chance to be used
Targetting Desire
3.0 Base Chance to Target Random Hero / Monster
6.0 Base Chance to Target Marked Hero
66.7% Chance to Target Marked Hero
Cripple Them
1.0 Base Chance to be used
Goring Flight
7.0 Base Chance to be used if 3+ Enemy Positions are occupied by Monsters
Targetting Desire
1.0 Base Chance to Target Random Hero / Monster
Skill Breakdown
Spit to Roast is a Decently Accurate Very High Crit Chance Single Target Attack usable from the Back 3 Positions that deals High Damage to a Hero in the Front 3 Positions while Moving the Skiver Forward.
This Attack can inflict a Stun to the Target Hero while inflicting Knockback, potentially Moving them to Position 4.
Goring Flight is a Single Target Repositioning Attack usable in the Front 2 Positions that deals Low Damage to a Hero in the Front 2 Positions while Moving the Skiver Back.
This Attack has a much Higher Chance to be used if at least 3 Enemy Positions are occupied in order to ensure the Swine Skiver ends up at the Back 2 Ranks after it is used.
If not, Goring Flight is only guarenteed to be used if the Swine Skiver is in Position 1, and Spit to Roast will take priority if the Swine Skiver is in Position 2 unless the Attack is on Cooldown.
Cripple Them is an AoE Attack usable from the Back 3 Positions that deals High HP Damage to all Heroes in the Back 3 Positions alongside a relatively Weak Blight.
This Attack can also inflict a Significant - Speed Debuff alongside a - Dodge Debuff to all Target Heroes.Overall Analysis
The Swine Skiver is a High HP Backline Enemy with High Speed and Dodge in addition to some Prot that applies a Large amount of offensive pressure to your Heroes using Spit to Roast and Cripple Them.
Due to the Swine Skiver having overall superb Stats and the offensive pressure it applies, it is dreaded by many players and is considered to be the most dangerous Enemy in the game.
Using Skills like Disorienting Blast or Flashbang to Shuffle the Swine Skiver to the Front while Stunned effectively shuts it down for 2 turns.
That being Stuns by themselves are still very useful for keeping the Swine Skiver in check while you try to get rid of it.
Using Mark tactics to focus the Skiver down can also be a good way to eliminate it quickly.
Although the Swine Skiver should be a top priority to get rid of, the other threatening Warrens Enemies accompanying it should not be ignored, for single mindedly focusing on the Swine Skiver will let those Enemies show you what they are made of.
Overall Threat Level: Very High
Seaward Slash
1.0 Base Chance to Target Random Hero / Monster
1.0 Base Chance to Target Marked Hero
50% Chance to Target Marked Hero
Spearfishing
1.0 Base Chance to Target Random Hero / Monster
1.0 Base Chance to Target Marked Hero
50% Chance to Target Marked Hero
Veteran
Seaward Slash
2.0 Base Chance to Target Random Hero / Monster
3.0 Base Chance to Target Marked Hero
60% Chance to Target Marked Hero
Spearfishing
2.0 Base Chance to Target Random Hero / Monster
3.0 Base Chance to Target Marked Hero
60% Chance to Target Marked Hero
Champion
Seaward Slash
3.0 Base Chance to Target Random Hero / Monster
7.0 Base Chance to Target Marked Hero
70% Chance to Target Marked Hero
Spearfishing
3.0 Base Chance to Target Random Hero / Monster
7.0 Base Chance to Target Marked Hero
70% Chance to Target Marked Hero
Skill Breakdown
Seaward Slash is a Single Target Attack usable from the Front 2 Positions that deals High HP Damage to a Hero in the Front 2 Positions.
Spearfishing is a Single Target Attack usable from the Back 2 Positions that deals High HP Damage to a Hero in the Back 2 Ranks.
This Attack gains the ability to Pull the Target Hero Forward from Veteran Difficulty onwards.Overall Analysis
The Pelagic Grouper is an Enemy with Decently High Speed that can dish out High Damage to the Front 2 Ranks using Seaward Slash and deal Decent Damage to the Back 2 Ranks using Spearfishing.
Due to their Abysmal Stun Resist Stat, Stuns are very effective for shutting them down for a turn, limiting their Damage output and giving your Heroes more time to deal with them.
When dealing with the Pelagic Grouper, it is useful to keep in mind that they can only use Seaward Slash if in the Front 2 Positions and Spearfishing if in the Back 2 Ranks.
Overall Threat Level: Borderline High
Apprentice
Sea Breeze - 3 rd Cooldown
Veteran & Champion
Sea Breeze - 2 rd Cooldown
All Difficulties
Call of the Deep - 2 rd Cooldown
All Skills
1.0 Base Chance to Target Random Hero / Monster
Apprentice
Stress Wave
2.0 Base Chance to be used
Targetting Desire
1.0 Base Chance to Target Most Stressed Hero
50% Chance to Target Most Stressed Hero
Call of the Deep
1.0 Base Chance to be used
Sea Breeze
1.0 Base Chance to be used if any Allies have ≤ 70% HP
Targetting Desire
5.0 Base Chance Target Ally with Lowest HP %
83.3% Chance to Target Ally with Lowest HP %
Veteran
Stress Wave
3.0 Base Chance to be used
Targetting Desire
2.0 Base Chance to Target Most Stressed Hero
66% Chance to Target Most Stressed Hero
Call of the Deep
1.0 Base Chance to be used
Sea Breeze
1.0 Base Chance to be used if any Allies have ≤ 70% HP
Targetting Desire
5.0 Base Chance Target Ally with Lowest HP %
83.3% Chance to Target Ally with Lowest HP %
Champion
Stress Wave
3.0 Base Chance to be used
Targetting Desire
3.0 Base Chance to Target Most Stressed Hero
75% Chance to Target Most Stressed Hero
Call of the Deep
1.0 Base Chance to be used
Sea Breeze
1.0 Base Chance to be used if any Allies have ≤ 70% HP
Targetting Desire
5.0 Base Chance Target Ally with Lowest HP %
83.3% Chance to Target Ally with Lowest HP %
Skill Breakdown
Stress Wave is a Decently Accurate Attack usable from the Back 3 Positions that deals minimal HP Damage alongside a hefty amount of Stress Damage to 1 or 2 Heroes in any Position whilst Moving the Pelagic Shaman Back.
Ceremonial Cut is a Low Accuracy Single Target Attack used from Position 1 that deals Low Damage to a Hero in the Front 2 Ranks.
Call of the Deep is a Support Skill usable from the Back 3 Positions that the Pelagic Shaman uses to Buff an Ally's Accuracy, Crit Chance, and Damage.
Sea Breeze is a Support Skill usable from the Back 3 Positions that the Pelagic Shaman uses to Heal an Ally.
This Skill has a Very High Chance to be used on the Ally with the Lowest HP %Overall Analysis
The Pelagic Shaman is a Low HP Backline Enemy with High Speed and Dodge that deals Stress Damage to your Heroes alongside supporting their Allies with Buffs and Healing.
They also gain 2 Turns of Stealth at the start of any Combat from Veteran Difficulty onwards, making them harder to eliminate.
Sea Breeze can cause you trouble especially if the Pelagic Shaman Targets a Drowned Thrall, and Call of the Deep can make Dangerous Monsters such as the Pelagic Grouper more of a threat.
Due to the Pelagic Shaman being quite troublesome due to its Stress Dealing Attacks and Support Skills, it is a good idea to eliminate them early on.
It is preferrable to have a Hero who can outspeed and Stun the Pelagic Shaman, shutting it down for the turn and giving your other Heroes time to get rid of it.
If possible, Moving the Pelagic Shaman to Position 1 can be a good way to neutralize them due to them only being able to use Ceremonial Cut.
Overall Threat Level: Medium High
Barnacle Barrier - 2 rd Cooldown
All Skills
1.0 Base Chance to Target Random Hero / Monster
Apprentice
Octocestus
1.0 Base Chance to be used
Targetting Desire
2.0 Base Chance to be Target Marked Hero
66% Chance to Target Marked Hero
Barnacle Barrier
2.0 Base Chance if there are no Guarded Monsters
Turn 1: 5.0 Base Chance if there are no Guarded Monsters
Veteran
Octocestus
1.0 Base Chance to be used
Targetting Desire
3.0 Base Chance to be Target Marked Hero
75% Chance to Target Marked Hero
Barnacle Barrier
2.0 Base Chance if there are no Guarded Monsters
Turn 1: 5.0 Base Chance if there are no Guarded Monsters
Champion
Octocestus
1.0 Base Chance to be used
Targetting Desire
4.0 Base Chance to be Target Marked Hero
80% Chance to Target Marked Hero
Barnacle Barrier
2.0 Base Chance if there are no Guarded Monsters
Turn 1: 5.0 Base Chance if there are no Guarded Monsters
Skill Breakdown
Octocestus is a Single Target Attack usable from all Positions that deals Mediocre Damage alongside inflicting Bleed to a Hero in the Front 2 Positions.
Barnacle Barrier is a Support Skill the Pelagic Guardian uses to Guard an Ally while Buffing its own Prot to let it take more hits.
This Skill can only be used if there are no Guarded Monsters Present and has a Very High Chance to be used on its first turn.Overall Analysis
The Pelagic Guardian is a High HP Frontline Enemy with High Prot that can Guard their Allies with Barnacle Barrier and inflict Bleed using Octocestus.
The Pelagic Guardian by itself lacks any significant Damage output, making it not much of a threat
The Pelagic Guardian instead Guards other more threatening Enemies such as the Pelagic Shaman or the Drowned Thrall.
Stuns are especially effective against the Pelagic Guardian, shutting it down for a turn whilst breaking its Guard
Overall Threat Level: Medium Low
All Difficulties
1.0 Base Chance to Target Random Hero / Monster
Apprentice
1.0 Base Chance to Target Lowest Disease Resist Hero
50% Chance to Target Hero with Lowest Disease Resist
Veteran
2.0 Base Chance to Target Lowest Disease Resist Hero
66% Chance to Target Hero with Lowest Disease Resist
Champion
2.0 Base Chance to Target Lowest Disease Resist Hero
66% Chance to Target Hero with Lowest Disease Resist
Skill Breakdown
Brine is a Low Accuracy Single Target Attack with no Positioning or Targetting Requirements that deals Low Damage to the Target Hero in addition to inflicting a hefty - Dodge Debuff and - Speed Debuff.
The Sea Maggot is a Very Low HP Enemy with very High Prot, High Stun Resist, and Very Low Speed that can Debuff your Heroes using Brine, its only Attack.
Since the Sea Maggot has Very High Prot but Very Low HP, DoTs and Armor Piercing Attacks are best for dealing with it.
Due to Diseases potentially being very disruptive and hindering, it is a good idea to get rid of the Sea Maggot early on in the Battle.
Overall Threat Level: Low
1.0 Base Chance to Target Random Hero / Monster
Apprentice
Shocker
Requires there to be at least 2 Non Stunned Heroes to be used
1.0 Base Chance to be used
6.0 Base Chance to be used as First Action
Targetting Desire
2.0 Base Chance to Target Lowest Stun Resist Non Stunned Hero
66% Chance to Target Lowest Stun Resist Non Stunned Hero
Salty Gouge
1.0 Base Chance to be used
Targetting Desire
1.0 Base Chance to Target Lowest Bleed Resist Hero
50% Chance to Target Hero with the Lowest Bleed Resist
Veteran
Shocker
1.0 Base Chance to be used
6.0 Base Chance to be used as First Action
+ 5.0 Base Chance to be used if Uca Crusher is Present
Targetting Desire
3.0 Base Chance to Target Lowest Stun Resist Non Stunned Hero
75% Chance to Target Lowest Stun Resist Non Stunned Hero
Salty Gouge
1.0 Base Chance to be used
Targetting Desire
2.0 Base Chance to Target Lowest Bleed Resist Hero
66% Chance to Target Hero with the Lowest Bleed Resist
Champion
Shocker
1.0 Base Chance to be used
6.0 Base Chance to be used as First Action
+5.0 Base Chance to be used if Uca Crusher is Present
Targetting Desire
4.0 Base Chance to Target Lowest Stun Resist Non Stunned Hero
80% Chance to Target Lowest Stun Resist Non Stunned Hero
Salty Gouge
1.0 Base Chance to be used
Targetting Desire
3.0 Base Chance to Target Lowest Bleed Resist Hero
75% Chance to Target Hero with the Lowest Bleed Resist
Skill Breakdown
Shocker is a High Accuracy Single Target Attack without any Positioning or Targetting Requirements that deals Minimal HP Damage to the Target Hero alongside potentially Stunning them.
The Bleed Resist Debuff the Attack can inflict can be troublesome as well, making the Hero more susceptible to Bleeds from Enemies such as the Deep Stinger itself and the Uca Crusher.
Salty Gouge is a High Accuracy Single Target Attack without any Positioning or Targetting Requirements that deals Low Damage alongside inflicting Bleed in addition to a - Dodge Debuff to the Target Hero.
Both Attacks have a 6% Chance to inflict a Random Disease to the Target Hero, which can prove to be troublesomeOverall Analysis
The Deep Stinger is a Low HP Enemy with High Speed and Dodge alongside a Decently High Stun Resist Stat that can use its High Accuracy Attacks to Stun, Bleed and Disease your Heroes.
Shocker is used to Stun a Hero while Debuffing their Bleed Resist for itself and other Bleed causing Enemies, and has a Very High Chance to be used on its first turn.
Although the Deep Stinger doesn't deal much Damage, its ability to disrupt your Heroes with Stuns and aid its Allies through the - Bleed Resist Debuff it can inflict can prove to be troublesome.
Considering both Attacks of the Deep Stinger have a chance to inflict a Disease, it is a good idea to consider eliminating them early on since they aren't too difficult to kill.
Overall Threat Level: Medium Low
Gargling Grab
1.0 Base Chance to be used
Targetting Desire
1.0 Base Chance to Target Random Hero
2.0 Base Chance to Target Marked Hero
66.7% Chance to Target Marked Hero
The Revenge
100000.0 Base Chance to be used as Second Action
Skill Breakdown
Gargling Grab is a Low Accuracy Single Target Attack usable from any Position that deals High HP Damage and some Stress Damage to a Hero in the Front 2 Positions.
The Revenge is an AoE Attack usable from any Position that deals Extremely High HP Damage and Decently High Stress Damage to all of your Heroes.
This Attack is used if the Drowned Thrall Enemy is allowed to take its second action, upon which it kills itself to use The Revenge.Overall Analysis
The Drowned Thrall is a Slow Enemy with a Middling HP Pool that relies on surviving until it can take its second action so it can use The Revenge, a Highly threatening Attack.
Although the Drowned Thrall by itself is quite easy to kill, the fact that other Enemies may support it can be troublesome.
For Example, the Pelagic Guardian may Guard the Drowned Thrall, the Pelagic Shaman may Heal it using Sea Breeze,and the Deep Stinger could Stun your Heroes.
Notably, the Drowned Thrall cannot take actions whilst Stunned, making Stuns a viable way to give yourself more time to eliminate it.
Overall Threat Level: Medium Low
Kill Before 2nd Action
1.0 Base Chance to Target Random Hero / Monster
Veteran
Arterial Pinch
2.0 Base Chance to be used
5.0 Base Chance to be used if Deep Stinger is Present
Targetting Desire
3.0 Base Chance to Target Lowest Bleed Resist Hero
75% Chance to Target Hero with the Lowest Bleed Resist
Tidal Slam
1.0 Base Chance to be used
Champion
Arterial Pinch
2.0 Base Chance to be used
6.0 Base Chance to be used if Deep Stinger is Present
Targetting Desire
4.0 Base Chance to Target Lowest Bleed Resist Hero
80% Chance to Target Hero with the Lowest Bleed Resist
Tidal Slam
1.0 Base Chance to be used
Skill Breakdown
Arterial Pinch is a Decently Accurate Single Target Attack usable from any Position that deals Minimal HP Damage alongside a Staggering amount of Bleed with a nasty - Healing Received Debuff to a Target Hero in the Front 3 Positions.
It should be noted that this Attack has a Very High Chance to Target the Hero with the Lowest Bleed Resist Stat.
Tidal Slam is a Decently Accurate Single Target Attack usable from the Front 3 Positions that deals Decent Damage to a Hero in the Front 2 Positions.
This Attack can Stun a Frontline Hero alongside possibly sending them to the Back Ranks, which can end up greatly hindering the Hero.Overall Analysis
The Uca Crusher is a High HP Size 2 Enemy with High Prot that can dish out huge amounts of Bleed using Arterial Pinch or disrupt your Frontline Heroes using Tidal Slam.
Similarly to the - Healing Received Debuff that Butcher Cut inflicts, this Debuff can prove to be troublesome by making it so the Hero cannot recover from big hits easily.
Although the Bleeds it can inflict alongside the - Healing Received Debuff can be a threat if left unchecked, the Uca Crusher doesn't deal much Direct Damage, leading it to being completely countered if you have a way to reliably cure its Bleeds or Resist them.
If no Plague Doctor is avaliable to simply cure the Bleeds, using Heroes with High Dodge to Dodge Arterial Pinch can be a Decent Solution.
Stuns can come in handy by being able to limit the amount of Bleed the Uca Crusher can inflict to your Heroes.
Overall Threat Level: Medium
Offkilter Jig - 1 rd Cooldown
All Skills
1.0 Base Chance to Target Random Hero / Monster
Champion
Maddening Shanty
1.0 Base Chance to be used
Targetting Desire
10000.0 Base Chance to Target Jester if Present
Offkilter Jig
1000000000.0 Base Chance to be used if 3+ Ranks are
occupied by Monsters
Skill Breakdown
Maddening Shanty is a relatively Low Accuracy Single Target Attack without Positioning or Targetting Requirements that deals Minimal HP Damage and some Stress Damage while Moving the Squiffy Ghast to Position 1
This Attack always Targets a Jester if one is Present, and has a Low Chance to apply a +10% Stress Debuff to the Target Hero which lasts until the next time the Party Camps
Offkilter Jig is a relatively Low Accuracy AoE Attack that deals some Stress Damage in addition to inflicting Horror to all 4 of your Heroes while Moving the Squiffy Ghast to the Back Ranks.
This Attack can only be used if the Squiffy Ghast is in the Front 2 Ranks alongside at least 2 other Enemy Positions being Filled (Corpses do not count).Overall Analysis
The Squiffy Ghast is a High HP Enemy with High, Speed, and Dodge on top of a High Stun and Bleed Resist Stat that can potentially deal Massive Stress Damage with Offkilter Jig
It should be noted that the Attacks of the Squiffy Ghast have relatively Low Accuracy, making them not too hard to Dodge.
One way to deal with the Squiffy Ghast is the direct approach of taking advantage of its Low Move Resist by using Skills that cause Knockback to send the Squiffy Ghast to the Back Ranks, where it cannot use Offkilter Jig.
Another way to trivialize the Squiffy Ghast is to eliminate the Enemies accompanying it until there are less than 3 total Enemy Positions filled, in which case the Squiffy Ghast cannot use Offkilter Jig
The Squiffy Ghast has many parallels to the Jester with Maddening Shanty and Offkilter Jig being similar to the Jester's Solo and Finale Skills in that the User uses a Skill to Move to the Front Ranks to use their High Impact Attack.
There being an Achievement to Kill the Squiffy Ghast with Finale and the fact that Maddening Shanty always Targets the Jester if one is present futher confirms their rivalry.
Overall Threat Level: Medium High
Cove, Warrens
Hamlet
1.0 Base Chance to Target Random Hero / Monster
Apprentice
Slice And Dice
1.0 Base Chance to be used
Uppercut Slice
1.0 Base Chance to be used
Shank
1.0 Base Chance to be used
Targetting Desire
1.0 Base Chance to Target Lowest Bleed Resist Hero
2.0 Base Chance to Target Marked Hero
50% Chance to Target Marked Hero
25% Chance to Target Hero with Lowest Bleed Resist
Harmless Poke
1.0 Base Chance to be used
Veteran
Slice And Dice
2.0 Base Chance to be used
7.0 Base Chance to be used as First Action
Uppercut Slice
1.0 Base Chance to be used
Shank
2.0 Base Chance to be used
6.0 Base Chance to be used as Second Action
Targetting Desire
1.0 Base Chance to Target Lowest Bleed Resist Hero
3.0 Base Chance to Target Marked Hero
60% Chance to Target Marked Hero
20% Chance to Target Hero with Lowest Bleed Resist
Harmless Poke
1.0 Base Chance to be used
Champion
Slice And Dice
2.0 Base Chance to be used
7.0 Base Chance to be used as First Action
Uppercut Slice
1.0 Base Chance to be used
Shank
2.0 Base Chance to be used
6.0 Base Chance to be used as Second Action
Targetting Desire
1.0 Base Chance to Target Lowest Bleed Resist Hero
4.0 Base Chance to Target Marked Hero
66.7% Chance to Target Marked Hero
16.65% Chance to Target Hero with Lowest Bleed Resist
Harmless Poke
1.0 Base Chance to be used
Skill Breakdown
Slice And Dice is a High Crit Chance AoE Attack usable from the Front 3 Positions that deals Decent Damage alongside inflicting a - Bleed Resist Debuff to both Heroes in the Front 2 Ranks.
Uppercut Slice is a Single Target Attack usable from the Front 2 Positions that deals Low Damage alongside causing Knockback to a Target Hero in the Front 3 Ranks.
Shank is a Single Target Attack usable from the Front 3 Positions that deals Decently High Damage alongside a Bleed to a Hero in any Rank.
Harmless Poke is a Very Low Accuracy Single Target Repositioning Attack that deals Low Damage while Moving the Brigand Cutthroat Forward.
This Attack is only used if the Brigand Cutthroat is at Position 4 and can Target Heroes in any Rank and applies a Speed Buff to the Brigand Cutthroat if it hits the Target Hero.Overall Analysis
The Brigand Cutthroat is a relatively Low HP Enemy with some Prot that can dish out a surprising amount of Damage with Slice And Dice alongside Shank.
The Brigand Cutthroat can apply a large amount of offensive pressure to your Heroes with Slice And Dice & Shank, both of which deal good Damage and have a Higher Chance to be used.
The fact that the Brigand Cutthroat can pose such a threat on top of having a somewhat Small HP Pool makes them a High Priority to be eliminated quickly.Stuns can be useful for shutting down the Brigand Cutthroat for a turn, giving your Heroes more time to get rid of the Brigand Cutthroat and other threats
You can also try to Move them to Position 4, where they can only use Harmless Poke, a Weak Repositioning Attack
Overall Threat Level: Borderline High
Cove, Warrens
Hamlet
1.0 Base Chance to Target Random Hero / Monster
Apprentice
Blanket Fire
1.0 Base Chance to be used
Rushed Shot
1.0 Base Chance to be used
Targetting Desire
1.0 Base Chance to Target Marked Hero
50% Chance to Target Marked Hero
Veteran
Blanket Fire
1.0 Base Chance to be used
Rushed Shot
1.0 Base Chance to be used
Targetting Desire
2.0 Base Chance to Target Marked Hero
66.7% Chance to Target Marked Hero
Champion
Blanket Fire
1.0 Base Chance to be used
Rushed Shot
1.0 Base Chance to be used
Targetting Desire
3.0 Base Chance to Target Marked Hero
75% Chance to Target Marked Hero
Skill Breakdown
Blanket Fire is an AoE Attack usable from the Back 3 Positions that deals Low Damage alongside inflicting a Minor - Dodge Debuff to all 4 Heroes.
Rushed Shot is a Low Accuracy Single Target Repositioning Attack that deals Low Damage while Moving the Brigand Fusilier Back.
This Attack is only used if the Brigand Fusilier is at Position 1 and can Target a Hero in the Front 3 Positions.Overall Analysis
The Brigand Fusilier is a Relatively Low HP Backline Enemy with Decent Speed that uses Blanket Fire to chip down your Heroes alongside Debuffing their Dodge.
They also gain 2 Turns of Stealth at the start of any Combat from Veteran Difficulty onwards, making them harder to eliminate.
The Brigand Fusilier poses barely any threat, with Blanket Fire dealing too Low Damage to be of any real concern.
Due to the Brigand Fusilier usually being accompanied by the much more threatening Brigand Cutthroat and/or Brigand Bloodletter Enemies, it is better to focus on the more threatening Brigands first.
This is especially true from Veteran Difficulty onward, where the Brigand Fusilier starts with 2 turns of Stealth, making them harder to eliminate.
Overall Threat Level: Medium Low
Cove, Warrens
Hamlet
Apprentice
Point Blank Shot - 2 rd Cooldown
All Skills
1.0 Base Chance to Target Random Hero
2.0 Base Chance to Target Marked Hero
Apprentice
Punishment
1.0 Base Chance to be used
Targetting Desire
1.0 Base Chance to Target Lowest Bleed Resist Hero
50% Chance to Target Marked Hero
25% Chance to Target Hero with Lowest Bleed Resist
Rain of Whips
1.0 Base Chance to be used
Point Blank Shot
1.0 Base Chance to be used
4.0 Base Chance to be used as First Action
Veteran
Punishment
1.0 Base Chance to be used
Targetting Desire
1.0 Base Chance to Target Lowest Bleed Resist Hero
50% Chance to Target Marked Hero
25% Chance to Target Hero with Lowest Bleed Resist
Rain of Whips
1.0 Base Chance to be used
4.0 Base Chance to be used if Brigand Cutthroat Present
Point Blank Shot
1.0 Base Chance to be used
4.0 Base Chance to be used as First Action
Champion
Punishment
1.0 Base Chance to be used
Targetting Desire
1.0 Base Chance to Target Lowest Bleed Resist Hero
50% Chance to Target Marked Hero
25% Chance to Target Hero with Lowest Bleed Resist
Rain of Whips
2.0 Base Chance to be used
6.0 Base Chance to be used if Brigand Cutthroat Present
Point Blank Shot
1.0 Base Chance to be used
6.0 Base Chance to be used as First Action
Skill Breakdown
Rain of Whips is a Decently Accurate AoE Attack usable in the Front 3 Positions that deals Minimal HP Damage and some Minor Stress Damage alongside inflicting Bleed to all 4 Heroes.
From Veteran Difficulty onwards, this Attack has a Higher Chance to be used if a Brigand Cutthroat is Present.
Punishment is a Decently Accurate High Crit Chance Single Target Attack without Positioning or Targetting Requirements that deals Low HP and Stress Damage alongside a Bleed to the Target Hero.
Point Blank Shot is a Decently Accurate Single Target Attack with a Very High Crit Chance that is usable from Position 1 and Targets the Hero in Position 1, potentially dealing Very High Damage.
This Attack is very likely to be used as the First Action of the Brigand Bloodletter and Knocks the Target Hero Back.
The Brigand Bloodletter also suffers a - Speed Debuff upon using this Attack.
It should be noted Apprentice Level Brigand Bloodletter Enemies have a 2 round Cooldown on Point Blank Shot, whereas the Attack has no Cooldown from Veteran Difficulty onward.Overall Analysis
The Brigand Bloodletter is a Size 2 Enemy that can inflict Stress Damage and Bleeds to your Party using Punishment or Rain of Whips and deal Very High Damage to the Position 1 Hero using Point Blank Shot.
The main threat the Brigand Bloodletter poses is Point Blank Shot, which has a Very High Chance to be used as the Brigand Bloodletter's First Action.
You can use the fact that Point Blank Shot can only Target Heroes in Position 1 by having Heroes High Prot or Dodge to tank the hits.
In addition, you can take advantage of the fact that the Brigand Bloodletter must be at Position 1 to use Point Blank Shot, so Moving them to Position 2 or 3 will make the Brigand Bloodletter unable to use Point Blank Shot
Since the Brigand Bloodletter isn't as much of a threat if alone, it may be a good call to use Stuns to keep them in check while getting rid of the Enemies accompanying the Brigand Bloodletter.
Overall Threat Level: Medium High
Weald
Cove
Warrens
1.0 Base Chance to Target Random Hero / Monster
Apprentice
Rend for the Old Gods
1.0 Base Chance to be used
Targetting Desire
2.0 Base Chance to Target Marked Hero
66.7% Chance to Target Marked Hero
Stumbling Scratch
1.0 Base Chance to be used
Veteran
Rend for the Old Gods
1.0 Base Chance to be used
Targetting Desire
3.0 Base Chance to Target Marked Hero
75% Chance to Target Marked Hero
Stumbling Scratch
1.0 Base Chance to be used
Champion
Rend for the Old Gods
1.0 Base Chance to be used
Targetting Desire
4.0 Base Chance to Target Marked Hero
80% Chance to Target Marked Hero
Stumbling Scratch
1.0 Base Chance to be used
Skill Breakdown
Rend for the Old Gods is a High Crit Chance Single Target Attack usable from the Front 2 Positions that deals Low HP Damage alongside inflicting Bleed to a Hero in the Front 2 Ranks while Moving the Cultist Brawler Forward.
This Attack benefits from a +50% Damage Buff when Targetting Marked Heroes and can apply a + Stress Debuff to your Heroes, which synergizes with the Attack's High Crit Chance and the Stress inflicting Enemies that will likely be accompanying them.
Stumbling Scratch is a Low Accuracy Single Target Repositioning Attack usable from the Back 2 Positions that deals Low Damage to a Hero in the Front 2 Positions while Moving the Cultist Brawler Forward.Overall Analysis
The Cultist Brawler is a Frontline Enemy with Decent Speed that can inflict Bleed and help other Enemies deal more Stress Damage to your Heroes.
The Cultist Brawler doesn't pose much of a threat due to their main Attack Rend for the Old Gods dealing Decent at best Damage even to Marked Targets.
Both of its Attacks can only Target the Front 2 Positions, making the Cultist Brawler very predictable and easy to deal with.
You can easily Stun the Cultist Brawler or Move it to the Back 2 Positions to render them helpless
Due to these factors, it is usually better to take out the bigger threats that accompanying the Cultist Brawler.
Overall Threat Level: Medium Low

Weald
Cove
Warrens
Veteran & Champion
Eldritch Push - 2 rd Cooldown
Eldritch Pull - 2 rd Cooldown
All Skills
1.0 Base Chance to Target Random Hero / Monster
Apprentice
Stressful Incantation
2.0 Base Chance to be used
7.0 Base Chance to be used as First Action
Targetting Desire
1.0 Base Chance to Target Most Stressed Hero
50% Chance to Target Most Stressed Hero
Eldritch Push
1.0 Base Chance to be used
Eldritch Pull
1.0 Base Chance to be used
Veteran
Stressful Incantation
Unless All 4 Heroes are Virtued or 3+ Marked Heroes are Present
2.0 Base Chance to be used
7.0 Base Chance to be used as First Action
Targetting Desire
2.0 Base Chance to Target Most Stressed Hero
66.7% Chance to Target Most Stressed Hero
Eldritch Push
1.0 Base Chance to be used
Eldritch Pull
1.0 Base Chance to be used
Champion
Stressful Incantation
Unless All 4 Heroes are Virtued or 3+ Marked Heroes are Present
2.0 Base Chance to be used
7.0 Base Chance to be used as First Action
Targetting Desire
3.0 Base Chance to Target Most Stressed Hero
75% Chance to Target Most Stressed Hero
Eldritch Push
1.0 Base Chance to be used
Eldritch Pull
1.0 Base Chance to be used
Skill Breakdown
Stressful Incantation is a Decently Accurate Single Target Attack with no Positioning or Targetting Requirements that deals minimal HP Damage and a hefty amount of Stress Damage to the Target Hero alongside Lowering the Light Level.
This Attack gains the ability to Mark Heroes from Veteran Difficulty onward, helping the many Enemies who have a bias towards Targetting Marked Heroes or have a Bonus vs Marked Targets focus down the Marked Hero.
Eldritch Pull is a Decently Accurate Single Target Attack usable from the Back 3 Positions that deals Minimal HP Damage while Pulling a Hero in the Back 2 Ranks Forward.
This Attack deals Minor Stress Damage from Veteran Difficulty onward alongside a 2 round Cooldown.
Eldritch Push is a Decently Accurate Single Target Attack usable from all positions that deals Minimal HP Damage while Pushing a Hero in the Front 2 Ranks to the Back Ranks.
This Attack deals Minor Stress Damage from Veteran Difficulty onward alongside a 2 round Cooldown.Overall Analysis
The Cultist Acolyte is a Backline Enemy with High Speed and Dodge that dishes out Stress Damage (And can Mark Heroes from Veteran Difficulty Onwards) with Stressful Incantation and disrupts your Heroes using Eldritch Pull and Eldritch Push.
Due to the Cultist Acolyte being able to deal hefty Stress Damage to your Heroes and the disruption they can cause, it is in your best interest to eliminate it quickly.
It is preferrable to have a Hero who can Outspeed the Cultist Acolyte and Stun them to shut them down for the turn, giving your other Heroes time to finish them off quickly.
Overall Threat Level: Medium High
Cove, Warrens
Hamlet
1.0 Base Chance to Target Random Hero / Monster
Apprentice
Accusation
1.0 Base Chance to be used
Targetting Desire
1.0 Base Chance to Target Hero with Most Stress
50% Chance to Target Hero Most Stress
Doomsay
1.0 Base Chance to be used
Veteran
Accusation
1.0 Base Chance to be used
Targetting Desire
2.0 Base Chance to Target Hero with Most Stress
66.7% Chance to Target Hero Most Stress
Doomsay
1.0 Base Chance to be used
Champion
Accusation
1.0 Base Chance to be used
Targetting Desire
3.0 Base Chance to Target Hero with Most Stress
75% Chance to Target Hero Most Stress
Doomsay
1.0 Base Chance to be used
Skill Breakdown
Doomsay is a Very Accurate AoE Attack usable from any Position that deals no Damage but inflicts Stress Damage to all 4 of your Heroes.
Accusation is a Very Accurate Single Target Attack without any Positioning or Targetting Requirements that deals Minimal HP Damage and inflicts Horror to the Target Hero.
This Attack also has a Chance to inflict a + Stress Debuff to the Target Hero which lasts until the Party Camps.Overall Analysis
The Madman is a Backline Enemy with Very High Speed and Dodge that can Spread a hefty amount of Stress using its 2 Attacks.
It is preferrable to have a Hero who can Outspeed the Madman and Stun them to shut them down for the turn and have the other Heroes finish them off quickly.
The Madman has a roughly 4% Chance to drop one of the Music Box Trinkets as Loot, which could come in handy.
Overall Threat Level: High

Weald
Warrens
Courtyard
All Skills
1.0 Base Chance to Target Random Hero / Monster
10.0 Base Chance to Target Marked Hero
91.4% Chance to Target Marked Hero
Bite
10.0 Base Chance to be used if Marked Hero Present
Web
3.0 Base Chance to be used unless 3+ Heroes are Marked
Skill Breakdown
Web is a Decently Accurate Single Target Attack without any Positioning or Targetting Requirements that deals Minimal Damage alongside a Marking the Target Hero.
This Attack can also Stun your Heroes in addition to inflicting a - Blight Resist Debuff.
Bite is a Single Target Attack without any Positioning or Targetting Requirements that deals Very Low Damage and inflicts Blight to the Target Hero.
Even though this Attack benefits from a +100% Damage Buff when Targetting a Marked Hero, it is not much of a threat due to its Very Low Baseline Damage.Overall Analysis
The Webber is a very Low HP Enemy with Decent Speed and High Dodge that uses Web to disrupt your Heroes and set of Marks for Spitters.
When dealing with Spiders, you want to be taking out the Webbers First due to them having Higher Speed and the fact that Spitters pose no threat without Webbers setting up Marks for them.
Spit cannot be used at the Front 2 Positions, meaning if both Webbers are dead, the remaining Spitters are forced to use Bite, a much less threatening Attack.
Stuns can also be used to stop some of the Spiders from acting, although due to their Low HP Pool, just killing them is preferred and safer
Overall Threat Level: Prioritize over Spitters if possible
Weald
Warrens
Courtyard
1.0 Base Chance to Target Random Hero / Monster
100.0 Base Chance to Target Marked Hero
Skill Breakdown
Spit is a Decently Accurate Single Target Attack usable from the Back 2 Positions that deals Mediocre Baseline Damage and inflicts Blight to a Hero in any Position.
This Attack can also inflict a - Accuracy Debuff to your Heroes, making it harder for them to land their Attacks.
More importantly, This Attack benefits from a +100% Damage Buff when Targetting Marked Heroes, letting the Attack deal a High Amount of Damage.
Bite is a Single Target Attack usable in the Front 2 Positions that deals Very Low Damage and Blight to a Hero in any Position.
Even though this Attack benefits from a +100% Damage Buff when Targetting a Marked Hero, it is not much of a threat due to its Very Low Baseline Damage.Overall Analysis
The Spitter is a very Low HP Enemy with High Dodge that uses Spit to deal very High Damage to Marked Heroes.
When dealing with Spiders, you want to be taking out the Webbers First due to them having Higher Speed and the fact that Spitters pose no threat without Webbers setting up Marks for them.
Spit cannot be used at the Front 2 Positions, meaning if both Webbers are dead, the remaining Spitters are forced to use Bite, a much less threatening Attack.
Stuns can also be used to stop some of the Spiders from acting, although due to their Low HP Pool, simply killing them is preferred and safer
Overall Threat Level: Medium
Weald
Warrens
Courtyard
All Difficulties
1.0 Base Chance to Target Random Hero / Monster
3.0 Base Chance to Target Hero with Lowest Stun Resist
75% Chance to Target Hero with Lowest Stun Resist
Skill Breakdown
Grave Nibble is a Low Accuracy High Crit Chance Single Target Attack without any Positioning or Targetting Requirements that deals Low HP Damage and Minor Stress Damage alongside a relatively Low Chance to Stun the Target Hero.
The Maggot is a Very Low HP Enemy with a High Stun Resist Stat that can inflict Stress, Stuns, and Disease to your Heroes using Grave Nibble.
Due to its Small HP Pool. the Maggot can be easily eliminated, which should be done quickly before any Disease can be spread.
Overall Threat Level: Medium Low
Weald
Warrens
1.0 Base Chance to Target Random Hero / Monster
Apprentice
All Skills
2.0 Base Chance to Target Marked Hero
66.7% Chance to Target Marked Hero
Bump In The Night
1.0 Base Chance to be used
Tic-Toc
1.0 Base Chance to be used
Veteran
All Skills
3.0 Base Chance to Target Marked Hero
75% Chance to Target Marked Hero
Bump In The Night
1.0 Base Chance to be used
Tic-Toc
1.0 Base Chance to be used
Champion
All Skills
4.0 Base Chance to Target Marked Hero
80% Chance to Target Marked Hero
Bump In the Night
1.0 Base Chance to be used
Tic-Toc
1.0 Base Chance to be used
Skill Breakdown
Bump in the Night is a Low Accuracy Single Target Attack usable from the Front 3 Ranks that deals Low Damage to Heroes in the Front 2 Positions.
The Bone Rabble has overall Low Stats alongside Weak Attacks with Low Damage and Accuracy.
Due to the Bone Rabble being a non threat, it should be the last thing you deal with.
Overall Threat Level: Very Low
Weald
1.0 Base Chance to Target Random Hero / Monster
Veteran
Flurry of Claws
1.0 Base Chance to be used
Lash of the Tail
1.0 Base Chance to be used
Targetting Desire
2.0 Base Chance to Target Marked Hero
66% Chance to Target Marked Hero
Champion
Flurry of Claws
2.0 Base Chance to be used
Lash of the Tail
1.0 Base Chance to be used
Targetting Desire
2.0 Base Chance to Target Lowest Stun Resist Non Stunned Hero
3.0 Base Chance to Target Marked Hero
33.3% Chance to Target Lowest Stun Resist Non Stunned Hero
50% Chance to Target Marked Hero
Skill Breakdown
Flurry of Claws is a Decently Accurate AoE Attack usable from the Front 3 Positions that deals Very Low Damage to both Front Rank Heroes and has a Very Low Chance to Shuffle them.
Lash of the Tail is a Decently Accurate Single Target Attack without any Positioning or Targetting Requirements that deals Minimal Damage to the Target Hero.
This Attack can Stun the Target Hero and has a Low Chance to cause Knockback as well.Overall Analysis
The Gargoyle is a Low HP Enemy with High Speed, Decent Dodge, and High Bleed Resist that attempts to disrupt your Heroes using its Attacks, both of which have a Chance to displace the Target Hero.
That being said although the Stun Chance on Lash of the Tail is standard, the Knockback and Shuffle Chances of the 2 Attacks are too Low to actually do anything.
The Gargoyle is more of an annoyance more than anything and can be largely ignored while you prioritize getting rid of more threatening Enemies.
Overall Threat Level: Medium Low
Warrens, Cove
Courtyard
1.0 Base Chance to Target Random Hero / Monster
Veteran
Rend
1.0 Base Chance to be used
4.0 Base Chance to be used as First Action
Targetting Desire
3.0 Base Chance to Target Marked Hero
75% Chance to Target Marked Hero
Skull Toss
2.0 Base Chance to be used
Targetting Desire
3.0 Base Chance to Target Marked Hero
2.0 Base Chance to Target Hero with Most Stress
50% Chance to Target Marked Hero
33.3% Chance to Target Non Stunned Hero with Most Stress
Howl
2.0 Base Chance to be used
Champion
Rend
1.0 Base Chance to be used
6.0 Base Chance to be used as First Action
Targetting Desire
4.0 Base Chance to Target Marked Hero
80% Chance to Target Marked Hero
Skull Toss
2.0 Base Chance to be used
Targetting Desire
4.0 Base Chance to Target Marked Hero
4.0 Base Chance to Target Hero with Most Stress
44.4% Chance to Target Marked Hero
44.4% Chance to Target Non Stunned Hero with Most Stress
Howl
3.0 Base Chance to be used
Skill Breakdown
Rend is a Decently Accurate Single Target Attack usable from the Front 3 Positions that deals Decently High Damage alongside a High Crit Chance to a Hero in the Front 2 Ranks.
This Attack can inflict a + Stress Debuff to the Target Hero and has a High Chance to be used on its first turn
Skull Toss is a Decently Accurate Single Target Attack usable from any Position that deals Decently High HP Damage and a hefty amount of Stress Damage alongside having a Chance to Stun a Hero in the Back 2 Positions.
Howl is a Decently Accurate AoE Attack usable from any Position that can inflict Horror to all 4 Heroes while also Lowering the Light Level
This Attack also has a 5% Chance to give the Worries Disease to each Target Hero.Overall Analysis
The Ghoul is a relatively Low HP Size 2 Enemy with High Speed and Prot that can inflict Stress, Bleed, and Stuns to your Heroes.
The Ghoul is a troublesome Enemy, with all 3 of its Attacks contributing to your Heroes taking more Stress Damage, which is further enabled by its High Speed.
As is the case with many Size 2 Enemies, Stuns are handy for keeping the Ghoul in check while you either focus on getting rid of the Ghoul or get rid of the threats accompanying it
Overall Threat Level: High

Cove, Warrens
Hamlet
1.0 Base Chance to Target Random Hero / Monster
Darkest
Slice And Dice
2.0 Base Chance to be used
Uppercut Slice
1.0 Base Chance to be used
Shank
Not used if 2+ Heroes are Marked
2.0 Base Chance to be used
6.0 Base Chance to be used as First Action
Targetting Desire
2.0 Base Chance to Target Lowest Bleed Resist Hero
66.7% Chance to Target Hero with Lowest Bleed Resist
Harmless Poke
1.0 Base Chance to be used
Skill Breakdown
Slice And Dice is a High Crit Chance AoE Attack usable from the Front 3 Positions that deals Decent Damage alongside inflicting a Bleed Resist Debuff to both Heroes in the Front 2 Ranks.
Uppercut Slice is a Single Target Attack usable from the Front 2 Positions that deals Low Damage alongside inflicting Knockback to a Target Hero in the Front 3 Ranks.
Shank is a Single Target Attack usable from the Front 3 Positions that deals Decently High Damage alongside a Bleed to a Hero in any Rank.
The Brigand Raider also Marks the Target Hero with this Attack, helping the many Enemies who have a Higher Chance to Target Marked Heroes focus down the Marked Hero with their Attacks.
Harmless Poke is a Very Low Accuracy Single Target Repositioning Attack usable from Position 4 that deals Low Damage to a Hero in any Position while Moving the Brigand Raider Forward.
The Brigand Raider gains a + Speed Buff if the Attack hits.Overall Analysis
The Brigand Raider Enemy is the Darkest Level version of the Brigand Cutthroat with Slightly Better Stats and Skills overall. It can be encountered during the Brigand Incursion and within Champion Level Dungeons.
The Brigand Raider gains the ability to Mark Heroes with Shank, helping many Enemies who have a Higher Chance to Target Marked Heroes focus down the Marked Hero with their Attacks.
The fact that they can pose a threat with their High Offensive Pressure on top of having a somewhat Small HP Pool makes them a High Priority to be eliminated.Stuns can be useful for shutting down the Brigand Raider for a turn, giving your Heroes more time to take care of the Brigand Raider and other threats.
You can also try to Move them to Position 4, where they can only use Harmless Poke, a Weak Repositioning Attack
Overall Threat Level: Borderline High
Cove, Warrens
Hamlet
1.0 Base Chance to Target Random Hero / Monster
Darkest
Blanket Fire
1.0 Base Chance to be used
Rushed Shot
1.0 Base Chance to be used
Skill Breakdown
Blanket Fire is an AoE Attack usable from the Back 3 Positions that deals Low Damage alongside inflicting a Minor Dodge Debuff to all 4 Heroes.
The Brigand Hunter deals minor Stress Damage with Blanket Fire, making the Attack more of a concern.
Rushed Shot is a Low Accuracy Single Target Repositioning Attack usable from Position 1 that deals Low Damage to a Hero in the Front 3 Positions while Moving the Brigand Hunter Back.Overall Analysis
The Brigand Hunter is the Darkest Level version of the Brigand Fusilier, with Slightly Better Stats and Skills overall. It can be encountered during the Brigand Incursion and within Champion Level Dungeons.
It also starts every Combat with 2 Turns of Stealth, making it harder to deal with.
The Brigand Hunter while being more of a threat than the Brigand Fusilier still proves to be not much of a threat in the Damage department, although the Stress Damage Blanket Fire can inflict can stack up, especially in the case of a Critial Hit.
Although it would be preferrable to take them out early, unless you have the means necessary to get rid of it quickly, it is usually better to focus on dealing with the Brigand Cutthroat and Brigand Raider Enemies accompanying it.
Overall Threat Level: Medium High
Ruins, Weald
Cove, Warrens
Farmstead X
All Skills
2.0 Base Chance to Target Random Hero / Monster
Warning Rattle
5.0 Base Chance to be used unless Self Guarding / Guarded or
less than 2 Monsters aren't Guarded
Targetting Desire
10.0 Base Chance to Target Non Guarding / Guarded Monster
83.3% Chance to Target Non Guarding / Guarded Monster
Snakebite
1.0 Base Chance to be used
Targetting Desire
4.0 Base Chance to Target Marked Hero
3.0 Base Chance to Target Lowest Bleed Resist Hero
44.4% Chance to Target Marked Hero
33.3% Chance to Target Lowest Bleed Resist Hero
Slther Forwards
1.0 Base Chance to be used
Targetting Desire
4.0 Base Chance to Target Marked Hero
66.7% Chance to Target Marked Hero
Skill Breakdown
Warning Rattle is a Support Skill the Rattler uses to Guard its Allies alongside activating its Riposte and Buffing its Prot.
Snakebite is a High Accuracy Single Target Attack usable from the Front 3 Positions that deals Decent Damage alongside inflicting Bleed to a Hero in the Front 3 Positions.
Slither Forward is a Single Target Repositioning Attack used from Position 4 that deals Very Low Damage to a Hero in the Front 2 Ranks while Moving the Rattler Forward.Overall Analysis
The Rattler is one of the Enemies introduced with the Shieldbreaker DLC alongside the Pilskin and Adder.
It is a High HP Enemy with Decent Prot and Dodge alongside High Speed that uses Warning Rattle to Guard an Ally and Snakebite to deal Decent Damage in addition to inflicting Bleed.
The Rattler isn't too much of a threat, although alongside the Bleed or Blight the Serpent Enemies accompanying it will be inflicting, the Damage can stack up.
Due to the Rattler being quite durable, it may be a better idea to take care of the Pilskin Enemy first if you have the tools to Destealth and kill it.
Stuns are very useful for dealing with the Rattler thanks to Stuns letting you shut down the Rattler for a turn while also breaking its Guard.
Overall Threat Level: Medium
Ruins, Weald
Cove , Warrens
Farmstead X
All Skills
2.0 Base Chance to Target Random Hero / Monster
4.0 Base Chance to Target Marked Hero
3.0 Base Chance to Target Lowest Blight Resist Hero
44.4% Chance to Target Marked Hero
33.3% Chance to Target Lowest Blight Resist Hero
Infuse
1.0 Base Chance to be used
Venomous Gleek
1.0 Base Chance to be used
Skill Breakdown
Venomous Gleek is a High Accuracy Single Target Attack usable from the Back 2 Positions that deals Minimal Damage and inflicts Blight to a Hero in any Position
Infuse is a High Accuracy Single Target Attack that deals Decent Damage alongside inflicting Blight to the Target Hero.
This Attack can be used if the Pilskin is in the Front 2 Ranks, and can only Target Heroes in the Front 2 Ranks
While the Crit Chance of both Attacks is unremarkable, the +12% Crit Chance Buff the Pilskin benefits from while Stealthed gives it a Very High Chance to Crit if it is allowed to remain StealthedOverall Analysis
The Pilskin is one of the Enemies introduced with the Shieldbreaker DLC alongside the Rattler and Adder.
The Pilskin is a Low HP Enemy with Minor Prot, High Dodge and High Speed that deals Blight with its Attacks. They also gain 2 Turns of Stealth at the start of any Combat from making them harder to eliminate, alongside benefitting from a +12 CRIT Buff if they are Stealthed.
The Pilskin isn't too much of a threat, although alongside the High Crit Chance when Stealthed and the Bleed or Blight the Serpent Enemies accompanying it will be inflicting, the Damage can stack up.
When facing a Pilskin, it is advised to Destealth them to deprive them of their + Crit Chance Buff and eliminate them quickly since they have Low HP, making them quite easy to kill once they are Destealthed
It may also be useful to note that they cannot use Infuse from the Back 2 Positions, instead using Venomous Gleek which has Very Low Damage and can only Target the Front 2 Ranks.
Overall Threat Level: Medium High
Ruins, Weald
Cove, Warrens
Farmstead X
All Skills
2.0 Base Chance to Target Random Hero / Monster
Molt
1.0 Base Chance to be used if own HP ≤ 90%
6.0 Base Chance to be used if own HP ≤ 50%
11.0 Base Chance to be used if own HP ≤ 20%
+ 3.0 Base Chance to be used if Self has DoTs
(Blight / Bleed)
Adder's Fang
3.0 Base Chance to be used
Targetting Desire
4.0 Base Chance to Target Marked Hero
3.0 Base Chance to Target Lowest Blight Resist Hero
44.4% Chance to Target Marked Hero
33.3% Chance to Target Lowest Blight Resist Hero
Paralyzing Quills
3.0 Base Chance to be used
Targetting Desire
4.0 Base Chance to Target Marked Hero
3.0 Base Chance to Target Lowest Stun Resist Non Stunned Hero
44.4% Chance to Target Marked Hero
33.3% Chance to Target Lowest Stun Resist Non Stunned Hero
Skill Breakdown
Adder's Fang is a High Accuracy Single Target Attack without any Positioning or Targetting Requirements that deals Low Damage and inflicts Blight to a Hero in any Position
Paralyzing Quills is a High Accuracy Single Target Attack usable from all Positions that deals High Damage alongside inflicting a very potent Stun to a Hero in the Front 3 Ranks.
Molt is a Self Healing Skill which Heals the Adder, curing all Bleed, Blight, and Debuffs alongside Buffing its Blight Skill Chance and Damage.
This Skill has a Higher Chance to be used the Less HP the Adder has or if the Adder is suffering from any Bleed or Blight.Overall Analysis
The Adder is one of the Enemies introduced with the Shieldbreaker DLC alongside the Rattler and Pilskin.
It is a High HP Size 2 Enemy with some Prot that can use its High Accuracy Attacks to Stun or Blight your Heroes alongside being able to cure any Bleed, Blight, or Debuffs inflicted on itself using Molt.
The Adder is only really a threat if other Enemies are present due to it not dealing enough Damage to be of much threat alone.
Due to the Adder not posing much of a threat alone, it is advised to eliminate any Monsters accompanying the Adder while using Stuns to keep it in check.
Overall Threat Level: Medium
Cove Warrens
Courtyard
Farmstead X
1.0 Base Chance to Target Random Hero / Monster
Apprentice
All Skills
2.0 Base Chance to Target Marked Hero
66.7% Chance to Target Marked Hero
Gather the Blood
4.0 Base Chance to be used
Predigestion
1.0 Base Chance to be used
Veteran & Champion
All Skills
3.0 Base Chance to Target Marked Hero
75% Chance to Target Marked Hero
Gather the Blood
3.0 Base Chance to be used
Predigestion
1.0 Base Chance to be used
Skill Breakdown
Gather the Blood is a Low Damage Single Target Attack usable from the Front 2 Positions that has a 31% Chance to inflict the Crimson Curse to a Hero in any Position while Moving the Supplicant Forward.
Predigestion is a Single Target Attack without Positioning or Targetting Requirements that deals Low Damage alongside inflicting Blight while Moving the Supplicant Forward.
This Attack can also inflict a - Bleed Resist Debuff that synergizes with the Bleed Heavy Crimson Court Enemies that will be accompanying the Supplicant.Overall Analysis
The Supplicant is a relatively Low HP Enemy with some Prot and a Sky High Stun Resist Stat that can spread the Crimson Curse using Gather the Blood and inflict Blight using Predigestion.
Due to the Supplicant not dealing much Damage, it doesn't pose much of a threat, and you should be prioritizing the more threatening Crimson Court Enemies accompanying it.
Overall Threat Level: Medium Low
Cove Warrens
Farmstead X
1.0 Base Chance to Target Random Hero / Monster
Apprentice
Enraging Slight
1.0 Base Chance to be used
Targetting Desire
10.0 Base Chance to Target Rank 3 or 4
3.0 Base Chance to Target Most Stressed Hero
71.4% Base Chance to Target Rank 3 or 4
21.4% Chance to Target Most Stressed Hero
Elusive Exit
3.0 Base Chance to be used as Second Action
1003.0 Base Chance to be used as Third Action
Veteran & Champion
Enraging Slight
1.0 Base Chance to be used
Targetting Desire
10.0 Base Chance to Target Rank 3 or 4
4.0 Base Chance to Target Most Stressed Hero
66.7% Base Chance to Target Rank 3 or 4
26.7% Chance to Target Most Stressed Hero
Elusive Exit
3.0 Base Chance to be used as Second Action
1003.0 Base Chance to be used as Third Action
Skill Breakdown
Enraging Slight is a Decently Accurate Single Target Attack with no Positioning or Targetting Requirements that deals minimal HP Damage alongside Decent Stress Damage.
This Attack also Marks the Target Hero while possibly Pulling them to the Front Ranks, where the Hero will be in more danger of being Focused Down by the many Crimson Court Monsters that have a Higher Chance to Target Marked Heroes.
It should be noted that this Attack has a much Higher Chance to target your (probably) more vulnerable Backline Heroes.
Elusive Exit is a Very Accurate AoE Attack usable from any Position that deals minimal HP Damage and inflicts Horror to all 4 Heroes while the Gatekeeper Escapes from the battle.
After escaping, the Gatekeeper also removes all Enemy Corpses alongside Summoning Sycophant Enemies in all Empty Positions.
This Attack is only usable if the Gatekeeper is taking its Second Action, with a High Chance to be used as its Second Action (66.7% on Apprentice // 75% on Veteran & Champion) and is essentially guarenteed to be used as its Third Action.Overall Analysis
The Gatekeeper is a Low HP Enemy with High Speed and Very High Dodge that you can encounter when the Infestation Level of the Hamlet is High.
It can use Enraging Slight to deal Stress to your Heroes alongside Marking and Pulling them, and if they are left alive for too long, they will flee the Battle using Elusive Exit, removing any Enemy Corpses and Summoning Sycophant Enemies in empty spaces.
The Gatekeeper always drops an Invitation to the currently active Courtyard Epic Quest alongside being guarenteed to spawn if you interact with a Throbbing Coccoon Curio outside the Courtyard.
Due to Elusive Exit being a highly troublesome Attack, it is in your best interest to eliminate the Gatekeeper quickly.
Thanks to turns while being Stunned not counting as taking an Action, Stunning the Gatekeeper is a good way to delay it from being able to use Elusive Exit.
Overall Threat Level: Very High
Cove Warrens
Courtyard
Farmstead X
Buried Blast - 3 rd Cooldown
All Difficulties
1.0 Base Chance to use Random Skill
All Skills
1.0 Base Chance to Target Random Hero / Monster
3.0 Base Chance to Target Marked Hero
75% Chance to Target Marked Hero
Buried Blast
1.0 Base Chance to be used
Subterranean Skewer
1.0 Base Chance to be used
Skill Breakdown
Subterranean Skewer is a Decently Accurate Single Target Attack with no Positioning or Targetting Requirements that deals High Damage alongside inflicting Bleed while Moving the Chevalier Back.
This Attack also inflicts a - Bleed Resist Debuff that synergizes with the Bleed Heavy Crimson Court Enemies accompanying the Chevalier.
Buried Blast is a Decently Accurate Attack which Targets 2 Heroes at once and is usable from the Back 3 Positions alongside being able to Target Heroes in any Position.
Although this Attack cannot Crit, it still deals Decent Damage alongside potentially Stunning your Heroes and more importantly inflicting a Hefty Debuff that Nukes a Hero's Dodge(-40 on Veteran // -50 on Champion)
Overall Analysis
The Chevalier is a Sturdy Enemy with a Decent Amount of Prot alongside Sky High Move Resist and a Very Low Stun, Bleed, and Debuff Resist Stat.
They can use Subterranean Skewer to dish out High Damage with a Bleed or use Buried Blast to Cripple the Dodge of your Heroes while Stunning them.
The Chevalier can be difficult to deal with due to it being quite Sturdy and its Sky High Move Resist letting it stay in the Back Ranks.
Even though the Chevalier is a big threat, it being so tanky means you may want to deal with the other Enemies that can pose a threat and can be more easily dispatched first.
On top of that, due to the Chevalier having a Very Low Stun Resist Stat, Stuns are very useful for keeping it in check, letting you focus on the other threats first.
That being said if the Chevalier is posing an immediate threat to your and/or you can dispatch it decently easily, it can be beneficial to take it out earlier on in the battle.
Overall Threat Level: High
Cove Warrens
Courtyard
Farmstead X
Enraging Slight - 1 rd Cooldown
Infallible Servitude - 1 rd Cooldown
All Skills
1.0 Base Chance to Target Random Hero / Monster
Apprentice
Enraging Slight
2.0 Base Chance to be used
Targetting Desire
3.0 Base Chance to Target Most Stressed Hero
75% Chance to Target Most Stressed Hero
Infallible Servitude
2.0 Base Chance to be used unless 2+ Monsters are Guarded
The Thirst
3.0 Base Chance to be used if Own HP ≤ 33%
Targetting Desire
3.0 Base Chance to Target Marked Hero
75% Chance to Target Marked Hero
Veteran & Champion
Enraging Slight
2.0 Base Chance to be used
Targetting Desire
3.0 Base Chance to Target Most Stressed Hero
75% Chance to Target Most Stressed Hero
Infallible Servitude
2.0 Base Chance to be used unless 2+ Monsters are Guarded
The Thirst
5.0 Base Chance to be used if Own HP ≤ 55%
Targetting Desire
3.0 Base Chance to Target Marked Hero
75% Chance to Target Marked Hero
Skill Breakdown
Enraging Slight is a Decently Accurate Single Target Attack with no Positioning or Targetting Requirements that deals minimal HP Damage alongside some Stress Damage.
This Attack also Marks the Target Hero while possibly Pulling them to the Front Ranks, where the Hero will be in more danger of being Focused Down by the many Crimson Court Monsters that have a Higher Chance to Target Marked Heroes.
Infallible Servitude is a Support Skill used by the Manservant to Guard one of their Allies while Buffing its own Prot to make itself more durable.
The Thirst if used in its Thirsty Form is a Decently Accurate Single Target Attack with no Positioning or Targetting Requirements that deals some HP and Stress Damage while Moving the Manservant Forward.
The Manservant must have 33% or less HP in order to use this Attack on Apprentice Difficulty and a Higher Chance to use it if it has 55% or less HP on Veteran & Champion Difficulty
This Attack has a 31% Chance to Inflict the Crimson Curse alongside a Chance to apply a Hefty + Stress Debuff to the Target Hero.
In addition, the Manservant Heals some HP & Receives any Blight that was on the Target Hero and changes into its Bloodlust Form.
Overall Analysis
The Manservant is a Low HP Enemy with High Speed and Dodge that supports its Allies by Guarding them whilst Disrupting your Heroes with Pulls and Stuns and inflicting Stress to your Heroes.
The Manservant doesn't do much Damage Overall, instead it opts to take up more of a supporting role, Guarding its Allies in both Forms with Infallible Servitude and Gibbering Entourage.
In addition, the Manservant uses Attacks such as Enraging Slight and Refined Palate to inflict Stress to your Heroes alongside Disrupting your Heroes.
As is the case with most of the Crimson Court Enemies, The Thirst is used to Heal Themselves while dealing HP and Stress Damage to your Heroes alongside having a Chance to inflict the Crimson Curse.
It should be noted that the Version of The Thirst that the Manservant can use in its Thirsty Form can inflict a Large + Stress Debuff to the Target Hero (+33% on Apprentice // +50% on Veteran // +67% on Champion)
While the Manservant isn't as directly threatening as some of the other Crimson Court Enemies, they do a good job of being a hinderance by Guarding their Allies and dealing Stress to your Heroes.
It can be a good idea to kill them early on or use Stuns to shut the Manservant down whilst you take care of other threats.
Overall Threat Level: Medium High
Cove Warrens
Courtyard
Farmstead X
The Thirst - 2 rd Cooldown
Refined Palate - 1 rd Cooldown
Gibbering Entourage - 1 rd Cooldown
Apprentice
All Skills
1.0 Base Chance to Target Random Hero / Monster
Refined Palate
1.0 Base Chance to be used
Targetting Desire
3.0 Base Chance to Target Most Stressed Hero
3.0 Base Chance to Target Marked Hero
42.85% Chance to Target Most Stressed Hero
42.85% Chance to Target Marked Hero
Choice Cut
1.0 Base Chance to be used
Targetting Desire
3.0 Base Chance to Target Marked Hero
75% Chance to Target Marked Hero
Gibbering Entourage
Not used on Apprentice Difficulty
The Thirst
5.0 Base Chance to be used if Own HP ≤ 33%
Targetting Desire
3.0 Base Chance to Target Marked Hero
75% Chance to Target Marked Hero
Veteran & Champion
All Skills
1.0 Base Chance to Target Random Hero / Monster
Refined Palate
1.0 Base Chance to be used
Targetting Desire
3.0 Base Chance to Target Most Stressed Hero
3.0 Base Chance to Target Marked Hero
42.85% Chance to Target Most Stressed Hero
42.85% Chance to Target Marked Hero
Choice Cut
1.0 Base Chance to be used
Targetting Desire
3.0 Base Chance to Target Marked Hero
75% Chance to Target Marked Hero
Gibbering Entourage
1.0 Base Chance to be used if 2+ Non Guarded Monsters
and at least 3 Monsters are Present
The Thirst
5.0 Base Chance to be used if Own HP ≤ 33%
Targetting Desire
3.0 Base Chance to Target Marked Hero
75% Chance to Target Marked Hero
Skill Breakdown
Refined Palate is a Decently Accurate Single Target Attack without any Positioning or Targetting Requirements that is used by the Manservant in its Bloodlust Form.
This Attack deals minimal HP Damage and some Stress Damage to the Target Hero alongside being able to Stun them as well.
Gibbering Entourage is a Support Skill used by the Manservant in its Bloodlust Form to Guard all of its Allies while Greatly Buffing its Prot to make itself much more durable.
Choice Cut is a Single Target Attack usable from any Position that deals Low Damage alongside a Bleed to a Hero in the Back 2 Positions.
The Thirst if used in its Bloodlust Form is a Decently Accurate Single Target Attack with no Positioning or Targetting Requirements that deals mediocre HP Damage and some Stress Damage while Moving the Manservant Forward.
The Manservant must have 33% or less HP in order to use this Attack.
This Attack has a 31% Chance to Inflict the Crimson Curse alongside Healing some HP & Recieving any Blight that was on the Target Hero.
Unlike when used in its Thirsty Form, The Thirst Applies an Accuracy and Speed Debuff to the Manservant.Overall Analysis
The Manservant is a Low HP Enemy with High Speed and Dodge that supports its Allies by Guarding them whilst Disrupting your Heroes with Pulls and Stuns and inflicting Stress to your Heroes.
The Manservant doesn't do much Damage Overall, instead it opts to take up more of a supportingg role, Guarding its Allies in both Forms with Infallible Servitude and Gibbering Entourage.
In addition, the Manservant uses Attacks such as Enraging Slight and Refined Palate to inflict Stress to your Heroes alongside Disrupting your Heroes.
As is the case with most of the Crimson Court Enemies, The Thirst is used to Heal Themselves while dealing HP and Stress Damage to your Heroes alongside having a Chance to inflict the Crimson Curse.
While the Manservant isn't as directly threatening as some of the other Crimson Court Enemies, they do a good job of being a hinderance by Guarding their Allies and dealing Stress to your Heroes.
It can be a good idea to kill them early on or use Stuns to shut the Manservant down whilst you take care of other threats.
Overall Threat Level: Medium High
Cove Warrens
Courtyard
Farmstead X
Maddening Whine - 1 rd Cooldown
All Skills
1.0 Base Chance to Target Random Hero / Monster
Apprentice
Maddening Whine
2.0 Base Chance to be used if 2+ Non Stunned Heroes Present
Targetting Desire
3.0 Base Chance to Target Most Stressed Hero
2.0 Base Chance to Target Marked Hero
50% Chance to Target Most Stressed Hero
33.3% Chance to Target Marked Hero
The Thirst
1.0 Base Chance to be used
5.0 Base Chance to be used if Own HP ≤ 40%
Targetting Desire
2.0 Base Chance to Target Marked Hero
66.7% Chance to Target Marked Hero
Veteran & Champion
Maddening Whine
1.0 Base Chance to be used
Targetting Desire
3.0 Base Chance to Target Most Stressed Hero
3.0 Base Chance to Target Marked Hero
42.85% Chance to Target Most Stressed Hero
42.85% Chance to Target Marked Hero
The Thirst
1.0 Base Chance to be used
5.0 Base Chance to be used if Own HP ≤ 40%
Targetting Desire
2.0 Base Chance to Target Marked Hero
66.7% Chance to Target Marked Hero
Skill Breakdown
Maddening Whine is a Decently Accurate Single Target Attack with no Positioning or Targetting Requirements that deals minimal HP Damage alongside a Decent amount of Stress Damage while Moving the Sycophant Back.
The Thirst if used in its Thirsty Form is a High Accuracy Single Target Attack with no Positioning or Targetting Requirements that deals Low HP Damage and some Stress Damage while Moving the Sycophant Forward.
The Sycophant has a much Higher Chance to use this Attack if its HP is at 40% or Lower.
This Attack has a 31% Chance to Inflict the Crimson Curse to the Target Hero and grants the Sycophant a Buff to its Stun Skill Chance.
In addition, the Sycophant Heals some HP & Receives any Blight that was on the Target Hero and changes into its Bloodlust Form.Overall Analysis
The Sycophant is a Low HP Enemy with High Speed and Dodge that deals overall mediocre Damage , mainly inflicting Stress Damage with its Attacks.
It can also use Deafening Whine in order to Stun your Heroes and dish out some Bleeds using Bombing Run.
As is the case with most of the Crimson Court Enemies, The Thirst is used to Heal Themselves while dealing HP and Stress Damage to your Heroes alongside having a Chance to inflict the Crimson Curse.
While the Sycophant isn't as much of a threat as some of the other Crimson Court Enemies, they can still be troublesome due to their High Speed and Dodge which lets them act quickly and evade your Attacks.
Using a Hero with High Speed to Outspeed and Stun the Sycophant can be effective, in addition to taking advantage of their Low HP and killing them outright.
Overall Threat Level: Medium High
Cove Warrens
Courtyard
Farmstead X
All Difficulties
Deafening Whine - 1 rd Cooldown
Apprentice
The Thirst - 2 rd Cooldown
Veteran & Champion
The Thirst - 1 rd Cooldown
All Skills
1.0 Base Chance to Target Random Hero / Monster
Apprentice
Deafening Whine
3.0 Base Chance to be used
Targetting Desire
2.0 Base Chance to Target Marked Hero
66.7% Chance to Target Marked Hero
The Thirst
2.0 Base Chance to be used
6.0 Base Chance to be used if Own HP ≤ 30%
Targetting Desire
2.0 Base Chance to Target Marked Hero
66.7% Chance to Target Marked Hero
Bombing Run
3.0 Base Chance to be used
Veteran & Champion
Deafening Whine
3.0 Base Chance to be used
Targetting Desire
3.0 Base Chance to Target Marked Hero
75% Chance to Target Marked Hero
The Thirst
2.0 Base Chance to be used
8.0 Base Chance to be used if Own HP ≤ 30%
Targetting Desire
3.0 Base Chance to Target Marked Hero
75% Chance to Target Marked Hero
Bombing Run
3.0 Base Chance to be used
Skill Breakdown
Deafening Whine is a Decently Accurate Single Target Attack with no Positioning or Targetting Requirements that deals minimal HP Damage and minor Stress Damage while Moving the Sycophant Back.
This Attack takes advantage of the Stun Skill Chance Buff the Sycophant gains by using The Thirst in its Thirsty Form, which makes up for its relatively Low Stun Chance.
Bombing Run is an Attack with no Positioning or Targetting Requirements that deals Mediocre Damage to 1 or 2 Heroes alongside Bleed.
The Thirst if used in its Bloodlust Form is a High Accuracy Single Target Attack with no Positioning or Targetting Requirements that deals Decent Damage and Stress while Moving the Sycophant Forward.
The Sycophant has a much Higher Chance to use this Skill if its HP is at 30% or Lower.
This Attack also has a 31% Chance to Inflict the Crimson Curse alongside Healing some HP & Recieving any Blight that was on the Target Hero.
Unlike in its Thirsty Form, The Thirst Applies an Accuracy and Speed Debuff to the Sycophant.Overall Analysis
The Sycophant is a Low HP Enemy with High Speed and Dodge that can prove to be quite the nuisance.
The Sycophant does overall mediocre Damage, mainly dishing out Stress with its Attacks. It can also use Deafening Whine in order to Stun your Heroes and dish out some Bleeds using Bombing Run.
As is the case with most of the Crimson Court Enemies, The Thirst is used to Heal Themselves while dealing HP and Stress Damage to your Heroes alongside having a Chance to inflict the Crimson Curse.
While they are not as Threatening as some of the other Crimson Court Enemies, the Sycophant can still be troublesome due to their High Speed and Dodge which lets them act quickly and evade your Attacks.
The best way to deal with them is by Stunning them with a Faster Hero to shut them down for a turn or taking advantage of their Low HP by taking them out early on.
Overall Threat Level: Medium High
Farmstead X
Skewering Repartee - 2 rd Cooldown
The Thirst - 1 rd Cooldown
All Skills
1.0 Base Chance to Target Random Hero / Monster
All Difficulties
1.0 Base Chance to use Random Skill
Rib Cracker
2.0 Base Chance to be used
Targetting Desire
11.0 Base Chance to Target Marked Hero
91.7% Chance to Target Marked Hero
Skewering Repartee
3.0 Base Chance to be used
The Thirst
1.0 Base Chance to be used
11.0 Base Chance to be used if Own HP ≤ 50%
Targetting Desire
3.0 Base Chance to Target Marked Hero
75% Chance to Target Marked Hero
Skill Breakdown
Rib Cracker is a Decently Accurate Single Target Attack usable in the Front 2 Ranks that deals Mediocre Damage to a Hero in the Front 2 Ranks.
This Attack has a 91% Chance to Target Marked Heroes and can Push a Frontline Hero Back and Debuff their Speed.
More importantly, the Esquire moves Back into the Back Ranks where he can use his highly threatening Skill, Skewering Repartee.
Skewering Repartee is a Decently Accurate AoE Attack usable in the Back 2 Ranks that Deals High Damage with Bleed to your Entire Party alongside Activating the Esquire's Riposte.
The Thirst if used in its Thirsty Form is a High Accuracy Single Target Attack with no Positioning or Targetting Requirements that deals some Damage and Stress while Moving the Esquire Forward.
The Esquire has a much Higher Chance to use this Skill if its HP is at 50% or Lower.
This Attack has a 45% Chance to Inflict the Crimson Curse alongside Healing some HP & Recieving any Blight that was on the Target Hero.
The Thirst Applies an Accuracy and Speed Debuff to the Esquire and Clears its Riposte.Overall Analysis
The Esquire is an Enemy that can potentially dish out Large Amounts of Damage alongside being able to Support its Allies in its Bloodlust Form.
The Esquire can deal a Large Amount of Damage if it is allowed to act in the Back 2 Ranks, being able to use Skewering Repartee in its Thirsty Form and Piercing Foreleg in its Bloodlust Form.
Unlike in its Thirsty Form where it mostly does its own thing, the Esquire provides Support to its Allies by Marking Heroes using Needling Execration and inflicting a Bleed Resist Debuff with Piercing Foreleg.
As is the case with most of the Crimson Court Enemies, The Thirst is used to Heal Themselves while dealing HP and Stress Damage to your Heroes alongside having a Chance to inflict the Crimson Curse.
Due to the Esquire being so threatening in the Back 2 Ranks, you want to prioritize not letting the Esquire act in the Back 2 Ranks, which can happen due to the Esquire Moving Back by itself or other Enemies Moving Forward
Stuns are useful for shutting down the Esquire for a turn, giving your Heroes more time to use displacing Skills to Move the Esquire to the Front Ranks or outright kill it.
Eliminating the Enemies accompanying the Esquire can also be effective since once only 2 Enemies are left the Esquire will be stranded in the Front 2 Positions.
Overall Threat Level: Borderline High
Farmstead X
The Thirst - 4 rd Cooldown
All Skills
1.0 Base Chance to Target Random Hero / Monster
All Difficulties
1.0 Base Chance to use Random Skill
Needling Execration
2.0 Base Chance to be used
Targetting Desire
4.0 Base Chance to Target Most Stressed Hero
80% Chance to Target Most Stressed Hero
Piercing Foreleg
2.0 Base Chance to be used
The Thirst
1.0 Base Chance to be used
11.0 Base Chance to be used if Own HP ≤ 50%
Targetting Desire
3.0 Base Chance to Target Marked Hero
75% Chance to Target Marked Hero
Skill Breakdown
Needling Execration is a Decently Accurate Single Target Attack usable in the Front 3 Ranks that deals Mediocre HP Damage and some Stress Damage alongside inflicting Bleed to a Target Hero in the Front 3 Positions.
This Attack applies a Mark to the Target Hero, which helps many Crimson Court Enemies that have a Higher Chance to Target Marked Heroes focus down the Marked Hero
More importantly, when using this Attack the Esquire moves Back into the Back Ranks where he can use his highly threatening Skill, Piercing Foreleg.
Piercing Foreleg is a Decently Accurate AoE Attack usable in the Back 2 Ranks that deals High Damage to your Entire Party.
This Attack also inflicts a Bleed Resist Debuff that synergizes with the Bleed Heavy Crimson Court Enemies.
The Thirst if used in its Bloodlust Form is a Decently Accurate Single Target Attack with no Positioning or Targetting Requirements that deals Decent HP and Stress Damage while Moving the Esquire Forward.
The Esquire has a much Higher Chance to use this Skill if its HP is at 50% or Lower.
This Attack also has a 45% Chance to Inflict the Crimson Curse alongside Healing some HP & Recieving any Blight that was on the Target Hero.
The Thirst Applies an Accuracy and Speed Debuff to the Esquire.Overall Analysis
The Esquire is an Enemy that can potentially dish out Large Amounts of Damage alongside being able to Support its Allies in its Bloodlust Form.
The Esquire can deal a Large Amount of Damage if it is allowed to act in the Back 2 Ranks, being able to use Skewering Repartee in its Thirsty Form and Piercing Foreleg in its Bloodlust Form.
Unlike in its Thirsty Form where it mostly does its own thing, the Esquire provides Support to its Allies by Marking Heroes using Needling Execration and inflicting a Bleed Resist Debuff with Piercing Foreleg.
As is the case with most of the Crimson Court Enemies, The Thirst is used to Heal Themselves while dealing HP and Stress Damage to your Heroes alongside having a Chance to inflict the Crimson Curse.
Due to the Esquire being so threatening in the Back 2 Ranks, you want to prioritize not letting the Esquire act in the Back 2 Ranks, which can happen due to the Esquire Moving Back by itself or other Enemies Moving Forward
Stuns are useful for shutting down the Esquire for a turn, giving your Heroes more time to use displacing Skills to Move the Esquire to the Front Ranks or outright kill it.
Eliminating the Enemies accompanying the Esquire can also be effective since once only 2 Enemies are left the Esquire will be stranded in the Front 2 Positions.
Overall Threat Level: Borderline High
Farmstead X
Midnight Minuet - 4 rd Cooldown
Careless Whispers - 2 rd Cooldown
All Skills
1.0 Base Chance to Target Random Hero / Monster
All Difficulties
1.0 Base Chance to use Random Skill
Careless Whispers
12.0 Base Chance to be used
Midnight Minuet
24.0 Base Chance to be used if 3+ Monsters Present
Mind Your Manners
3.0 Base Chance to be used
Damsel In Distress
12.0 Base Chance to be used if no Guarded Monsters Present
The Thirst
8.0 Base Chance to be used
44.0 Base Chance to be used if Own HP ≤ 60%
Targetting Desire
3.0 Base Chance to Target Marked Hero
75% Chance to Target Marked Hero
Skill Breakdown
Careless Whispers is a High Accuracy AoE Attack usable from the Back 3 Ranks that deals minimal HP Damage while inflicting Horror and an Accuracy Debuff to all of your Heroes.
Midnight Minuet is a Support Skill used by the Courtesan that Shuffles the entire Enemy Party while giving them a hefty Speed and Damage Buff that lasts for 3 Turns while Debuffing their Accuracy for a Turn
Mind Your Manners is a Decently Accurate Single Target Attack with no Positioning or Targetting Requirements that deals Mediocre Damage while Marking the Target Hero.
Damsel In Distress is a Support Skill used by the Courtesan that Forces an Ally to Guard the Courtesan while Buffing said Ally with a large amount of Prot to make them Tankier
The Thirst if used in its Thirsty Form is a High Accuracy Single Target Attack with no Positioning or Targetting Requirements that deals some HP and Stress Damage while Moving the Courtesan Forward.
The Courtesan has a much Higher Chance to use this Skill if its HP is at 60% or Lower.
This Attack has a 45% Chance to Inflict the Crimson Curse and grants the Courtesan a Hefty Dodge Buff.
In addition, the Courtesan Heals some HP & Receives any Blight that was on the Target Hero alongside changing into its Bloodlust Form.Overall Analysis
The Courtesan is a relatively Low HP Enemy with High Speed and Decent Dodge which can prove to be quite the nuisance by spreading Stress, Buffing their Allies, and Marking your Heroes.
The Courtesan doesn't deal much Damage Overall, instead Buffing their allies with Midnight Minuet & Damsel in Distress or using Skills such as Careless Whispers and Renewed Appetite to inflict Stress to your Heroes.
In addition, the Courtesan has Attacks that Mark Heroes in both Forms, helping the many Crimson Court Enemies which have a Higher Chance to Target Marked Heroes focus down the Marked Hero.
As is the case with most of the Crimson Court Enemies, The Thirst is used to Heal Themselves while dealing HP and Stress Damage to your Heroes alongside having a Chance to inflict the Crimson Curse.
While The Courtesan isn't as threatening as some of the other Crimson Court Enemies, they can still be troublesome due to their High Speed alongside their ability to Support their Allies and deal Stress Damage to your Heroes.
It is usually a good idea to attempt to take them out quickly, although there will be times where other Enemies take priority over them, in which case Stuns can be good to shut them down while your Heroes deal with the other threats.
Overall Threat Level: Medium High
Farmstead X
The Thirst - 3 rd Cooldown
All Skills
1.0 Base Chance to Target Random Hero / Monster
All Difficulties
1.0 Base Chance to use Random Skill
Renewed Appetite
12.0 Base Chance to be used
Targetting Desire
3.0 Base Chance to Target Marked Hero
5.0 Base Chance to Target Most Stressed Hero
33.3% Chance to Target Marked Hero
55.5% Chance to Target Most Stressed Hero
Expose the Vein
12.0 Base Chance to be used
Targetting Desire
3.0 Base Chance to Target Marked Hero
75% Chance to Target Marked Hero
The Thirst
6.0 Base Chance to be used
42.0 Base Chance to be used if Own HP ≤ 50%
Targetting Desire
3.0 Base Chance to Target Marked Hero
75% Chance to Target Marked Hero
Skill Breakdown
Renewed Appetite is a Decently Accurate Single Target Attack with no Positioning or Targetting Requirements that deals Mediocre HP Damage and some Stress Damage alongside inflicting Blight.
Expose the Vein is a Decently Accurate Single Target Attack with no Positioning or Targetting Requirements that deals Very Low Damage while Marking the Target Hero.
This Attack also inflicts a Bleed Resist Debuff and a tiny Prot Debuff that synergizes with the Bleed Heavy Crimson Court Enemies.
The Thirst if used in its Bloodlust Form is a Decently Accurate Single Target Attack with no Positioning or Targetting Requirements that deals Decent HP and Stress Damage while Moving the Courtesan Forward.
The Courtesan has a much Higher Chance to use this Skill if its HP is at 50% or Lower.
This Attack has a 45% Chance to Inflict the Crimson Curse alongside letting the Courtesan Heal some HP & Receive any Blight that was on the Target Hero.
Unlike in its Thirsty Form, The Thirst Applies an Accuracy and Speed Debuff to the Courtesan.Overall Analysis
The Courtesan is a relatively Low HP Enemy with High Speed and Decent Dodge which can prove to be quite the nuisance by spreading Stress, Buffing their Allies, and Marking your Heroes.
The Courtesan doesn't deal much Damage Overall, instead Buffing their allies with Midnight Minuet & Damsel in Distress or using Skills such as Careless Whispers and Renewed Appetite to inflict Stress to your Heroes.
In addition, the Courtesan has Attacks that Mark Heroes in both Forms, helping the many Crimson Court Enemies which have a Higher Chance to Target Marked Heroes focus down the Marked Hero.
As is the case with most of the Crimson Court Enemies, The Thirst is used to Heal Themselves while dealing HP and Stress Damage to your Heroes alongside having a Chance to inflict the Crimson Curse.
While The Courtesan isn't as threatening as some of the other Crimson Court Enemies, they can still be troublesome due to their High Speed alongside their ability to Support their Allies and deal Stress Damage to your Heroes.
It is usually a good idea to attempt to take them out quickly, although there will be times where other Enemies take priority over them, in which case Stuns can be good to shut them down while your Heroes deal with the other threats.
Overall Threat Level: Medium High

All Skills
2.0 Base Chance to Target Random Hero / Monster
Apprentice
Unstable Resonance
1.0 Base Chance to be used
Targetting Desire
3.0 Base Chance to Target Marked Hero
60% Chance to Target Marked Hero
Explosive Undoing
1.0 Base Chance to be used
Veteran
Unstable Resonance
1.0 Base Chance to be used
Targetting Desire
4.0 Base Chance to Target Marked Hero
66.7% Chance to Target Marked Hero
Explosive Undoing
1.0 Base Chance to be used
Champion / Endless
Unstable Resonance
1.0 Base Chance to be used
Targetting Desire
5.0 Base Chance to Target Marked Hero
71.4% Chance to Target Marked Hero
Explosive Undoing
1.0 Base Chance to be used
Skill Breakdown
Unstable Resonance is a Decently Accurate Single Target Attack without any Positioning or Targetting Requirements that deals Very High HP Damage and some Stress Damage alongside some Blight to the Hero.
The Crystalline Aberration can spawn from Enemy Corpses and has a miniscule HP Pool, literally negative Dodge and Speed and High Resists against Bleeds, Stuns, and Debuffs.
Your Heroes get a Minor HP Heal if they kill a Crystalline Aberration (2 HP on Apprentice // 4 HP on Veteran // 5 HP on Champion / Endless)
Due to the Attacks the Crystalline Aberration can use being quite threatening alongside the ease of eliminating them, it is a good idea to get rid of the Crystalline Aberration.
Overall Threat Level: Low
Pause from Labor - 2 rd Cooldown
All Skills
1.0 Base Chance to Target Random Hero / Monster
Apprentice
Sow the Seeds
4.0 Base Chance to be used
Ceaseless Labor
5.0 Base Chance to be used
Targetting Desire
2.0 Base Chance to Target Marked Hero
66.7% Chance to Target Marked Hero
Pause from Labor
1.0 Base Chance to be used if Own HP ≤ 50%
Veteran
Sow the Seeds
4.0 Base Chance to be used
Ceaseless Labor
5.0 Base Chance to be used
Targetting Desire
3.0 Base Chance to Target Marked Hero
75% Chance to Target Marked Hero
Pause from Labor
1.0 Base Chance to be used if Own HP ≤ 50%
Endless
Sow the Seeds
4.0 Base Chance to be used
Ceaseless Labor
5.0 Base Chance to be used
Targetting Desire
4.0 Base Chance to Target Marked Hero
80% Chance to Target Marked Hero
Pause from Labor
1.0 Base Chance to be used if Own HP ≤ 60%
Skill Breakdown
Sow the Seeds is a Decently Accurate Single Target Attack without any Positioning or Targetting Requirements that deals Minimal HP Damage and a hefty amount of Stress Damage alongside inflicting Blight to the Target Hero.
Ceaseless Labor is a Single Target Attack usable from any Position that deals Mediocre Damage to a Hero in the Front 2 Ranks.
Pause from Labor is a Skill the Farmhand can use if their HP is Low enough to Heal itself and Buff its Speed.Overall Analysis
The Farmhand is a Relatively Low HP Enemy with Decent Dodge that can inflict Stress and Blight with Sow the Seeds alongside some Damage with Ceaseless Labor.
The Farmhand isn't much of a threat thanks its Low Damage output, although the Stress Damage Sow the Seeds inflicts can be a concern.
Although the Farmhand isn't very threatening, the nature of the Endless Harvest alongside the Relatively Low HP of the Farmhand makes them good to kill if you can.
Overall Threat Level: Medium Low
Apprentice / Veteran
Haunting Revelation - 2 rd Cooldown
Endless
Haunting Revelation - 1 rd Cooldown
Roots - 6 rd Cooldown
Shard of Growth - 3 rd Cooldown
All Skills
1.0 Base Chance to Target Random Hero / Monster
Apprentice
Flail the Crops
1.0 Base Chance to be used
Targetting Desire
2.0 Base Chance to Target Marked Hero
66.7% Chance to Target Marked Hero
Haunting Revelation
1.0 Base Chance to be used
Veteran
Flail the Crops
1.0 Base Chance to be used
Targetting Desire
3.0 Base Chance to Target Marked Hero
75% Chance to Target Marked Hero
Haunting Revelation
1.0 Base Chance to be used
Endless
Flail the Crops
1.0 Base Chance to be used
Targetting Desire
4.0 Base Chance to Target Marked Hero
80% Chance to Target Marked Hero
Haunting Revelation
1.0 Base Chance to be used
Roots
1.0 Base Chance to be used
Shard of Growth
1.0 Base Chance to be used if 3+ Monsters Present
Skill Breakdown
Haunting Revelation is a Decently Accurate Single Target Attack without any Positioning or Targetting Requirements that deals Very Low Damage alongside some Horror to a Target Hero.
Flail the Crops is a Decently Accurate Single Target Attack usable from any Position that deals Decent Damage alongside Blight to a Hero in the Front 2 Ranks.
Roots is a Decently Accurate Single Target Attack usable from any Position that deals Low Damage alongside a - Speed and - Accuracy Debuff to a Hero in the Back 3 Ranks.
Shard of Growth is a Support Skill the Scarecrow uses to give their Allies Restoration, Healing them over time.Overall Analysis
The Scarecrow is an Enemy with High Speed and Dodge alongside a Very High Bleed Resist and a High Stun Resist that can Inflict Horror and Blight on Apprentice/Veteran Levels.
The Scarecrow gains the ability to Debuff your Heroes with Roots and Heal their allies with Shard of Growth during the Endless Harvest.
The Scarecrow enters the Battle with 2 Turns of Stealth on any Difficulty, making them harder to eliminate.
The Scarecrow doesn't pose much of a threat with many of its Attacks dealing minimal Damage outside of Flail the Crops.
Since the Scarecrow isn't very threatening, it is better to get rid of other Enemies that will continue to spawn during the Endless Harvest unless you have a good way to take it out.
Overall Threat Level: Medium Low
All Difficulties
1.0 Base Chance to Target Random Hero / Monster
Apprentice
2.0 Base Chance to Target Marked Hero
66.7% Chance to Target Marked Hero
Veteran
3.0 Base Chance to Target Marked Hero
75% Chance to Target Marked Hero
Endless
4.0 Base Chance to Target Marked Hero
80% Chance to Target Marked Hero
Skill Breakdown
Reality Bend is a High Accuracy Attack usable from any Position that can Target 1 or 2 Heroes in Any Position, dealing Minimal HP Damage alongside some Minor Stress Damage.
This Attack can inflict several Debuffs such as - Healing Received, - Accuracy, and Random Target Chance to Target Heroes.
Its Riposte attack similarly has Very Low Damage and Crit Chance and has a relatively Low Chance to inflict a + Stress Debuff to the Attacking Hero.Overall Analysis
The Sleeper's Herald is a Very Low HP Enemy with Low Speed, High Prot and overall High Resistances that has a Permanent Riposte Active.
The Sleeper's Herald is more annoying than anything due to it dealing next to no actual HP Damage, making them a Low Priority to get rid of.
Due to the Sleeper's Herald having High Prot, Bleed Resist, and Blight Resist, Armor Piercing is the best way to kill them.
Overall Threat Level: Low
Stir The Rabble - 2 rd Cooldown
Many Hands - 2 rd Cooldown
All Difficulties
All Skills
1.0 Base Chance to Target Random Hero / Monster
No Trespassers
2.0 Base Chance to be used
Many Hands
1.0 Base Chance to be used
Stir The Rabble
Used as an Auto Action if Farmhand is Present
Targetting Desire
Targets Farmhands
Skill Breakdown
No Trespassers is a Decently Accurate Single Target Attack without Positioning or Targettng Requirements that deals High Damage and a Bleed alongside a + Stress Debuff to the Target Hero.
This Attack also Marks the Target Hero, helping other Enemies who have a High Chance to Target Marked Heroes such as the Scarecrow and Farmhand focus the Marked Hero.
Stir The Rabble is a Support Skill that is used at the start of a Round as a Free Action if a Farmhand is present, granting them a Buff to their Blight Skill Chance, Blight Duration, and Speed.
This Skill also activates the Riposte of the Target Farmhand, letting it strike back at Heroes who Attack it.
Many Hands is a Support Skill that is used to give an Ally a Buff to their Speed and Prot.Overall Analysis
The Foreman is a Relatively High HP Enemy with overall Low Resists that can deal High Damage and Bleed with No Trespassers and Buffs their Allies with their other 2 Skills.
The Foreman is the only Enemy in the game to get a Buff from an Enemy spawning in, gaining a Speed Buff with each Farmhand that spawns to join the battle.
The Foreman can prove to be troublesome if you are not ready to deal with No Trespassers, which deals quite a bit of Damage and helps other Enemies focus down a Hero.
Due to the Foreman having a Low Stun Resist Stat, Stuns can be effective at shutting it down for a turn, giving your party more room to breathe.
Overall Threat Level: Medium High
Rearing Strike - 1 rd Cooldown
All Skills
1.0 Base Chance to Target Random Hero / Monster
Apprentice
Paw the Ground
4.0 Base Chance to be used if Own HP ≥ 35%
Trample
Guarenteed to be used if Paw the Ground has been used.
Rearing Strike
2.0 Base Chance to be used
Targetting Desire
2.0 Base Chance to Target Marked Hero
66.7% Chance to Target Marked Hero
Bestial Scream
1.0 Base Chance to be used
Veteran
Paw the Ground
4.0 Base Chance to be used if Own HP ≥ 35%
Trample
1000.0 Base Chance to be used if Paw the Ground has been used
Rearing Strike
2.0 Base Chance to be used if at least 2 Non Stunned Heroes
Targetting Desire
3.0 Base Chance to Target Marked Hero
75% Chance to Target Marked Hero
Bestial Scream
1.0 Base Chance to be used
Endless
Paw the Ground
4.0 Base Chance to be used if Own HP ≥ 35%
Trample
1000.0 Base Chance to be used if Paw the Ground has been used
Rearing Strike
2.0 Base Chance to be used
Targetting Desire
4.0 Base Chance to Target Marked Hero
80% Chance to Target Marked Hero
Bestial Scream
1.0 Base Chance to be used
Skill Breakdown
Paw the Ground is a Skill the Plow Horse uses to Move itself into the Back Ranks while giving itself Stealth to get ready to use Trample.
Trample is a High Accuracy AoE Attack usable from any Position that deals Damage to all 4 of your Heroes alongside Shuffling them.
This Attack can only be used if Paw the Ground has been used, regardless of whether it is Stealthed or not.
Rearing Strike is a Decently Accurate Attack usable from any Position that deals Decent Damage alongside inflicting a Bleed and a potential Stun to 1 or 2 Heroes in the Front 2 Ranks.
This Attack has a Chance to Target both Heroes in the Front 2 Ranks from Veteran Difficulty onwards.
Bestial Scream is a Very Accurate Single Target Attack without any Positioning or Targetting Requirements that deals Minor Stress Damage to the Target Hero.Overall Analysis
The Plow Horse is a Low HP Size 2 Enemy with High Speed and some Prot that can disrupt your entire party with Trample and Spread Stuns and Bleed to your Frontline using Rearing Strike.
The Plow Horse is the only Enemy that can use a Skill to become Stealthed.
The main threat the Plow Horse poses is its ability to disrupt your entire Party if the Plow Horse is allowed to use Trample.
The best way to deal with the Plow Horse is having a Hero that is fast enough to Outspeed and Stun the Plow Horse, preventing it from using Paw the Ground and giving your Heroes more time to dispatch it.
Doing enough Damage to the Plow Horse to get it below 35% of its Max HP can also be effective since this prevents the Plow Horse from using Paw the Ground entirely.Overall Threat Level: Medium High
The Sleeper's Dream appears once you have earned 10 Enemy Kills. If you have killed more than 10 Enemies, the Excess gets carried over to the next wave, making you need to score less than 10 Kills to end the wave.
Its sole purpose is to use Beyond Time and Space to Teleport your party into a room at the end of a wave.
Floor 1-2
Farmstead X
Flesh Wall - 2 rd Cooldown
All Skills
1.0 Base Chance to Target Random Hero / Monster
10.0 Base Chance to Target Cultist Priest
Darkest
Flesh Wall
3.0 Base Chance to be used if there are No Guarded Monsters
13.0 Base Chance to be used if there are No Guarded Monsters
and there is a Cultist Priest Present
Targetting Desire
91% Chance to Target Cultist Priest if one is Present
Flesh to Flesh
1.0 Base Chance to be used
Targetting Desire
4.0 Base Chance to Target Monster with Lowest HP %
66.7% Chance to Target Cultist Priests if one is Present
26.7% Chance to Target Monster with Lowest HP %
Skill Breakdown
Flesh Wall is a Support Skill the Rapturous Cultist uses to Guard an Ally, protecting them from harm.
This Skill is very Likely to Target a Cultist Priest if any are Present and isn't used if there are any Enemies being Guarded.
Flesh to Flesh is a Support Skill used by the Rapturous Cultist to Heal an Ally.
This Skill is very Likely to Target a Cultist Priest if any are Present or the Ally alongside having a Chance to Target the Ally with the Lowest HP %.Overall Analysis
The Rapturous Cultist is a Low HP Enemy with High Speed that uses its 2 Skills to Guard and Heal its Allies. It can be encountered during the First and Second Darkest Dungeon Missions.
While the Rapturous Cultist cannot harm your Party Directly, it poses an indirect threat by supporting the many dangerous Enemies present in the Darkest Dungeon.
In particular, it has a Very High Chance to Target a Cultist Priest with its Skills, which is a problem due to Cultist Priests being quite the threat.
Stuns are very useful for dealing with the Rapturous Cultist since it Breaks its Guard while dealing little Damage to the Rapturous Cultist itself and stopping it from acting for a turn.
The reason why you don't want to be killing the Rapturous Cultist is that they are very good to have as the last Enemy while you stall to Heal your Party up.
Overall Threat Level: Medium High
Floor 1
1.0 Base Chance to Target Random Hero / Monster
Darkest
Rend for the New God
1.0 Base Chance to be used
Targetting Desire
5.0 Base Chance to Target Marked Hero
83.3% Chance to Target Marked Hero
Stumbling Scratch
1.0 Base Chance to be used
Skill Breakdown
Rend for the New God is a relatively Low Damage Single Target Attack with a High Crit Chance that inflicts a larger amount of Bleed compared to Rend for the Old Gods.
It is usable from the Front 2 Ranks while being able to Target Heroes in the Front 2 Ranks and Moves the Ascended Brawler Forward.
This Attack benefits from a +50% Damage Buff when Targetting Marked Heroes and can apply a + Stress Debuff to your Heroes, which synergizes with their High Crit Chance and the Ascended Witches that will likely be accompanying them.
Stumbling Scratch is a Low Accuracy Single Target Repositioning Attack usable in the Back 2 Positions that deals Low Damage to a Hero in the Front 2 Positions while Moving the Ascended Brawler Forward.Overall Analysis
The Ascended Brawler is the Darkest Level version of the Cultist Brawler with Slightly Better Stats and Skills overall. It can be encountered during the First Darkest Dungeon Mission.
The Ascended Brawler doesn't pose much of a threat compared to other Darkest Dungeon Mobs, with Rend for the New God dealing Decent at best Damage even to Marked Targets.
It should also be noted that Ascended Brawlers can only Target Heroes in the Front 2 Ranks, making them very predictable and easy to deal with.
Stunning the Ascended Brawler or Moving it to Back 2 Positions is a good way to shut down the Ascended Brawler.
Due to these factors, it is usually better to take out the bigger threats that accompany the Ascended Brawler.
Overall Threat Level: Medium
Floor 1
Fate's Push - 3 rd Cooldown
Fate's Pull - 3 rd Cooldown
All Skills
1.0 Base Chance to Target Random Hero / Monster
Darkest
Fate's Reveal
Unless All 4 Heroes are Virtued or 2+ Marked Heroes are Present
3.0 Base Chance to be used
23.0 Base Chance to be used as First Action
Targetting Desire
10.0 Base Chance to Target Most Stressed Hero
91% Chance to Target Most Stressed Hero
Fate's Push
1.0 Base Chance to be used
Fate's Pull
1.0 Base Chance to be used
11.0 Base Chance to be used as Second Action
Targetting Desire
10.0 Base Chance to Target Marked Hero
91% Chance to Target Marked Hero
Skill Breakdown
Fate's Reveal is a Decently Accurate Single Target Attack with no Positioning or Targetting Requirements that deals minimal HP Damage and a hefty amount of Stress Damage to the Target Hero alongside Lowering the Light Level..
This Attack also applies a Mark to the Target Hero that lasts for the entire Battle, helping the many Enemies who have a bias towards Targetting Marked Heroes or have a Bonus vs Marked Targets focus down the Marked Hero.
It should be noted that this Attack has a massive 91% Chance to Target the most Stressed Hero, which can lead to them being focused down by Stress Damage, resulting in a potential Affliction.
Fate's Pull is a Decently Accurate Single Target Attack usable from the Back 3 Positions that deals Minimal HP Damage and Minor Stress Damage to the Target Hero in the Back 2 Positions while Pulling them Forward.
This Attack has a Very High (91%) Chance to Target Marked Heroes to bring to the front for Monsters that benefit from Targetting Marked Targets or have a higher chance to Target Marked Heroes can focus down the Marked Hero, which will likely be a relatively flimsy Backline Hero.
Fate's Push is a Decently Accurate Single Target Attack usable from all positions that deals Minimal HP Damage and Minor Stress Damage to the Target Hero in the Front 2 Positions while Pushing them Back.Overall Analysis
The Ascended Witch is the Darkest Level version of the Cultist Acolyte with Slightly Better Stats and Skills overall. It can be encountered during the First Darkest Dungeon Mission.
Due to the Ascended Witch being able to deal hefty Stress Damage to your Heroes alongside Marking them and the disruption they can cause, it is in your best interest to eliminate it quickly.
It is preferrable to have a Hero who can Outspeed the Ascended Witch and Stun them to shut them down for the turn, giving the other Heroes time to finish them off quickly.
Overall Threat Level: High
Floor 1-2
The Finger - 1 rd Cooldown
All Skills
3.0 Base Chance to Target Random Hero / Monster
Darkest
Death Lash
1.0 Base Chance to be used
The Finger
1.0 Base Chance to be used
Targetting Desire
1.0 Base Chance to Target Lowest Bleed Resist Hero
25% Chance to Target Lowest Bleed Resist Hero
Skill Breakdown
Death Lash is a High Accuracy AoE Attack usable from any Position that deals some HP Damage and Minor Stress Damage to both Heroes in the Front 2 Positions alongside inflicting a - Bleed Resist Debuff.
The Bleed Resist Debuff that this Attack inflicts synergizes well with the Bleed Heavy Enemies in the First 2 Floors of the Darkest Dungeon.
The Finger is a High Accuracy and Crit Chance Single Target Attack with no Positioning or Targetting Requirements that deals Decently High HP Damage and hefty Stress Damage alongside a nasty Bleed to the Target Hero.
Despite the Cultist Priest not having a Higher Chance to do so, this Attack benefits from a +50% Damage Buff when Targetting a Marked HeroOverall Analysis
The Cultist Priest is a Decently Fast Enemy that deals HP and Stress Damage with both of its Attacks, with The Finger being notable due to its High Crit Chance and nasty Bleed. It can be encountered during the First and Second Darkest Dungeon Missions.
The Cultist Priest is a threatening Enemy that applies a hefty amount of offensive pressure using its Attacks.
It is made more dangerous due to Rapturous Cultist Enemies having a Higher Chance to support the Cultist Priest by Guarding or Healing them.
Due to the Cultist Priest being such a threat, you want to get rid of them as quickly as possible and use Stuns to keep them in check.
It should be noted that The Finger has a 1 turn Cooldown and cannot be used consecutively.
Overall Threat Level: High
Floor 2
Grand Guard - 2 rd Cooldown
All Skills
1.0 Base Chance to Target Random Hero / Monster
Darkest
Grand Guard
5.0 Base Chance to be used if there are No Guarded Monsters
Bolster
1.0 Base Chance to be used
Ritualic Restoration
3.0 Base Chance to be used if any Ally Monster HP % ≤ 50%
Targetting Desire
3.0 Base Chance to Target Monster with Lowest HP %
75% Chance to Target Monster with Lowest HP %
Unbearable Tremors
1.0 Base Chance to be used if last Monster remaining
Skill Breakdown
Grand Guard is a Support Skill used by the Defensive Growth to Guard an Ally while Buffing itself with more Prot and has a High Chance to be used if no Enemies are being Guarded.
Bolster is used by the Defensive Growth to give an Ally a hefty Buff to their Speed, Accuracy, and Crit Chance.
Ritualic Restoration is used by the Defensive Growth to Heal an Ally if there are any Allies with 50% or less HP.
This Skill has a 75% Chance to be used on the Ally with the Lowest HP %.
Unbearable Tremors is a High Accuracy AoE Attack with High Accuracy usable from any Position that deals some Stress Damage to all 4 of your Heroes.
This Attack is only used if the Defensive Growth is the last Enemy remaining, making it harder for players to Stall on it.Overall Analysis
The Defensive Growth is a High HP Enemy with High Speed that uses its Skills to Guard, Buff, and Heal its Allies. It can be encountered during the Second darkest dungeon Mission, alongside Malignant Growths.
While the Defensive Growth cannot harm your Party Directly, it poses an indirect threat by supporting its High Threat Enemies.
Although it may seem like you should prioritize dealing with other Enemies that pose a direct threat to your Heroes, it is usually better to get rid of the Defensive Growth first due to it supporting its Allies well.
Overall Threat Level: High
Floor 1-2
1.0 Base Chance to Target Random Hero / Monster
4.0 Base Chance to Target Marked Hero
Darkest
Maul the Flesh
1.0 Base Chance to be used
Targetting Desire
2.0 Base Chance to Target Lowest Bleed Resist Hero
28.6% Chance to Target Lowest Bleed Resist Hero
57.1% Chance to Target Marked Hero
Daze the Mind
1.0 Base Chance to be used
Targetting Desire
2.0 Base Chance to Target Lowest Stun Resist Non Stunned Hero
28.6% Chance to Target Lowest Stun Resist Non Stunned Hero
57.1% Chance to Target Marked Hero
Skill Breakdown
Maul the Flesh is a Decently Accurate Single Target Attack with no Positioning or Targetting Requirements that deals Decently High Damage alongside a Bleed to the Target Hero.
The Malignant Growth is a High HP Enemy with a Very High Stun and Move Resist Stat that Stuns your Heroes using Daze the Mind and Bleeds Your Heroes using Maul the Flesh. It can be encountered during the First and Second Darkest Dungeon Missions.
The Malignant Growth is a threatening Enemy that is particularly threatening due to Maul the Flesh being able to deal Hefty Damage with a Bleed.
It should be noted that Maul the Flesh has a Higher Chance to Target Heroes with the Lowest Bleed Resist and Daze the Mind has a Higher Chance to Target Non Stunned Heroes with the Lowest Stun Resist.
In addition, the Malignant Growth has a 57% Chance to Target Marked Heroes with both of its Attacks
Although the Malignant Growth is certainly a threat that you want to get rid of, due to it being difficult to deal with quickly it can be a better call to focus on other threats that you can take care of more quickly.
Stuns are very useful for keeping the Malignant Growth in check and limiting its Damage Output.
Overall Threat Level: High
Floor 2-3
1.0 Base Chance to Target Random Hero / Monster
Darkest
Gnash
2.0 Base Chance to be used
12.0 Base Chance to be used if Marked Hero is Present
Targetting Desire
5.0 Base Chance to Target Marked Hero
83.3% Chance to Target Marked Hero
Fetch
1.0 Base Chance to be used
Nibble
1.0 Base Chance to be used
Skill Breakdown
Gnash is a Decently Accurate Single Target Attack usable from the Front 3 Positions that deals Decent HP Damage and Minor Stress Damage to a Hero in the Front 3 Positions.
This Attack also benefits from a +50% Damage Buff when Targetting Marked Heroes alongside an 83% Chance to Target Marked Heroes to complement it.
Fetch is a High Accuracy Single Target Attack usable from the Front 3 Positions that deals Mediocre Damage to a Hero in any Position alongside potentially Pulling and Stunning them.
Nibble is a Low Accuracy Repositioning Attack used from Position 4 that deals Minimal Damage to a Hero in any Position while Moving the Flesh Hound Forward to Position 1.Overall Analysis
The Flesh Hound is a High Speed Enemy that deals HP and Stress Damage using Gnash and disrupts your Heroes using Fetch. It can be encountered during the Second and Third Darkest Dungeon Missions.
The Flesh Hound can be troublesome due to Gnash being able to deal hefty Damage to Marked Heroes and Fetch being a Highly disruptive Attack.
The Flesh Hound should be prioritized if paired with Polyps due to the Flesh Hound dealing the bulk of the Damage between the 2 Enemies alongside the fact that Polyps are rendered completely powerless if left as the final Enemy unlike the Flesh Hound
Stuns are useful for shutting down the Flesh Hound for a turn and limiting its Damage Output.
Moving the Flesh Hound to Position 4 is a good way to shut it down since it'll be forced to use Nibble, a Very Weak Repositioning Attack.
Overall Threat Level: Medium High
Floor 2-3
Venomous Phlegm - 2 rd Cooldown
All Skills
1.0 Base Chance to Target Random Hero / Monster
Darkest
Venomous Phlegm
1.0 Base Chance to be used if no Heroes are Marked
11.0 Base Chance to be used Turn 1 if no Heroes are Marked
Banish
2.0 Base Chance to be used if at least 3 Heroes are Present
Violent Hack
1.0 Base Chance to be used
Skill Breakdown
Venomous Phlegm is a Decently Accurate Single Target Attack usable from the Back 3 Positions that deals Mediocre Damage and a Hefty Blight to a Hero in the Back 3 Positions on top of Marking them as well.
The Polyp has a 91% Chance to use this Attack as its first action if no Heroes are Marked.
This Attack Marking a Hero helps the Flesh Hound and Antibody focus their attacks onto the Marked Hero.
Banish is a High Accuracy Single Target Attack usable from the Front 3 Positions that deals Middling Damage to a Hero in the Front 2 Ranks, potentially Knocking them Back to the Back 2 Ranks.
Violent Hack is a Low Accuracy Single Target Repositioning Attack used if the Polyp is at Position 1 that deals Minimal Damage to a Hero in the Front 2 Positions while Moving itself to the Back 2 Ranks.Overall Analysis
The Polyp is a Backline Enemy with Very High Speed and High Dodge that Blights and Marks your Heroes using Venomous Phlegm in addition to dirupting them using Banish. It can be encountered during the Second and Third Darkest Dungeon Missions.
Although the Polyp can be a nusiance by Marking your Heroes or disrupting them, they don't deal much Damage, making them a relatively low threat Enemy.
Due to this, you are usually better off dealing with the more threatening Enemies such as the Flesh Hound and Antibody first while mostly ignoring the Polyp.
Moving the Polyp to Position 1 is a good way to shut it down as it will be forced to use Violent Hack, a Very Weak Repositioning Attack.
Overall Threat Level: Medium
Floor 3
Stunning Secretion
1.0 Base Chance to be used
Targetting Desire
1.0 Base Chance to be Target Random Hero
2.0 Base Chance to Target Marked Hero
66.7% Chance to Target Marked Hero
Skill Breakdown
Stunning Secretion is a High Accuracy Single Target Attack usable from any Position that deals High Damage alongside potentially Stunning a Hero in the Front 3 Positions.
The Antibody is a Decently Fast Enemy that uses Stunning Secretion to deal hefty Damage to a Hero while also Stunning them. It can be encountered during the Third Darkest Dungeon Mission.
The Antibody is more threatening than the Flesh Hound and Polyp, making them the Highest priority to be eliminated between the 3.
Stuns are a good tool for shutting down the Antibody for a turn and limiting its Damage Output although due to its relatively High Stun Resist Stat it is usually better and safer to outright kill it.
Overall Threat Level: High
Floor 3
Body Slam - 1 rd Cooldown
All Skills
1.0 Base Chance to Target Random Hero / Monster
Darkest
Torment
1.0 Base Chance to be used
Stinger Stab
1.0 Base Chance to be used
Body Slam
1.0 Base Chance to be used
Skill Breakdown
Torment is a Decently Accurate AoE Attack that deals High Damage to both Heroes in the Front 2 Positions.
Stinger Stab is a Decently Accurate Single Target Attack usable if the Templar Gladiator is in the Front 3 Positions that deals Very High Damage to a Hero in the Back 3 Ranks in addition to applying a massive amount of Blight.
Body Slam is a Single Target Attack with a Decently High Crit Chance which is usable from any Position that deals High Damage to a Hero in the Front 3 Positions while Moving the Templar Gladiator Forward.
This Attack has a High Chance to Stun the Target Hero while also Pushing them to the Back Ranks.Overall Analysis
The Templar Gladiator is the Non Boss Version of the Templar Impaler, having only 1 action per round and being unable to use Revelation.
It can be encountered during Third Darkest Dungeon Mission and its Stats are identical to the Templar Impaler.
The Templar Gladiator is a very threatening Enemy due to it being able to deal hefty amounts of Damage and Blight to your Heroes using its Attacks.
Thankfully, you will only encounter the Templar Gladiator by itself during the third Darkest Dungeon Mission, making it easier to handle.
Stuns are very useful for shutting down the Templar Gladiator for a turn, and Debuffs are a good way to limit its Damage Output.
While they are not able to use the threatening Revelation Skill, all 3 of its Skills can do very high amounts of Damage. Thankfully, you will only encounter the Templar Gladiator by itself outside of the Endless Harvest, making it easier to handle.
Overall Threat Level: High (In darkest Dunegon)
Very High in Endless Harvest
Floor 3
1.0 Base Chance to Target Random Hero / Monster
Darkest
Torment
1.0 Base Chance to be used
Stinger Shot
1.0 Base Chance to be used
Doomsday
1.0 Base Chance to be used
Skill Breakdown
Torment is a Decently Accurate AoE Attack that deals High Damage to both Heroes in the Front 2 Positions.
Stinger Shot is a High Accuracy Single Target Attack usable from the Back 2 Ranks that has a Very High Crit Chance and deals Very High Damage to a Hero in the Back 3 Ranks in addition to applying a hefty amount of Blight.
This Attack can also inflict a hefty Debuff to the Hero's Damage and Crit Chance.
Doomsday is a High Accuracy AoE Attack usable from the Back 2 Ranks that deals Decent Damage and Blight to all of your Heroes.Overall Analysis
The Templar Sniper is the Non Boss Version of the Templar Warlord, having only 1 action per round and being unable to use Revelation. It can be encountered during Third Darkest Dungeon Mission and its Stats are identical to the Templar Warlord.
The Templar Sniper is very threatening with it being able to deal hefty amounts of Damage and Blight to your Heroes using its Attacks.
Thankfully, you will only encounter the Templar Sniper by itself during the third Darkest Dungeon Mission, in which case the Templar Sniper can only use Torment, making it much easier to handle
Stuns are very useful for shutting down the Templar Sniper for a turn, and Debuffs are a good way to limit its Damage Output.
Overall Threat Level: Medium High (In Darkest Dungeon)
Very High in Endless Harvest
10 / 12
2
0
15%
Yes
10%
20%
15%
No
Graveyard Stumble
14 / 17
3
8.75
25%
Yes
30%
40%
35%
Yes
Graveyard Stumble
20 / 24
4
21.25
25%
Yes
50%
60%
55%
Yes
Graveyard Stumble
15 / 18
0
0
25%
Yes
10%
50%
15%
No
Dead Weight
Clumsy Axeblade
21 / 26
1
8.75
45%
Yes
30%
70%
35%
No
Dead Weight
Clumsy Axeblade
Foul Warding
29 / 35
2
21.25
45%
Yes
50%
90%
55%
No
Dead Weight
Clumsy Axeblade
Foul Warding
15 / 18
5
5
0%
Yes
10%
25%
15%
No
Bayonet Jab
21 / 26
6
13.75
0%
Yes
30%
45%
35%
No
Bayonet Jab
29 / 35
7
26.25
0%
Yes
50%
65%
55%
No
Bayonet Jab
10 / 12
8
12.5
0%
Yes
10%
10%
15%
No
Knife in the Dark
14 / 17
9
21.25
0%
Yes
30%
30%
35%
No
Knife in the Dark
20 / 24
10
33.75
0%
Yes
50%
50%
55%
No
Knife in the Dark
21 / 26
4
8.75
0%
Yes
30%
45%
35%
No
Impale
29 / 35
5
21.25
0%
Yes
50%
65%
55%
No
Impale
49 / 59
1
8.75
33%
Yes
30%
95%
40%
No
Ground Pound
68 / 82
2
21.25
33%
Yes
50%
115%
60%
No
Ground Pound
43 / 52
7
34.25
15%
Yes
70%
55%
55%
No
Wicked Surge
Unholy Rally
Bone Bearer Passive
Eldritch
19 / 23
0
0
33%
Yes
60%
25%
15%
No
Rend the Marked
Harmless Swipe
Eldritch
27 / 33
1
8.75
50%
Yes
80%
45%
35%
No
Rend the Marked
Harmless Swipe
Eldritch
37 / 45
2
21.25
50%
Yes
100%
65%
55%
No
Rend the Marked
Harmless Swipe
Eldritch
14 / 17
2
5
15%
Yes
60%
25%
15%
No
Rain of Blight
Escape Cloud
Eldritch
20 / 24
3
13.75
25%
Yes
80%
45%
35%
No
Rain of Blight
Escape Cloud
Eldritch
27 / 33
4
26.25
25%
Yes
100%
65%
55%
No
Rain of Blight
Escape Cloud
10 / 12
8
15
0%
No
60%
10%
10%
No
14 / 17
9
23.75
0%
No
80%
30%
30%
No
20 / 24
10
36.25
0%
No
100%
50%
50%
No
8 / 10
1
0
0%
Yes
60%
25%
40%
No
Cytokinesis
Ectoplasmic Profusion
11 / 14
2
8.75
0%
Yes
80%
45%
60%
No
Cytokinesis
Ectoplasmic Profusion
16 / 20
3
21.25
0%
Yes
100%
65%
80%
No
Cytokinesis
Ectoplasmic Profusion
35 / 42
1
0
20%
Yes
60%
50%
40%
No
Slime Smack
Cytokinesis
49 / 59
2
8.75
33%
Yes
80%
70%
60%
No
Slime Smack
Cytokinesis
68 / 82
3
21.25
33%
Yes
100%
90%
80%
No
Slime Smack
Cytokinesis
18 / 22
9
28.75
0%
Yes
60%
30%
60%
Yes
Fetid Censer
Embrace the Dark
25 / 30
10
41.25
0%
Yes
80%
50%
80%
Yes
Fetid Censer
Embrace the Dark
Beast
98 / 118
1
8.75
0%
Yes
80%
95%
60%
No
Confusion Spores
Poison Spores
Beast
137 / 165
2
21.25
0%
Yes
100%
115%
80%
No
Confusion Spores
Poison Spores
55 / 66
10
46.25
7%
Yes
140%
70%
110%
No
Putrefying Breath
From Death Comes Life
31 / 38
3
0
0%
No
80%
120%
140%
No
Beast
21 / 26
3
0
15%
Yes
60%
50%
15%
No
Ball and Chain
Beast
29 / 35
4
8.75
33%
Yes
80%
70%
35%
No
Ball and Chain
Beast
41 / 50
5
21.25
33%
Yes
100%
90%
55%
No
Ball and Chain
Beast
15 / 18
7
0
0%
Yes
40%
25%
15%
No
Drums of Doom
Beast
21 / 26
8
8.75
0%
Yes
60%
45%
35%
No
Drums of Doom
Beast
29 / 35
9
21.25
0%
Yes
80%
65%
55%
No
Drums of Doom
12 / 15
8
12.5
0%
Yes
40%
0%
15%
No
17 / 21
9
21.25
0%
Yes
60%
20%
35%
No
23 / 28
10
33.75
0%
Yes
80%
40%
55%
No
Beast
8 / 10
5
7.5
25%
Yes
40%
25%
15%
No
Beast
11 / 14
6
16.25
40%
Yes
60%
45%
35%
Yes
Beast
16 / 20
7
28.75
40%
Yes
80%
65%
55%
Yes
11 / 14
4
0
0%
Yes
100%
50%
40%
No
15 / 18
5
8.75
0%
Yes
120%
70%
60%
No
21 / 26
6
21.25
0%
Yes
140%
90%
80%
No
52 / 63
2
8.75
15%
Yes
120%
95%
60%
No
Tentacle Devour
72 / 87
3
21.25
15%
Yes
140%
115%
80%
No
Tentacle Devour
Beast
63 / 76
1
8.75
40%
Yes
80%
120%
40%
No
Boar Rush
Trot Retreat
Crunching Backhand
Beast
88 / 106
2
21.25
40%
Yes
100%
140%
60%
No
Boar Rush
Trot Retreat
Crunching Backhand
Beast
49 / 59
9
31.25
15%
Yes
100%
65%
70%
No
Cripple Them
Goring Flight
14 / 17
6
5
0%
Yes
10%
10%
10%
No
Spearfishing
20 / 24
7
13.75
0%
Yes
30%
30%
30%
No
Spearfishing
27 / 33
8
26.25
0%
Yes
50%
50%
50%
No
Spearfishing
12 / 15
10
5
0%
Yes
10%
10%
20%
No
Call of the Deep
Ceremonial Cut
Sea Breeze
17 / 21
11
13.75
0%
Yes
30%
30%
40%
Yes
Call of the Deep
Ceremonial Cut
Sea Breeze
23 / 28
12
26.25
0%
Yes
50%
50%
60%
Yes
Call of the Deep
Ceremonial Cut
Sea Breeze
25 / 30
0
0
33%
Yes
10%
50%
10%
No
Barnacle Barrier
35 / 42
1
8.75
50%
Yes
30%
70%
30%
No
Barnacle Barrier
49 / 59
2
21.25
50%
Yes
50%
90%
50%
No
Barnacle Barrier
5 / 6
-5
0
75%
No
20%
10%
10%
No
7 / 9
-4
8.75
75%
No
40%
30%
30%
No
10 / 12
-3
21.25
75%
No
60%
50%
50%
No
10 / 12
7
12.5
0%
Yes
10%
10%
10%
No
Salty Gouge
14 / 17
8
21.25
0%
Yes
30%
30%
30%
No
Salty Gouge
20 / 25
9
33.75
0%
Yes
50%
50%
50%
No
Salty Gouge
Unholy
14 / 17
0
0
0%
No
10%
25%
10%
No
The Revenge
Unholy
20 / 24
1
8.75
0%
No
30%
45%
30%
No
The Revenge
Unholy
27 / 33
2
21.25
0%
No
50%
65%
50%
No
The Revenge
59 / 71
1
8.75
50%
Yes
30%
70%
40%
No
Tidal Slam
82 / 99
2
21.25
50%
Yes
50%
90%
60%
No
Tidal Slam
53 / 64
8
32.25
0%
No
55%
45%
55%
No
Offkilter Jig
12 / 15
3
2.5
15%
Yes
20%
25%
15%
No
Uppercut Slice
Shank
Harmless Poke
17 / 21
4
11.25
25%
Yes
40%
45%
35%
No
Uppercut Slice
Shank
Harmless Poke
23 / 28
5
23.75
25%
Yes
60%
65%
55%
No
Uppercut Slice
Shank
Harmless Poke
12 / 15
6
2.5
0%
Yes
20%
25%
15%
No
Rushed Shot
17 / 21
7
11.25
0%
Yes
40%
45%
35%
Yes
Rushed Shot
23 / 28
8
23.75
0%
Yes
60%
65%
55%
Yes
Rushed Shot
35 / 42
1
0
0%
Yes
20%
75%
15%
No
Punishment
Point Blank Shot
49 / 59
2
8.75
0%
Yes
40%
95%
35%
No
Punishment
Point Blank Shot
68 / 82
3
21.25
0%
Yes
60%
105%
55%
No
Punishment
Point Blank Shot
15 / 18
5
0
0%
Yes
20%
25%
15%
No
Stumbling Scratch
21 / 26
6
8.75
0%
Yes
40%
45%
35%
No
Stumbling Scratch
29 / 35
7
21.25
0%
Yes
60%
65%
55%
No
Stumbling Scratch
13 / 16
7
12.5
0%
Yes
20%
10%
40%
No
Eldritch Push
Stressful Incantation
18 / 22
8
21.25
0%
Yes
40%
30%
60%
No
Eldritch Push
Stressful Incantation
25 / 30
9
33.75
0%
Yes
60%
50%
80%
No
Eldritch Push
Stressful Incantation
14 / 17
9
20
0%
Yes
10%
10%
15%
No
Doomsay
20 / 24
10
28.75
0%
Yes
30%
30%
35%
No
Doomsay
27 / 33
11
41.25
0%
Yes
50%
50%
55%
No
Doomsay
7 / 9
5
15
0%
No
20%
10%
10%
No
Bite
10 / 12
6
23.75
0%
No
40%
30%
30%
No
Bite
14 / 17
7
36.25
0%
No
40%
50%
50%
No
Bite
7 / 9
4
15
0%
No
20%
10%
10%
No
Bite
10 / 12
5
23.75
0%
No
40%
30%
30%
No
Bite
14 / 17
6
36.25
0%
No
40%
50%
50%
No
Bite
6 / 8
3
0
0%
No
40%
0%
60%
No
8 / 10
4
8.75
0%
No
60%
20%
80%
No
12 / 15
5
21.25
0%
No
80%
40%
100%
No
8 / 10
1
0
0%
Yes
10%
10%
15%
No
Tic-Toc
11 / 14
2
8.75
0%
Yes
30%
30%
35%
No
Tic-Toc
16 / 20
3
21.25
0%
Yes
50%
50%
55%
No
Tic-Toc
Unholy
10 / 12
9
16.25
50%
No
40%
30%
35%
No
Lash of the Tail
Unholy
14 / 17
10
28.75
50%
No
60%
50%
55%
No
Lash of the Tail
41 / 50
6
13.75
40%
Yes
40%
82%
40%
No
Skull Toss
Howl
57 / 69
7
26.25
40%
Yes
60%
102%
60%
No
Skull Toss
Howl
25 / 30
5
26.25
25%
Yes
67.5%
73%
62.5%
No
Uppercut Slice
Shank
Harmless Poke
25 / 30
8
31.25
0%
Yes
67.5%
73%
62.5%
Yes
Rushed Shot
24 / 29
9
7.5
25%
Yes
40%
50%
20%
No
Snakebite
Slither Forward
Rattler Riposte
34 / 41
10
16.25
25%
Yes
60%
70%
40%
No
Snakebite
Slither Forward
Rattler Riposte
47 / 57
11
28.75
25%
Yes
80%
90%
60%
No
Snakebite
Slither Forward
Rattler Riposte
12 / 15
6
12
10%
Yes
80%
25%
20%
Yes
Infuse
Stealthed Passive
17 / 21
7
20.75
10%
Yes
100%
45%
40%
Yes
Infuse
Stealthed Passive
23 / 28
8
33.25
10%
Yes
120%
65%
60%
Yes
Infuse
Stealthed Passive
45 / 54
4
5
20%
Yes
75%
80%
40%
No
Paralyzing Quills
Molt
63 / 76
5
13.75
20%
Yes
95%
100%
60%
No
Paralyzing Quills
Molt
88 / 106
6
26.25
20%
Yes
115%
120%
80%
No
Paralyzing Quills
Molt
12 / 15
1
0
10%
Yes
50%
25%
40%
No
Predigestion
17 / 21
2
8.75
20%
Yes
70%
45%
60%
No
Predigestion
23 / 28
3
21.25
20%
Yes
90%
65%
80%
No
Predigestion
29 / 35
1
8.75
30%
Yes
70%
270%
50%
No
Subterranean Skewer
41 / 50
2
21.25
30%
Yes
90%
290%
70%
No
Subterranean Skewer
10 / 12
9
16
0%
Yes
40%
10%
30%
No
The Thirst (Manservant Thirsty)
Infallible Servitude
14 / 17
10
24.75
0%
Yes
60%
30%
50%
No
The Thirst (Manservant Thirsty)
Infallible Servitude
20 / 24
11
37.25
0%
Yes
80%
50%
70%
No
The Thirst (Manservant Thirsty)
Infallible Servitude
12 / 15
5
21
0%
Yes
60%
50%
50%
No
Elusive Exit
17 / 21
6
29.75
0%
Yes
80%
70%
70%
No
Elusive Exit
23 / 28
7
42.25
0%
Yes
100%
90%
90%
No
Elusive Exit
10 / 12
9
16
0%
Yes
40%
10%
30%
No
Choice Cut
Gibbering Entourage
The Thirst (Manservant Bloodlust)
14 / 17
10
24.75
0%
Yes
60%
30%
50%
No
Choice Cut
Gibbering Entourage
The Thirst (Manservant Bloodlust)
20 / 24
11
37.25
0%
Yes
80%
50%
70%
No
Choice Cut
Gibbering Entourage
The Thirst (Manservant Bloodlust)
12 / 15
10
10
0%
No
80%
5%
40%
No
The Thirst (Sycophant Thirsty)
17 / 21
11
18.75
0%
No
100%
25%
60%
No
The Thirst (Sycophant Thirsty)
23 / 28
12
31.25
0%
No
120%
45%
80%
No
The Thirst (Sycophant Thirsty)
12 / 15
10
10
0%
No
80%
5%
40%
No
Bombing Run
The Thirst (Sycophant Bloodlust)
17 / 21
11
18.75
0%
No
100%
25%
60%
No
Bombing Run
The Thirst (Sycophant Bloodlust)
23 / 28
12
31.25
0%
No
120%
45%
80%
No
Bombing Run
The Thirst (Sycophant Bloodlust)
22 / 27
3
12.75
0%
Yes
60%
55%
30%
No
Skewering Repartee
The Thirst (Esquire Thirsty)
Esquire Riposte
31 / 38
4
25.25
0%
Yes
80%
75%
50%
No
Skewering Repartee
The Thirst (Esquire Thirsty)
Esquire Riposte
22 / 27
3
12.75
0%
Yes
60%
55%
30%
No
Piercing Foreleg
The Thirst (Esquire Bloodlust)
31 / 38
4
25.25
0%
Yes
80%
75%
50%
No
Piercing Foreleg
The Thirst (Esquire Bloodlust)
18 / 22
6
14.75
0%
Yes
60%
50%
55%
No
Midnight Minuet
Mind Your Manners
Damsel In Distress
The Thirst (Courtesan Thirsty)
25 / 38
7
27.25
0%
Yes
80%
70%
75%
No
Midnight Minuet
Mind Your Manners
Damsel In Distress
The Thirst (Courtesan Thirsty)
18 / 22
6
14.75
0%
Yes
60%
50%
55%
No
Renewed Appetite
Expose the Vein
25 / 38
7
27.25
0%
Yes
80%
70%
75%
No
Renewed Appetite
Expose the Vein
5 / 6
-4
-20
0%
No
0%
0%
200%
No
Explosive Undoing
Crystal Heal
6 / 8
-4
-20
0%
No
0%
0%
200%
No
Explosive Undoing
Crystal Heal
7 / 9
-3
-20
0%
No
0%
0%
200%
No
Explosive Undoing
Crystal Heal
Human
12 / 15
2
8
0%
Yes
50%
10%
20%
No
Pause from Labor
Ceaseless Labor
Farmhand Riposte
Human
17 / 21
3
16.75
0%
Yes
70%
30%
40%
No
Pause from Labor
Ceaseless Labor
Farmhand Riposte
Human
22 / 27
4
28
0%
Yes
90%
50%
60%
No
Pause from Labor
Ceaseless Labor
Farmhand Riposte
12 / 15
6
15
0%
Yes
25%
10%
40%
Yes
Flail The Crops
17 / 21
7
23.75
0%
Yes
45%
30%
60%
Yes
Flail The Crops
22 / 27
8
35
0%
Yes
65%
50%
80%
Yes
Flail The Crops
Roots
Shard of Growth
6 / 8
1
0
45%
No
100%
20%
60%
No
Permanent Riposte
8 / 10
2
8.75
45%
No
120%
40%
80%
No
Permanent Riposte
11 / 14
3
20
45%
No
140%
60%
100%
No
Permanent Riposte
Human
26 / 32
3
0
15%
Yes
50%
20%
20%
No
No Trespassers
Many Hands
Farmhand Spawn Buff
Human
36 / 44
4
8.75
15%
Yes
70%
40%
40%
No
No Trespassers
Many Hands
Farmhand Spawn Buff
Human
47 / 57
5
20
15%
Yes
90%
60%
60%
No
No Trespassers
Many Hands
Farmhand Spawn Buff
Beast
20 / 24
7
5
15%
Yes
20%
60%
40%
No
Trample
Rearing Strike
Bestial Scream
Beast
28 / 34
8
13.75
15%
Yes
40%
80%
60%
No
Trample
Rearing Strike
Bestial Scream
Beast
36 / 44
9
25
15%
Yes
60%
100%
60%
No
Trample
Rearing Strike
Bestial Scream
500 / 600
99
1000
150%
Yes
200%
10%
200%
No
500 / 600
99
1000
150%
Yes
220%
30%
220%
No
500 / 600
99
1000
150%
Yes
240%
50%
240%
No
Human
21 / 26
9
0
0%
Yes
47.5%
48%
47.5%
No
Flesh to Flesh
32 / 39
7
23.75
0%
Yes
67.5%
73%
62.5%
No
Stumbling Scratch
27 / 33
9
36.25
0%
Yes
67.5%
58%
87.5%
No
Fate's Push
Fate's Pull
Beast
38 / 46
7
23.75
0%
Yes
57.5%
73%
67.5%
No
The Finger
42 / 51
10
13.75
0%
Yes
77.5%
148%
47.5%
No
Bolster
Ritualic Restoration
Unbearable Tremors
42 / 51
4
18.75
0%
Yes
77.5%
148%
47.5%
No
Daze the Mind
Beast
34 / 41
9
28.75
0%
Yes
77.5%
73%
67.5%
No
Nibble
Fetch
Beast
25 / 30
12
33.75
0%
Yes
87.5%
73%
67.5%
No
Violent Hack
Banish
Beast
38 / 46
6
28.75
0%
No
67.5%
73%
67.5%
No
Beast
137 / 165
5
46.25
0%
Yes
97.5%
73%
67.5%
No
Stinger Stab
Body Slam
Beast
105 / 126
6
46.25
0%
Yes
97.5%
48%
67.5%
No
Stinger Shot
Doomsday
Very Rare
Champion Level Bone Courtiers (about 4.5% Chance)
+20% MAX HP
+3 SPD // +8 DODGE
+25% Stress
-10% Virtue Chance
Very Rare
Madman Enemies (about 4% Chance)
+2 SPD
+15% DMG
+10% Stress
Very Rare
Madman Enemies (about 4% Chance)
-25% Stress
Very Rare
Madman Enemies (about 4% Chance)
+15% MAX HP
+8 DODGE
-2 ACC


Graveyard Slash
Melee
ACC : 82.5 / CRIT : 6% / DMG : 3-8
Graveyard Slash
Melee
ACC : 88.75 / CRIT : 12% / DMG : 4-11
Graveyard Slash
Melee
ACC : 102.5 / CRIT : 14% / DMG : 5-14

Graveyard Stumble
Melee
Forward 1
ACC : 42.5 / Cannot CRIT / DMG : 2-5
Graveyard Stumble
Melee
Forward 1
ACC : 48.75 / Cannot CRIT / DMG : 2-6
Graveyard Stumble
Melee
Forward 1
ACC : 62.5 / Cannot CRIT / DMG : 3-8

Axeblade
Melee
ACC : 72.5 / CRIT : 6% / DMG : 3-5
Axeblade
Melee
ACC : 78.75 / CRIT : 12% / DMG : 4-7
Debuff Target:
-20% Stun Resist (3 rds) (120% Base)
-20% Move Resist (3 rds) (120% Base)
Axeblade
Melee
ACC : 92.5 / CRIT : 14% / DMG : 5-10
Debuff Target:
-30% Stun Resist (3 rds) (140% Base)
-30% Move Resist (3 rds) (140% Base)
Dead Weight
Melee
ACC : 82.5 / CRIT : 6% / DMG : 2-4
Stun (100% Base)
Knockback 1 (100% Base)
Dead Weight
Melee
ACC : 88.75 / CRIT : 12% / DMG : 3-5
Stun (120% Base)
Knockback 1 (120% Base)
Dead Weight
Melee
ACC : 102.5 / CRIT : 14% / DMG : 4-7
Stun (140% Base)
Knockback 1 (140% Base)

Clumsy Axeblade
Melee
Forward 1
ACC : 42.5 / Cannot CRIT / DMG : 2-4
Clumsy Axeblade
Melee
Forward 1
ACC : 48.75 / Cannot CRIT / DMG : 3-5
Clumsy Axeblade
Melee
Forward 1
ACC : 62.5 / Cannot CRIT / DMG : 4-7

Foul Warding
Support
Cooldown (2 rds)
Guard Ally (3 rds)
Buff Self:
+25% PROT (2 rds)
Foul Warding
Support
Cooldown (2 rds)
Guard Ally (3 rds)
Buff Self:
+25% PROT (2 rds)

Quarrel
Ranged
ACC : 82.5 / CRIT : 12% / DMG : 3-7
+25% DMG vs Marked
Bayonet Jab
Melee
Back 1
ACC : 72.5 / CRIT : 2% / DMG : 2-4
Quarrel
Ranged
ACC : 88.75 / CRIT : 16% / DMG : 5-9
+50% DMG vs Marked
Bayonet Jab
Melee
Back 1
ACC : 78.75 / CRIT : 6% / DMG : 3-5
Quarrel
Ranged
ACC : 102.5 / CRIT : 19% / DMG : 6-13
+50% DMG vs Marked
Bayonet Jab
Melee
Back 1
ACC : 92.5 / CRIT : 9% / DMG : 4-7

Tempting Goblet
Ranged
ACC : 92.5 / Cannot CRIT / DMG : 2-4
Stress +15
Tempting Goblet
Ranged
ACC : 98.75 / CRIT : 4% / DMG : 3-5
Stress +15
Debuff Target:
-3% CRIT (3 rds) (120% Base)
Tempting Goblet
Ranged
ACC : 112.5 / CRIT : 7% / DMG : 4-7
Stress +15
Debuff Target:
-5% CRIT (3 rds) (140% Base)
Knife in the Dark
Melee
ACC : 62.5 / CRIT : 6% / DMG : 2-4
Knife in the Dark
Melee
ACC : 68.75 / CRIT : 12% / DMG : 3-5
Knife in the Dark
Melee
ACC : 82.5 / CRIT : 14% / DMG : 4-7

Spear Thrust
Melee
ACC : 78.75 / CRIT : 12% / DMG : 5-11
Knockback 1 (120% Base)

Impale
Melee
ACC : 88.75 / CRIT : 16% / DMG : 3-5
Spear Thrust
Melee
ACC : 92.5 / CRIT : 14% / DMG : 7-15
Knockback 1 (140% Base)
Impale
Melee
ACC : 102.5 / CRIT : 19% / DMG : 4-7
Crushing Blow
Melee
ACC : 88.75 / CRIT : 16% / DMG : 8-16
Debuff Target:
-30% Stun Resist (3 rds) (120% Base)

Ground Pound
Ranged
ACC : 88.75 / CRIT : 12% / DMG : 3-5
Stun (80% Base)
Crushing Blow
Melee
ACC : 102.5 / CRIT : 19% / DMG : 11-22
Debuff Target:
-40% Stun Resist (3 rds) (140% Base)
Ground Pound
Ranged
ACC : 102.5 / CRIT : 14% / DMG : 4-7
Stun (100% Base)
Wicked Surge
Support
Cannot Target Self
Buff Target:
+10 ACC (3 rds)
+20% DMG (3 rds)
Defend the Icon
Melee
Back 1
ACC : 92.5 / CRIT : 11% / DMG : 5-11
Unholy Rally
Auto Action (Round End)
At Round End:
Revives a Corpse to Enemy With full health

Bone Bearer Passive
Support
Buff Target:
+25% DMG (Self Excluded)
Groping Swipe
Melee
ACC : 72.5 / CRIT : 6% / DMG : 3-5
Groping Swipe
Melee
ACC : 78.75 / CRIT : 12% / DMG : 4-7
Blight (120% Base) 2pts/rd for 3rds
Groping Swipe
Melee
ACC : 92.5 / CRIT : 14% / DMG : 5-10
Blight (140% Base) 3pts/rd for 3rds
Rend The Marked
Melee
ACC : 82.5 / CRIT : 6% / DMG : 3-5
+50% DMG vs Marked
Harmless Swipe
Melee
Forward 1
ACC : 42.5 / Cannot CRIT / DMG : 2-4
Rend The Marked
Melee
ACC : 88.75 / CRIT : 12% / DMG : 4-7
+50% DMG vs Marked
Harmless Swipe
Melee
Forward 1
ACC : 48.75 / Cannot CRIT / DMG : 3-5
Rend The Marked
Melee
ACC : 102.5 / CRIT : 14% / DMG : 5-10
+50% DMG vs Marked
Harmless Swipe
Melee
Forward 1
ACC : 62.5 / Cannot CRIT / DMG : 4-7
Mark Prey
Ranged
ACC : 92.5 / CRIT : 6% / DMG : 1
Mark Target (3 rds)
Debuff Target:
-5 DODGE (4 rds) (100% Base)

Rain of Blight
Ranged
ACC : 97.5 / CRIT : 6% / DMG : 1
Blight (100% Base) 2 pts/rd for 3 rds
Disease (Any) (15% Chance)

Escape Cloud
Melee
Back 2
ACC : 97.5 / CRIT : 6% / DMG : 1
Blight (100% Base) 1 pts/rd for 3 rds
Mark Prey
Ranged
ACC : 98.75 / CRIT : 12% / DMG : 1-2
Mark Target (3 rds)
Debuff Target:
-7 DODGE (4 rds) (120% Base)
Rain of Blight
Ranged
ACC : 103.75 / CRIT : 12% / DMG : 2
Blight (120% Base) 3 pts/rd for 3 rds
Disease (Any) (15% Chance)
Escape Cloud
Melee
Back 2
ACC : 103.75 / CRIT : 12% / DMG : 2
Blight (120% Base) 2 pts/rd for 3 rds
Mark Prey
Ranged
ACC : 112.5 / CRIT : 14% / DMG : 1-3
Mark Target (3 rds)
Debuff Target:
-10 DODGE (4 rds) (140% Base)
Rain of Blight
Ranged
ACC : 117.5 / CRIT : 14% / DMG : 2
Blight (140% Base) 4 pts/rd for 3 rds
Disease (Any) (15% Chance)
Escape Cloud
Melee
Back 2
ACC : 117.5 / CRIT : 14% / DMG : 2
Blight (140% Base) 3 pts/rd for 3 rds
Rabid Rush
Melee
Forward 3
ACC : 82.5 / CRIT : 16% / DMG : 1-3
Disease (Rabies) (10% Chance)
Bleed (100% Base) 1pt/rd for 3rds
Rabid Rush
Melee
Forward 3
ACC : 88.75 / CRIT : 22% / DMG : 2-4
Disease (Rabies) (10% Chance)
Bleed (120% Base) 2pts/rd for 3rds
Rabid Rush
Melee
Forward 3
ACC : 102.5 / CRIT : 24% / DMG : 2-5
Disease (Rabies) (10% Chance)
Bleed (140% Base) 3pts/rd for 3rds
Slime
Melee
ACC : 82.5 / CRIT : 6% / DMG : 3-5
Slime
Melee
ACC : 88.75 / CRIT : 12% / DMG : 4-7
Debuff Target:
-1 SPD (3 rds) (120% Base)
Slime
Melee
ACC : 102.5 / CRIT : 14% / DMG : 6-9
Debuff Target:
-2 SPD (3 rds) (140% Base)
Cytokinesis
Melee
Requires 1 Corpse/Empty Space
ACC : 82.5 / CRIT : 6% / DMG : 1
Summon 1 Ectoplasm
Ectoplasmic Profusion
Melee
Requires 2 Corpses/Empty Spaces
Only way to encounter Apprentice Large Ectoplasm
ACC : 82.5 / Cannot CRIT / DMG : 1
Stress +10
Summon 1 Large Ectoplasm
Cytokinesis
Melee
Requires 1 Corpse/Empty Space
ACC : 88.75 / CRIT : 12% / DMG : 2
Summon 1 Ectoplasm
Ectoplasmic Profusion
Melee
Requires 2 Corpses/Empty Spaces
ACC : 88.75 / Cannot CRIT / DMG : 2
Stress +10
Summon 1 Large Ectoplasm
Cytokinesis
Melee
Requires 1 Corpse/Empty Space
ACC : 102.5 / CRIT : 14% / DMG : 2
Summon 1 Ectoplasm
Ectoplasmic Profusion
Melee
Requires 2 Corpses/Empty Spaces
ACC : 102.5 / Cannot CRIT / DMG : 2
Stress +10
Summon 1 Large Ectoplasm
Big Slime
Melee
ACC : 82.5 / CRIT : 12% / DMG : 4-8
Big Slime
Melee
ACC : 88.75 / CRIT : 16% / DMG : 5-11
Debuff Target:
-2 SPD (3 rds) (120% Base)
Big Slime
Melee
ACC : 102.5 / CRIT : 19% / DMG : 7-15
Debuff Target:
-3 SPD (3 rds) (140% Base)

Slime Smack
Melee
ACC : 82.5 / CRIT : 2% / DMG : 2-4
Stun (100% Base)
Slime Smack
Melee
ACC : 88.75 / CRIT : 6% / DMG : 3-5
Stun (110% Base)
Slime Smack
Melee
ACC : 102.5 / CRIT : 9% / DMG : 4-7
Stun (120% Base)
Cytokinesis
Melee
Requires 1 Corpse/Empty Space
ACC : 82.5 / CRIT : 2% / DMG : 2-4
Summon 1 Ectoplasm
Cytokinesis
Melee
Requires 1 Corpse/Empty Space
ACC : 88.75 / CRIT : 6% / DMG : 3-5
Summon 1 Ectoplasm
Cytokinesis
Melee
Requires 1 Corpse/Empty Space
ACC : 102.5 / CRIT : 9% / DMG : 4-7
Summon 1 Ectoplasm
Curse of Vulnerbility
Ranged
Cooldown (2 rds)
Extra Target 1 (60% Chance)
ACC : 88.75 / CRIT : 6% / DMG : 1-2
Mark Target (3 rds)
Debuff Target:
-7 ACC (3 rds) (120% Base)
-15 DODGE (3 rds) (120% Base)
Curse of Vulnerbility
Ranged
Cooldown (2 rds)
Extra Target 1 (75% Chance)
ACC : 102.5 / CRIT : 9% / DMG : 1-3
Mark Target (3 rds)
Debuff Target:
-10 ACC (3 rds) (140% Base)
-20 DODGE (3 rds) (140% Base)
Fetid Censer
Melee
ACC : 88.75 / CRIT : 12% / DMG : 2-3
Stress +10
Blight (120% Base) 3 pts/rd for 3 rds
Disease (Any) (7% Chance)
Fetid Censer
Melee
ACC : 102.5 / CRIT : 14% / DMG : 2-5
Stress +10
Blight (140% Base) 4 pts/rd for 3 rds
Disease (Any) (9% Chance)
Embrace the Dark
Ranged
Extra Target 1 (50% Chance)
ACC : 88.75 / Cannot CRIT / DMG : 0
Stress +10
-10 Torch
Embrace the Dark
Ranged
Extra Target 1 (60% Chance)
ACC : 102.5 / Cannot CRIT / DMG : 0
Stress +10
-10 Torch

Treebranch Smackdown
Melee
ACC : 83.75 / CRIT : 14% / DMG : 14-27
Knockback 1 (120% Base)
Confusion Spores
Ranged
Cooldown (2 rds)
ACC : 88.75 / CRIT : 12% / DMG : 2
Shuffle Party (90% Base)
Debuff Target:
-7 ACC (3 rds) (120% Base)
Poison Spores
Ranged
Cooldown (2 rds)
ACC : 88.75 / CRIT : 6% / DMG : 2
Blight (120% Base) 3 pts/rd for 3 rds
Treebranch Smackdown
Melee
ACC : 97.5 / CRIT : 16% / DMG : 19-37
Knockback 1 (140% Base)
Confusion Spores
Ranged
Cooldown (2 rds)
ACC : 102.5 / CRIT : 14% / DMG : 2
Shuffle Party (100% Base)
Debuff Target:
-10 ACC (3 rds) (140% Base)
Poison Spores
Ranged
Cooldown (2 rds)
ACC : 102.5 / CRIT : 9% / DMG : 2
Blight (140% Base) 4 pts/rd for 3 rds
Ruinous Hex
Melee
Extra Target 1 (75% Chance)
ACC : 97.5 / CRIT : 9% / DMG : 4-7
Mark Target (3 rds)
Debuff Target:
-10 ACC (3 rds) (140% Base)
-20 DODGE (3 rds) (140% Base)

Putrefying Breath
Ranged
ACC : 97.5 / CRIT : 14% / DMG : 6-13
Blight (120% Base) 3 pts/rd for 3 rds
Knockback 1 (150% Base)
From Death Comes Life
Auto Action
At Round End:
Consumes a Corpse and
Creates a Necrotic Fungus

Necrotic Fungus Passive
Debuff
All Heroes:
Disable Healing Skills

Butcher Cut
Melee
ACC : 82.5 / CRIT : 12% / DMG : 3-7
Bleed (100% Base) 2 pts/rd for 3 rds
Butcher Cut
Melee
ACC : 88.75 / CRIT : 16% / DMG : 5-9
Bleed (120% Base) 3 pts/rd for 3 rds
Debuff Target:
-33% Healing Received (3 rds) (120% Base)
Butcher Cut
Melee
ACC : 102.5 / CRIT : 17% / DMG : 7-13
Bleed (140% Base) 4 pts/rd for 3 rds
Debuff Target:
-50% Healing Received (3 rds) (140% Base)

Ball And Chain
Ranged
ACC : 82.5 / CRIT : 12% / DMG : 2-4
Knockback 1 (100% Base)
Stun (100% Base)
Ball And Chain
Ranged
ACC : 88.75 / CRIT : 16% / DMG : 3-5
Knockback 1 (120% Base)
Stun (120% Base)
Ball And Chain
Ranged
ACC : 102.5 / CRIT : 17% / DMG : 4-8
Knockback 1 (140% Base)
Stun (140% Base)
Vomit
Ranged
ACC : 82.5 / CRIT : 12% / DMG : 1
Stress + 10
Disease (Any) (33% Chance)
Vomit
Ranged
ACC : 88.75 / CRIT : 16% / DMG : 1-2
Stress + 10
Disease (Any) (33% Chance)
Debuff Target:
-7 DODGE (3 rds) (120% Base)
Vomit
Ranged
ACC : 102.5 / CRIT : 19% / DMG : 1-3
Stress + 10
Disease (Any) (33% Chance)
Debuff Target:
-10 DODGE (3 rds) (140% Base)
Drums of Debilitation
Ranged
ACC : 82.5 / CRIT : 6% / DMG : 1
Mark Target (3 rds)
Debuff Target:
-10 DODGE (3 rds) (100% Base)
Drums of Debilitation
Ranged
ACC : 88.75 / CRIT : 12% / DMG : 2
Mark Target (3 rds)
Debuff Target:
-15 DODGE (3 rds) (120% Base)
Drums of Debilitation
Ranged
ACC : 102.5 / CRIT : 14% / DMG : 2
Mark Target (3 rds)
Debuff Target:
-20 DODGE (3 rds) (140% Base)
Drums of Doom
Ranged
ACC : 82.5 / CRIT : 2% / DMG : 1
Stress +5(70% Chance)
Drums of Doom
Ranged
ACC : 88.75 / CRIT : 6% / DMG : 2
Stress +5(70% Chance)
Drums of Doom
Ranged
ACC : 102.5 / CRIT : 9% / DMG : 2
Stress +5(70% Chance)
Hook Where It Hurts
Melee
Back 1
ACC : 82.5 / CRIT : 16% / DMG : 3-7
Hook Where It Hurts
Melee
Back 1
ACC : 88.75 / CRIT : 22% / DMG : 5-9
Debuff Target:
-20% Bleed Resist (3 rds) (120% Base)
-10% Disease Resist (3 rds) (120% Base)
Hook Where It Hurts
Melee
Back 1
ACC : 102.5 / CRIT : 24% / DMG : 6-13
Debuff Target:
-30% Bleed Resist (3 rds) (140% Base)
-15% Disease Resist (3 rds) (140% Base)
Munch
Melee
ACC : 87.5 / CRIT : 12% / DMG : 2-4
+100% DMG vs Marked
Blight (100% Base) 1 pt/rd for 3 rds
Munch
Melee
ACC : 93.75 / CRIT : 16% / DMG : 3-5
+100% DMG vs Marked
Blight (120% Base) 2 pts/rd for 3 rds
Disease (Any) (7% Chance)
Munch
Melee
ACC : 107.5 / CRIT : 19% / DMG : 4-7
+100% DMG vs Marked
Blight (140% Base) 3 pts/rd for 3 rds
Disease (Any) (9% Chance)
Weaken Prey
Melee
ACC : 93.75 / CRIT : 12% / DMG : 3-5
Mark Target (3 rds)
Debuff Target:
-10 ACC (4 rds) (120% Base)
-25% DMG (3 rds) (120% Base)
-15% DMG (4 rds) (120% Base)
Weaken Prey
Melee
ACC : 107.5 / CRIT : 14% / DMG : 4-7
Mark Target (3 rds)
Debuff Target:
-10 ACC (4 rds) (140% Base)
-25% DMG (3 rds) (140% Base)
-15% DMG (4 rds) (140% Base)
Tentacle Devour
Melee
ACC : 93.75 / CRIT : 16% / DMG : 7-15
+100% DMG vs Marked
Debuff Target:
-5% CRIT (4 rds) (120% Base)
Tentacle Devour
Melee
ACC : 107.5 / CRIT : 19% / DMG : 10-20
+100% DMG vs Marked
Debuff Target:
-7% CRIT (4 rds) (140% Base)

Pig Spear
Melee
Forward 2
ACC : 88.75 / CRIT : 12% / DMG : 4-10
Pig Spear
Melee
Forward 2
ACC : 102.5 / CRIT : 14% / DMG : 6-13
Boar Rush
Melee
Forward 2
ACC : 88.75 / CRIT : 16% / DMG : 8-16
Knockback 3 (140% Base)
Stun (145% Base)
Boar Rush
Melee
Forward 2
ACC : 102.5 / CRIT : 19% / DMG : 11-22
Knockback 3 (160% Base)
Stun (165% Base)

Trot Retreat
Ranged
Back 3
ACC : 0 / Cannot Crit / DMG : 0
Trot Retreat
Ranged
Back 3
ACC : 0 / Cannot Crit / DMG : 0

Crunching Backhand
Melee
Extra Target 1(50% Chance)
ACC : 78.75 / CRIT : 12% / DMG : 5-9
Stun (80% Base)
Crunching Backhand
Melee
Extra Target 1(60% Chance)
ACC : 92.5 / CRIT : 14% / DMG : 6-13
Stun (95% Base)

Spit to Roast
Ranged
Forward 1
Cooldown (1 rd)
ACC : 107.5 / CRIT : 21% / DMG : 12-18
Knockback 3 (120% Base)
Stun (130% Base)

Cripple Them
Ranged
ACC : 97.5 / CRIT : 9% / DMG : 6-13
Blight (120% Base) 3 pts/rd for 3 rds
Debuff Target:
-8 DODGE (3 rds) (130% Base)
-6 SPD (3 rds) (130% Base)
Goring Flight
Melee
Back 4
ACC : 92.5 / CRIT : 7% / DMG : 4-7
Seaward Slash
Melee
ACC : 77.5 / CRIT : 2% / DMG : 5-9
Seaward Slash
Melee
ACC : 83.75 / CRIT : 6% / DMG : 6-13
Seaward Slash
Melee
ACC : 97.5 / CRIT : 9% / DMG : 9-17

Spearfishing
Melee
ACC : 77.5 / CRIT : 6% / DMG : 3-7
Spearfishing
Melee
ACC : 83.75 / CRIT : 12% / DMG : 5-9
Pull 1 (120% Base)
Spearfishing
Melee
ACC : 97.5 / CRIT : 14% / DMG : 6-13
Pull 1 (140% Base)
Octocestus
Melee
ACC : 77.5 / CRIT : 6% / DMG : 3-5
Bleed (100% Base) 2 pts/rd for 3 rds
Octocestus
Melee
ACC : 83.75 / CRIT : 12% / DMG : 4-7
Bleed (120% Base) 3 pts/rd for 3 rds
Octocestus
Melee
ACC : 97.5 / CRIT : 14% / DMG : 5-10
Bleed (140% Base) 4 pts/rd for 3 rds
Barnacle Barrier
Support
Cooldown (2 rds)
Guard Ally (3 rds)
Buff Self:
+25% PROT (3 rds)
Barnacle Barrier
Support
Cooldown (2 rds)
Guard Ally (3 rds)
Buff Self:
+25% PROT (3 rds)
Barnacle Barrier
Support
Cooldown (2 rds)
Guard Ally (3 rds)
Buff Self:
+25% PROT (3 rds)
Stress Wave
Ranged
Back 1
Extra Target 1 (25% Chance)
ACC : 82.5 / Cannot CRIT / DMG : 1
Stress +15


Call of the Deep
Support
Cooldown (2 rds)
Cannot Target Self
Buff Target:
+5 ACC (3 rds)
+3% CRIT (3 rds)
+25% DMG (3 rds)

Ceremonial Cut
Melee
ACC : 62.5 / CRIT : 2% / DMG : 2-4
Sea Breeze
Support
Cooldown (3 rds)
Cannot Target Self
Target Ally:
Heal 6-12
Stress Wave
Ranged
Back 1
Extra Target 1 (30% Chance)
ACC : 88.75 / Cannot CRIT / DMG : 1-2
Stress +15
Call of the Deep
Support
Cooldown (2 rds)
Cannot Target Self
Buff Target:
+7 ACC (3 rds)
+5% CRIT (3 rds)
+25% DMG (3 rds)
Ceremonial Cut
Melee
ACC : 68.75 / CRIT : 6% / DMG : 3-5
Sea Breeze
Support
Cooldown (2 rds)
Cannot Target Self
Target Ally:
Heal 8-14
Stress Wave
Ranged
Back 1
Extra Target 1 (35% Chance)
ACC : 102.5 / Cannot CRIT / DMG : 1-3
Stress +15
Call of the Deep
Support
Cooldown (2 rds)
Cannot Target Self
Buff Target:
+10 ACC (3 rds)
+7% CRIT (3 rds)
+25% DMG (3 rds)
Ceremonial Cut
Melee
ACC : 82.5 / CRIT : 9% / DMG : 4-7
Sea Breeze
Support
Cooldown (2 rds)
Cannot Target Self
Target Ally:
Heal 10-18
Shocker
Melee
ACC : 92.5 / CRIT : 6% / DMG : 1
Stun (100% Base)
Disease (Any) (6% Chance)
Debuff Target:
-20% Bleed Resist (3 rds) (100% Base)
Salty Gouge
Melee
ACC : 92.5 / CRIT : 6% / DMG : 2-4
Bleed (100% Base) 2 pts/rd for 3 rds
Disease (Any) (6% Chance)
Debuff Target:
-5 DODGE (3 rds) (100% Base)
Shocker
Melee
ACC : 98.75 / CRIT : 12% / DMG : 1-2
Stun (120% Base)
Disease (Any) (6% Chance)
Debuff Target:
-30% Bleed Resist (3 rds) (120% Base)
Salty Gouge
Melee
ACC : 98.75 / CRIT : 12% / DMG : 3-5
Bleed (120% Base) 3 pts/rd for 3 rds
Disease (Any) (6% Chance)
Debuff Target:
-7 DODGE (3 rds) (120% Base)
Shocker
Melee
ACC : 112.5 / CRIT : 14% / DMG : 1-3
Stun (140% Base)
Disease (Any) (6% Chance)
Debuff Target:
-40% Bleed Resist (3 rds) (140% Base)
Salty Gouge
Melee
ACC : 112.5 / CRIT : 14% / DMG : 4-7
Bleed (140% Base) 4 pts/rd for 3 rds
Disease (Any) (6% Chance)
Debuff Target:
-10 DODGE (3 rds) (140% Base)
Gargling Grab
Melee
ACC : 62.5 / CRIT : 2% / DMG : 5-9
Stress +10
The Revenge
Melee
ACC : 72.5 / CRIT : 2% / DMG : 5-13
Cannot be Riposted
Stress +5
Kill Self
Gargling Grab
Melee
ACC : 68.75 / CRIT : 6% / DMG : 6-13
Stress +10
The Revenge
Melee
ACC : 78.75 / CRIT : 6% / DMG : 7-17
Cannot be Riposted
Stress +8
Kill Self
Gargling Grab
Melee
ACC : 82.5 / CRIT : 9% / DMG : 9-17
Stress +10
The Revenge
Melee
ACC : 92.5 / CRIT : 9% / DMG : 10-23
Cannot be Riposted
Stress +13
Kill Self
Brine
Melee
ACC : 62.5 / CRIT : 2% / DMG : 2-4
Disease (Any) (8% Chance)
Debuff Target:
-20 DODGE (4 rds) (100% Base)
-3 SPD (4 rds) (100% Base)
Brine
Melee
ACC : 68.75 / CRIT : 6% / DMG : 3-5
Disease (Any) (8% Chance)
Debuff Target:
-20 DODGE (4 rds) (120% Base)
-3 SPD (4 rds) (120% Base)
Brine
Melee
ACC : 82.5 / CRIT : 9% / DMG : 4-7
Disease (Any) (8% Chance)
Debuff Target:
-20 DODGE (4 rds) (140% Base)
-3 SPD (4 rds) (140% Base)
Arterial Pinch
Melee
ACC : 88.75 / CRIT : 12% / DMG : 1-2
Bleed (120% Base) 8 pts/rd for 3 rds
Debuff Target:
-33% Healing Received (3 rds) (120% Base)
Tidal Slam
Melee
ACC : 88.75 / CRIT : 12% / DMG : 5-9
Knockback 3 (120% Base)
Stun (120% Base)
Arterial Pinch
Melee
ACC : 102.5 / CRIT : 14% / DMG : 1-3
Bleed (140% Base) 10 pts/rd for 3 rds
Debuff Target:
-33% Healing Received (3 rds) (140% Base)
Tidal Slam
Melee
ACC : 102.5 / CRIT : 14% / DMG : 6-13
Knockback 3 (140% Base)
Stun (140% Base)
Maddening Shanty
Ranged
Forward 4
ACC : 87.5 / Cannot CRIT / DMG : 1-3
Stress +8
Debuff Target:
+10% Stress (until camp) (100% Base)
Offkilter Jig
Ranged
Requires 2 or more enemy positions to be filled
Back 4
Cooldown (1 rd)
ACC : 87.5 / Cannot CRIT / DMG : 0
Stress +9
Horror 5 stress/rd for 4 rds

Slice and Dice
Melee
ACC : 72.5 / CRIT : 12% / DMG : 3-5
Debuff Target:
-15% Bleed Resist (3 rds) (100% Base)
Uppercut Slice
Melee
ACC : 72.5 / CRIT : 6% / DMG : 2-4
Knockback 1 (100% Base)

Shank
Melee
ACC : 72.5 / CRIT : 6% / DMG : 4-8
Bleed (100% Base) 1 pt/rd for 3 rds

Harmless Poke
Melee
Forward 1
ACC : 42.5 / Cannot CRIT / DMG : 2-4
On Attack Hit:
Buff Self:
+2 SPD (4 rds)
Slice and Dice
Melee
ACC : 78.75 / CRIT : 16% / DMG : 4-7
Debuff Target:
-25% Bleed Resist (3 rds) (120% Base)
Uppercut Slice
Melee
ACC : 78.75 / CRIT : 12% / DMG : 3-5
Knockback 1 (120% Base)
Shank
Melee
ACC : 82.5 / CRIT : 12% / DMG : 5-11
Bleed (120% Base) 2 pts/rd for 3 rds
Harmless Poke
Melee
Forward 1
ACC : 52.5 / Cannot CRIT / DMG : 3-5
On Attack Hit:
Buff Self:
+2 SPD (4 rds)
Slice and Dice
Melee
ACC : 92.5 / CRIT : 19% / DMG : 5-10
Debuff Target:
-35% Bleed Resist (3 rds) (140% Base)
Uppercut Slice
Melee
ACC : 92.5 / CRIT : 14% / DMG : 4-7
Knockback 1 (140% Base)
Shank
Melee
ACC : 90 / CRIT : 14% / DMG : 7-15
Bleed (140% Base) 3 pts/rd for 3 rds
Harmless Poke
Melee
Forward 1
ACC : 60 / Cannot CRIT / DMG : 4-7
On Attack Hit:
Buff Self:
+2 SPD (4 rds)
Rain of Whips
Melee
ACC : 82.5 / Cannot CRIT / DMG : 1
Bleed (100% Base) 1 pt/rd for 3 rds
Stress + 5
Punishment
Melee
ACC : 82.5 / CRIT : 12% / DMG : 2-4
Bleed (100% Base) 2 pts/rd for 3 rds
Stress + 5

Point Blank Shot
Ranged
Cooldown (2 rds)
ACC : 82.5 / CRIT : 16% / DMG : 4-11
Knockback 1 (100% Base)
Debuff Self:
-2 SPD (4 rds)
Rain of Whips
Melee
ACC : 88.75 / CRIT : 4% / DMG : 1-2
Bleed (120% Base) 2 pts/rd for 3 rds
Stress + 5
Punishment
Melee
ACC : 88.75 / CRIT : 16% / DMG : 3-5
Bleed (120% Base) 3 pts/rd for 3 rds
Stress + 5
Point Blank Shot
Ranged
ACC : 92.5 / CRIT : 22% / DMG : 5-14
Knockback 1 (120% Base)
Debuff Self:
-2 SPD (4 rds)
Rain of Whips
Melee
ACC : 102.5 / CRIT : 7% / DMG : 1-3
Bleed (140% Base) 3 pts/rd for 3 rds
Stress + 5
Punishment
Melee
ACC : 102.5 / CRIT : 19% / DMG : 4-7
Bleed (140% Base) 4 pts/rd for 3 rds
Stress + 5
Point Blank Shot
Ranged
ACC : 100 / CRIT : 24% / DMG : 7-20
Knockback 1 (140% Base)
Debuff Self:
-2 SPD (4 rds)

Blanket Fire
Ranged
ACC : 72.5 / Cannot CRIT / DMG : 1-3
Debuff Target:
-2 DODGE (3 rds) (100% Base)
Rushed Shot
Melee
Back 1
ACC : 62.5 / CRIT : 6% / DMG : 2-4
Blanket Fire
Ranged
ACC : 78.75 / CRIT : 4% / DMG : 1-4
Debuff Target:
-4 DODGE (3 rds) (120% Base)
Rushed Shot
Melee
Back 1
ACC : 68.75 / CRIT : 12% / DMG : 3-5
Blanket Fire
Ranged
ACC : 92.5 / CRIT : 7% / DMG : 2-5
Debuff Target:
-6 DODGE (3 rds) (140% Base)
Rushed Shot
Melee
Back 1
ACC : 82.5 / CRIT : 14% / DMG : 4-7
Rend for the Old Gods
Melee
Forward 1
ACC : 72.5 / CRIT : 12% / DMG : 2-4
+50% DMG vs Marked
Bleed (100% Base) 1 pt/rd for 3 rds
Debuff Target:
+10% Stress (3 rds) (100% Base)
Stumbling Scratch
Melee
Forward 1
ACC : 42.5 / Cannot CRIT / DMG : 2-4
Rend for the Old Gods
Melee
Forward 1
ACC : 78.75 / CRIT : 16% / DMG : 3-5
+50% DMG vs Marked
Bleed (120% Base) 2 pts/rd for 3 rds
Debuff Target:
+15% Stress (3 rds) (120% Base)
Stumbling Scratch
Melee
Forward 1
ACC : 48.75 / Cannot CRIT / DMG : 3-5
Rend for the Old Gods
Melee
Forward 1
ACC : 92.5 / CRIT : 19% / DMG : 4-7
+50% DMG vs Marked
Bleed (140% Base) 3 pts/rd for 3 rds
Debuff Target:
+20% Stress (3 rds) (140% Base)
Stumbling Scratch
Melee
Forward 1
ACC : 62.5 / Cannot CRIT / DMG : 4-7
Stressful Incantation
Ranged
ACC : 82.5 / Cannot CRIT / DMG : 1
Stress +15
Torch -10

Eldritch Pull
Ranged
ACC : 82.5 / CRIT : 6% / DMG : 1
Pull 2 (100% Base)
Eldritch Push
Ranged
ACC : 82.5 / CRIT : 6% / DMG : 1
Knockback 2 (100% Base)
Stressful Incantation
Ranged
ACC : 92.5 / Cannot CRIT / DMG : 1-2
Stress +17
Torch -10
Mark Target (3 rds)
Eldritch Pull
Ranged
Cooldown (2 rds)
ACC : 88.75 / CRIT : 12% / DMG : 1-2
Pull 2 (120% Base)
Stress +5
Eldritch Push
Ranged
Cooldown (2 rds)
ACC : 88.75 / CRIT : 12% / DMG : 1-2
Knockback 2 (120% Base)
Stress +5
Stressful Incantation
Ranged
ACC : 100 / Cannot CRIT / DMG : 1-3
Stress +20
Torch -10
Mark Target (3 rds)
Eldritch Pull
Ranged
Cooldown (2 rds)
ACC : 102.5 / CRIT : 14% / DMG : 1-3
Pull 2 (140% Base)
Stress +8
Eldritch Push
Ranged
Cooldown (2 rds)
ACC : 102.5 / CRIT : 14% / DMG : 1-3
Knockback 2 (140% Base)
Stress +8
Accusation
Ranged
ACC : 102.5 / Cannot CRIT / DMG : 1
Horror 3 stress/rd for 4 rds
Debuff Target:
+15% Stress (until camp) (100% Base)
Doomsay
Ranged
ACC : 102.5 / Cannot CRIT / DMG : 0
Stress +7 (80% Chance)
Accusation
Ranged
ACC : 108.75 / Cannot CRIT / DMG : 1-2
Horror 4 stress/rd for 4 rds
Debuff Target:
+15% Stress (until camp) (120% Base)
Doomsay
Ranged
ACC : 108.75 / Cannot CRIT / DMG : 0
Stress +9 (80% Chance)
Accusation
Ranged
ACC : 122.5 / Cannot CRIT / DMG : 1-3
Horror 4 stress/rd for 4 rds
Debuff Target:
+15% Stress (until camp) (140% Base)
Doomsay
Ranged
ACC : 122.5 / Cannot CRIT / DMG : 0
Stress +9 (80% Chance)
Web
Ranged
ACC : 82.5 / CRIT : 6% / DMG : 1
Stun (100% Base)
Mark Target (3 rds)
Debuff Target:
-15% Blight Resist (3 rds) (100% Base)
Bite
Melee
ACC : 72.5 / CRIT : 2% / DMG : 1-3
+100% DMG vs Marked
Blight (100% Base) 1 pt/rd for 3 rds
Web
Ranged
ACC : 88.75 / CRIT : 12% / DMG : 2
Stun (120% Base)
Mark Target (3 rds)
Debuff Target:
-20% Blight Resist (3 rds) (120% Base)
Bite
Melee
ACC : 78.75 / CRIT : 6% / DMG : 2-3
+100% DMG vs Marked
Blight (120% Base) 2 pts/rd for 3 rds
Web
Ranged
ACC : 102.5 / CRIT : 14% / DMG : 2
Stun (140% Base)
Mark Target (3 rds)
Debuff Target:
-25% Blight Resist (3 rds) (140% Base)
Bite
Melee
ACC : 92.5 / CRIT : 9% / DMG : 2-5
+100% DMG vs Marked
Blight (140% Base) 3 pts/rd for 3 rds

Spit
Ranged
ACC : 82.5 / CRIT : 12% / DMG : 3-5
+100% DMG vs Marked
Blight (100% Base) 1 pt/rd for 3 rds
Debuff Target:
-5 ACC (4 rds) (100% Base)
Bite
Melee
ACC : 72.5 / CRIT : 2% / DMG : 1-3
+100% DMG vs Marked
Blight (100% Base) 1 pt/rd for 3 rds
Spit
Ranged
ACC : 88.75 / CRIT : 16% / DMG : 4-7
+100% DMG vs Marked
Blight (120% Base) 2 pts/rd for 3 rds
Debuff Target:
-7 ACC (4 rds) (120% Base)
Bite
Melee
ACC : 78.75 / CRIT : 6% / DMG : 2-3
+100% DMG vs Marked
Blight (120% Base) 2 pts/rd for 3 rds
Spit
Ranged
ACC : 102.5 / CRIT : 19% / DMG : 5-10
+100% DMG vs Marked
Blight (140% Base) 3 pts/rd for 3 rds
Debuff Target:
-10 ACC (4 rds) (140% Base)
Bite
Melee
ACC : 92.5 / CRIT : 9% / DMG : 2-5
+100% DMG vs Marked
Blight (140% Base) 3 pts/rd for 3 rds
Grave Nibble
Melee
ACC : 62.5 / CRIT : 12% / DMG : 2-4
Stress +5
Stun (75% Base)
Disease (Any) (15% Chance)
Grave Nibble
Melee
ACC : 68.75 / CRIT : 16% / DMG : 3-5
Stress +5
Stun (85% Base)
Disease (Any) (15% Chance)
Grave Nibble
Melee
ACC : 82.5 / CRIT : 19% / DMG : 4-7
Stress +5
Stun (95% Base)
Disease (Any) (15% Chance)

Bump in the Night
Melee
ACC : 62.5 / CRIT : 2% / DMG : 2-5
Tic-Toc
Melee
Forward 1
ACC : 42.5 / Cannot CRIT / DMG : 2-5
Bump in the Night
Melee
ACC : 68.75 / CRIT : 6% / DMG : 2-6
Debuff Target:
-7 DODGE (3 rds) (120% Base)
Tic-Toc
Melee
Forward 1
ACC : 48.75 / Cannot CRIT / DMG : 2-6
Bump in the Night
Melee
ACC : 82.5 / CRIT : 9% / DMG : 3-8
Debuff Target:
-10 DODGE (3 rds) (140% Base)
Tic-Toc
Melee
Forward 1
ACC : 62.5 / Cannot CRIT / DMG : 3-8
Flurry of Claws
Melee
ACC : 88.75 / CRIT : 12% / DMG : 2-3
Shuffle Targets (50% Base)
Lash of the Tail
Ranged
ACC : 88.75 / CRIT : 12% / DMG : 1-2
Stun (120% Base)
Knockback 1 (85% Base)
Flurry of Claws
Melee
ACC : 102.5 / CRIT : 14% / DMG : 2-5
Shuffle Targets (65% Base)
Lash of the Tail
Ranged
ACC : 102.5 / CRIT : 14% / DMG : 1-3
Stun (140% Base)
Knockback 1 (100% Base)
Rend
Melee
ACC : 88.75 / CRIT : 16% / DMG : 5-11
Bleed (120% Base) 3 pts/rd for 3 rds
Debuff Target:
+15% Stress (3 rds) (120% Base)
Skull Toss
Ranged
ACC : 88.75 / CRIT : 12% / DMG : 5-11
Stress +15
Stun (100% Base)
Howl
Ranged
ACC : 92.5 / Cannot Crit / DMG : 0
Horror (75% Chance) 3 stress/rd for 3 rds
Torch -10
Disease (The Worries) (5% Chance)
Rend
Melee
ACC : 102.5 / CRIT : 19% / DMG : 7-15
Bleed (140% Base) 4 pts/rd for 3 rds
Debuff Target:
+20% Stress (3 rds) (140% Base)
Skull Toss
Ranged
ACC : 102.5 / CRIT : 14% / DMG : 7-15
Stress +15
Stun (130% Base)
Howl
Ranged
ACC : 100 / Cannot Crit / DMG : 0
Horror (75% Chance) 3 stress/rd for 3 rds
Torch -10
Disease (The Worries) (5% Chance)
Slice and Dice
Melee
ACC : 93.75 / CRIT : 20% / DMG : 6-11
Debuff Target:
-35% Bleed Resist (3 rds) (160% Base)
Uppercut Slice
Melee
ACC : 93.75 / CRIT : 15% / DMG : 4-9
Knockback 1 (140% Base)
Shank
Melee
ACC : 92.5 / CRIT : 11% / DMG : 7-15
Bleed (140% Base) 3 pts/rd for 3 rds
Mark Target (3 rds)
Harmless Poke
Melee
Forward 1
ACC : 62.5 / Cannot CRIT / DMG : 4-9
On Attack Hit:
Buff Self:
+2 SPD (4 rds)
Blanket Fire
Ranged
ACC : 93.75 / CRIT : 7% / DMG : 2-6
Debuff Target:
-6 DODGE (3 rds) (160% Base)
Stress +4
Rushed Shot
Melee
Back 1
ACC : 83.75 / CRIT : 15% / DMG : 4-9
Gather the Blood
Melee
Forward 4
ACC : 77.5 / Cannot CRIT / DMG : 2-5
Apply Crimson Curse (31% Chance)
Predigestion
Melee
Forward 1
ACC : 77.5 / CRIT: 4% / DMG : 1-5
Blight (100% Base) 2 pts/rd for 3 rds
Debuff Target:
-25% Bleed Resist (3 rds) (100% Base)
Gather the Blood
Melee
Forward 4
ACC : 83.75 / CRIT: 4% / DMG : 2-6
Apply Crimson Curse (31% Chance)
Predigestion
Melee
Forward 1
ACC : 83.75 / CRIT: 9% / DMG : 2-6
Blight (120% Base) 3 pts/rd for 3 rds
Debuff Target:
-25% Bleed Resist (3 rds) (120% Base)
Gather the Blood
Melee
Forward 4
ACC : 97.5 / CRIT: 7% / DMG : 3-8
Apply Crimson Curse (31% Chance)
Predigestion
Melee
Forward 1
ACC : 97.5 / CRIT: 12% / DMG : 2-9
Blight (140% Base) 4 pts/rd for 3 rds
Debuff Target:
-25% Bleed Resist (3 rds) (140% Base)
Buried Blast
Ranged
Cooldown (3 rds)
Extra Target 1
ACC : 88.75 / Cannot CRIT / DMG : 5-9
Stun (105% Base)
Debuff Target:
-40 DODGE (3 rds) (120% Base)
Subterranean Skewer
Melee
Back 1
ACC : 88.75 / CRIT: 12% / DMG : 8-11
Bleed (120% Base) 3 pts/rd for 3 rds
Debuff Target:
-25% Bleed Resist (3 rds) (120% Base)
Buried Blast
Ranged
Cooldown (3 rds)
Extra Target 1
ACC : 102.5 / Cannot CRIT / DMG : 7-12
Stun (125% Base)
Debuff Target:
-50 DODGE (3 rds) (140% Base)
Subterranean Skewer
Melee
Back 1
ACC : 102.5 / CRIT: 14% / DMG : 10-16
Bleed (140% Base) 3 pts/rd for 3 rds
Debuff Target:
-25% Bleed Resist (3 rds) (140% Base)
Maddening Whine
Ranged
Back 4
Cooldown (1 rd)
Usable in Thirsty Form
ACC : 82.5 / CRIT: 4% / DMG : 2
Stress + 9
The Thirst
Melee
Forward 4
Usable in Thirsty Form
ACC : 92.5 / CRIT: 2% / DMG : 2-4
Change to Bloodlust Form
Apply Crimson Curse (31% Chance)
Stress + 8 (85% Chance)
Self: Heal 4 & Receive Target Blight
Buff Self:
+20% Stun Skill Chance (6 rds)
The Thirst
Melee
Forward 4
Cooldown (2 rds)
Only Usable in Bloodlust Form
ACC : 92.5 / CRIT: 6% / DMG : 4-6
Apply Crimson Curse (31% Chance)
Stress + 12 (85% Chance)
Self: Heal 4 & Receive Target Blight
Debuff Self:
-20 ACC (3 rds) // -4 SPD (3 rds)
Deafening Whine
Ranged
Back 4
Cooldown (1 rd)
Only Usable in Bloodlust Form
ACC : 82.5 / CRIT: 4% / DMG : 1-2
Stun (90% Base)
Stress +4
Bombing Run
Ranged
Forward 4
Extra Target 1 (25% Chance)
Only Usable in Bloodlust Form
ACC : 83.75 / Cannot CRIT / DMG : 3-4
Bleed (100% Base) 2pts/rd for 3 rds
Maddening Whine
Ranged
Back 4
Cooldown (1 rd)
Usable in Thirsty Form
ACC : 88.75 / CRIT: 8% / DMG : 3
Stress + 11
The Thirst
Melee
Forward 4
Usable in Thirsty Form
ACC : 98.75 / CRIT: 6% / DMG : 3-5
Change to Bloodlust Form
Apply Crimson Curse (31% Chance)
> Stress + 8 (85% Chance)
Self: Heal 4 & Receive Target Blight
Buff Self:
+25% Stun Skill Chance (6 rds)
The Thirst
Melee
Forward 4
Cooldown (1 rd)
Only Usable in Bloodlust Form
ACC : 98.75 / CRIT: 12% / DMG : 6-8
Apply Crimson Curse (31% Chance)
Stress + 12 (85% Chance)
Self: Heal 6 & Receive Target Blight
Debuff Self:
-18 ACC (3 rds) // -3 SPD (3 rds)
Deafening Whine
Ranged
Back 4
Cooldown (1 rd)
Only Usable in Bloodlust Form
ACC : 88.75 / CRIT: 10% / DMG : 2
Stun (100% Base)
Stress +5
Bombing Run
Ranged
Forward 4
Extra Target 1 (25% Chance)
Only Usable in Bloodlust Form
ACC : 83.75 / CRIT: 6% / DMG : 4-5
Bleed (120% Base) 3pts/rd for 3 rds
Maddening Whine
Ranged
Back 4
Cooldown (1 rd)
Usable in Thirsty Form
ACC : 102.5 / CRIT: 11% / DMG : 4
Stress + 13
The Thirst
Melee
Forward 4
Usable in Thirsty Form
ACC : 112.5 / CRIT: 9% / DMG : 4-7
Change to Bloodlust Form
Apply Crimson Curse (31% Chance)
Stress + 8 (85% Chance)
Self: Heal 4 & Receive Target Blight
Buff Self:
+30% Stun Skill Chance (4 rds)
The Thirst
Melee
Forward 4
Cooldown (1 rd)
Only Usable in Bloodlust Form
ACC : 112.5 / CRIT: 14% / DMG : 8-11
Apply Crimson Curse (31% Chance)
Stress + 12 (85% Chance)
Self: Heal 9 & Receive Target Blight
Debuff Self:
-15 ACC (3 rds) // -2 SPD (3 rds)
Deafening Whine
Ranged
Back 4
Cooldown (1 rd)
Only Usable in Bloodlust Form
ACC : 102.5 / CRIT: 12% / DMG : 2-4
Stun (110% Base)
Stress +6
Bombing Run
Ranged
Forward 4
Extra Target 1 (25% Chance)
Only Usable in Bloodlust Form
ACC : 97.5 / CRIT: 8% / DMG : 5-8
Bleed (140% Base) 3pts/rd for 3 rds
Rib Cracker
Ranged
Back 2
Usable in Thirsty Form
ACC : 88.75 / CRIT: 8% / DMG : 4-7
Push 1 (110% Base)
Debuff Target:
-2 SPD (4 rds) (120% Base)
The Thirst
Melee
Forward 4
Cooldown (1 rd) // Usable in Thirsty Form
ACC : 98.75 / CRIT: 6% / DMG : 2-6
Change to Bloodlust Form
Apply Crimson Curse (45% Chance)
Stress + 8 (85% Chance)
Self: Heal 8 & Receive Target Blight
Debuff Self: -18 ACC (3 rds) // -3 SPD (3 rds)
Clear Riposte
Skewering Repartee
Melee
Forward 2
Cooldown (2 rds)
Only Usable in Thirsty Form
ACC : 93.75 / CRIT: 6% / DMG : 6-10
-75% DMG vs rank 4 // -40% DMG vs rank 3
-20% DMG vs rank 2
Bleed (120% Base) 3pts/rd for 3 rds
Activate Riposte (2 rds)
Riposte: -75% DMG // -3% CRIT
Riposte Attack
Melee
ACC : 88.75 / CRIT: 6% / DMG : 6-8
Hidden Modifiers:
Riposte: -75% DMG // Riposte: -3% CRIT
The Thirst
Melee
Cooldown (4 rds)
Only Usable in Bloodlust Form
ACC : 88.75 / CRIT: 8% / DMG : 5-9
Apply Crimson Curse (45% Chance)
Stress + 12 (85% Chance)
Self: Heal 8 & Receive Target Blight
Debuff Self:
-18 ACC (3 rds) // -3 SPD (3 rds)
Piercing Foreleg
Melee
Forward 2
Only Usable in Bloodlust Form
ACC : 93.75 / CRIT: 6% / DMG : 8-14
-80% DMG vs rank 4 //-65% DMG vs rank 3 //
-30% DMG vs rank 2
Debuff Target:
-23% Bleed Resist (3 rds) (120% Base)
Needling Execration
Melee
Back 2
Only Usable in Bloodlust Form
ACC : 88.75 / CRIT: 12% / DMG : 3-8
Stress +10 (90% Chance)
Bleed (120% Base) 3pts/rd for 3 rds
Mark Target (3 rds)
Rib Cracker
Ranged
Back 2
Usable in Thirsty Form
ACC : 102.5 / CRIT: 11% / DMG : 6-9
Push 1 (130% Base)
Debuff Target:
-2 SPD (4 rds) (140% Base)
The Thirst
Melee
Forward 4
Cooldown (1 rd) // Usable in Thirsty Form
ACC : 112.5 / CRIT: 9% / DMG : 3-8
Change to Bloodlust Form
Apply Crimson Curse (45% Chance)
Stress + 8 (85% Chance)
Self: Heal 10 & Receive Target Blight
Debuff Self: -15 ACC (3 rds) // -2 SPD (3 rds)
Clear Riposte
Skewering Repartee
Melee
Forward 2
Cooldown (2 rds)
Only Usable in Thirsty Form
ACC : 107.5 / CRIT: 11% / DMG : 8-14
-75% DMG vs rank 4 // -40% DMG vs rank 3
-20% DMG vs rank 2
Bleed (140% Base) 3pts/rd for 3 rds
Activate Riposte (2 rds)
Riposte: -75% DMG // -3% CRIT
Riposte Attack
Melee
ACC : 88.75 / CRIT: 9% / DMG : 8-11
Hidden Modifiers:
Riposte: -65% DMG // Riposte: -1% CRIT
The Thirst
Melee
Cooldown (4 rds)
Only Usable in Bloodlust Form
ACC : 102.5 / CRIT: 10% / DMG : 6-13
Apply Crimson Curse (45% Chance)
Stress + 12 (85% Chance)
Self: Heal 10 & Receive Target Blight
Debuff Self
-15 ACC (3 rds) // -2 SPD (3 rds)
Piercing Foreleg
Melee
Forward 2
Only Usable in Bloodlust Form
ACC : 107.5 / CRIT: 9% / DMG : 11-20
-80% DMG vs rank 4 //-65% DMG vs rank 3 //
-30% DMG vs rank 2
Debuff Target:
-26% Bleed Resist (3 rds) (140% Base)
Needling Execration
Melee
Back 2
Only Usable in Bloodlust Form
ACC : 102.5 / CRIT: 14% / DMG : 5-11
Stress +12 (90% Chance)
Bleed (140% Base) 4pts/rd for 3 rds
Mark Target (3 rds)
Careless Whispers
Ranged
Forward 2
Cooldown (2 rds)
Only Usable in Thirsty Form
ACC : 98.75 / CRIT: 4% / DMG : 2-3
Horror 3 stress/rd for 3 rds
Debuff Target:
-5 ACC (4 rds) (100% Base)
The Thirst
Melee
Forward 4
Usable in Thirsty Form
ACC : 98.75 / CRIT: 6% / DMG : 3-5
Change to Bloodlust Form
Apply Crimson Curse (45% Chance)
Stress + 8 (85% Chance)
Self: Heal 8 & Receive Target Blight
Buff Self:
+18 DODGE (4 rds)
Midnight Minuet
Support
Cooldown (4 rds)
Only Usable in Thirsty Form
Shuffle Party
Buff Party:
+4 SPD (1 rd) // +25% DMG (1 rd)
Debuff Party:
-16 ACC (1 rd)
Mind Your Manners
Melee
Forward 2
Only Usable in Thirsty Form
ACC : 93.75 / CRIT: 10% / DMG : 3-6
Mark Target (3 rds)
Damsel In Distress
Support
Only Usable in Thirsty Form
Target Ally: Force Guard (2 rds)
Mark Target (2 rds)
Buff Target:
+35% PROT (2 rds)
The Thirst
Melee
Cooldown (3 rds)
Only Usable in Bloodlust Form
ACC : 88.75 / CRIT: 6% / DMG : 4-11
Crimson Curse (45% Chance)
Stress + 12 (85% Chance)
Self: Heal 8 & Receive Target Blight
Debuff Self:
-18 ACC (3 rds) // -3 SPD (3 rds)
Renewed Appetite
Ranged
Forward 2
Only Usable in Bloodlust Form
ACC : 88.75 / CRIT: 6% / DMG : 3-6
Blight (120% Base) 3pts/rd for 3 rds
Stress +8
Expose the Vein
Melee
Forward 2
Only Usable in Bloodlust Form
ACC : 93.75 / CRIT: 12% / DMG : 2-3
Mark Target (3 rds)
Debuff Target:
-23% Bleed Resist (3 rds) (120% Base)
-7% PROT (3 rds) (120% Base)
Careless Whispers
Ranged
Forward 2
Cooldown (2 rds)
Only Usable in Thirsty Form
ACC : 112.5 / CRIT: 6% / DMG : 3-4
Horror 3 stress/rd for 3 rds
Debuff Target:
-5 ACC (4 rds) (120% Base)
The Thirst
Melee
Forward 4
Usable in Thirsty Form
ACC : 112.5 / CRIT: 8% / DMG : 4-7
Change to Bloodlust Form
Apply Crimson Curse (45% Chance)
Stress + 8 (85% Chance)
Self: Heal 10 & Receive Target Blight
Buff Self:
+20 DODGE (4 rds)
Midnight Minuet
Support
Cooldown (4 rds)
Only Usable in Thirsty Form
Shuffle Party
Buff Party:
+5 SPD (1 rd) // +30% DMG (1 rd)
Debuff Party:
-12 ACC (1 rd)
Mind Your Manners
Melee
Forward 2
Only Usable in Thirsty Form
ACC : 107.5 / CRIT: 12% / DMG : 5-8
Mark Target (3 rds)
Damsel In Distress
Support
Only Usable in Thirsty Form
Target Ally: Force Guard (2 rds)
Mark Target (2 rds)
Buff Target:
+45% PROT (2 rds)
The Thirst
Melee
Cooldown (3 rds)
Only Usable in Bloodlust Form
ACC : 102.5 / CRIT: 9% / DMG : 5-14
Crimson Curse (45% Chance) // Stress + 12 (85% Chance)
Self: Heal 10 & Receive Target Blight
Debuff Self:
-15 ACC (3 rds) // -2 SPD (3 rds)
Renewed Appetite
Ranged
Forward 2
Only Usable in Bloodlust Form
ACC : 102.5 / CRIT: 9% / DMG : 4-9
Blight (140% Base) 4pts/rd for 3 rds
Stress +10
Expose the Vein
Melee
Forward 2
Only Usable in Bloodlust Form
ACC : 107.5 / CRIT: 15% / DMG : 2-5
Mark Target (3 rds)
Debuff Target:
-26% Bleed Resist (3 rds) (140% Base)
-9% PROT (3 rds) (140% Base)
Enraging Slight
Ranged
ACC : 82.5 / CRIT: 2% / DMG : 1-3
Mark Target (3 rds)
Pull 2 (100% Base)
Stress + 10 (90% Chance)
Elusive Exit
Ranged
ACC : 120 / Cannot CRIT / DMG : 2
Cannot be Riposted
Horror 3 stress/rd for 3 rds
Self: Escape from Battle
Remove all Enemy Corpses
Summon Sycophants in all Unoccupied ranks
Enraging Slight
Ranged
ACC : 88.75 / CRIT: 6% / DMG : 2-3
1Mark Target (3 rds)
Pull 2 (120% Base)
Stress + 12 (90% Chance)
Elusive Exit
Ranged
ACC : 120 / Cannot CRIT / DMG : 3
Cannot be Riposted
Horror 3 stress/rd for 3 rds
Self: Escape from Battle
Remove all Enemy Corpses
Summon Sycophants in all Unoccupied ranks
Enraging Slight
Ranged
ACC : 102.5 / CRIT: 9% / DMG : 2-5
Mark Target (3 rds)
Pull 2 (140% Base)
Stress + 14 (90% Chance)
Elusive Exit
Ranged
ACC : 120 / Cannot CRIT / DMG : 4
Cannot be Riposted
Horror 3 stress/rd for 3 rds
Self: Escape from Battle
Remove all Enemy Corpses
Summon Sycophants in all Unoccupied ranks
Enraging Slight
Ranged
Cooldown (1 rd)
Usable in Thirsty Form
ACC : 82.5 / CRIT: 2% / DMG : 1-3
Mark Target (3 rds)
Pull 2 (100% Base)
Stress + 10 (90% Chance)
Enraging Slight
Ranged
Cooldown (1 rd)
Usable in Thirsty Form
ACC : 88.75 / CRIT: 6% / DMG : 2-3
Mark Target (3 rds)
Pull 2 (120% Base)
Stress + 12 (90% Chance)
Enraging Slight
Ranged
Cooldown (1 rd)
Usable in Thirsty Form
ACC : 102.5 / CRIT: 9% / DMG : 2-5
Mark Target (3 rds)
Pull 2 (140% Base)
Stress + 14 (90% Chance)
The Thirst
Melee
Forward 4
Usable in Thirsty Form
ACC : 92.5 / CRIT: 2% / DMG : 2-4
Change to Bloodlust Form
Apply Crimson Curse (31% Chance)
Stress + 8 (85% Chance)
Self: Heal 4 & Receive Target Blight
Debuff Target:
+33% Stress (5 rds) (100% Base)
The Thirst
Melee
Forward 4
Cooldown (2 rds)
Only Usable in Bloodlust Form
ACC : 82.5 / CRIT: 5% / DMG : 2-6
Apply Crimson Curse (31% Chance)
Stress + 12 (85% Chance)
Self: Heal 4 & Receive Target Blight
Debuff Self:
-20 ACC (3 rds) // -4 SPD (3 rds)
The Thirst
Melee
Forward 4
Usable in Thirsty Form
ACC : 98.75 / CRIT: 6% / DMG : 3-5
Change to Bloodlust Form
Apply Crimson Curse (31% Chance)
Stress + 8 (85% Chance)
Self: Heal 6 & Receive Target Blight
Debuff Target:
+50% Stress (5 rds) (120% Base)
The Thirst
Melee
Forward 4
Cooldown (2 rds)
Only Usable in Bloodlust Form
ACC : 88.75 / CRIT: 10% / DMG : 2-9
Apply Crimson Curse (31% Chance)
Stress + 12 (85% Chance)
Self: Heal 6 & Receive Target Blight
Debuff Self:
-18 ACC (3 rds) // -3 SPD (3 rds)
The Thirst
Melee
Forward 4
Usable in Thirsty Form
ACC : 112.5 / CRIT: 9% / DMG : 4-7
Change to Bloodlust Form
Apply Crimson Curse (31% Chance)
Stress + 8 (85% Chance)
Self: Heal 9 & Receive Target Blight
Debuff Target:
+67% Stress (5 rds) (140% Base)
The Thirst
Melee
Forward 4
Cooldown (2 rds)
Only Usable in Bloodlust Form
ACC : 102.5 / CRIT: 13% / DMG : 3-12
Apply Crimson Curse (31% Chance)
Stress + 12 (85% Chance)
Self: Heal 9 & Receive Target Blight
Debuff Self:
-15 ACC (3 rds) // -2 SPD (3 rds)
Infallible Servitude
Support
Cooldown (1 rd)
Only Usable in Thirsty Form
Guard Ally (3 rds)
Buff Self:
+33% PROT (2 rds)
Gibbering Entourage
Support
Cooldown (1 rd)
Only Usable in Bloodlust Form
Not used on Apprentice Difficulty
Guard All Allies (3 rds)
Buff Self:
+40% PROT (3 rds)
Mark Self (3 rds)
Gibbering Entourage
Support
Cooldown (1 rd)
Only Usable in Bloodlust Form
Guard All Allies (3 rds)
Buff Self:
+50% PROT (3 rds)
Mark Self (3 rds)
Gibbering Entourage
Support
Cooldown (1 rd)
Only Usable in Bloodlust Form
Guard All Allies (3 rds)
Buff Self:
+60% PROT (3 rds)
Mark Self (3 rds)
Refined Palate
Ranged
Cooldown (1 rd)
Only Usable in Bloodlust Form
ACC : 77.5 / CRIT: 4% / DMG : 1-3
Stun (100% Base)
Stress +10
Choice Cut
Melee
Cooldown (1 rd)
Only Usable in Bloodlust Form
ACC : 77.5 / CRIT: 4% / DMG : 2-4
Bleed (100% Base) 2pts/rd for 3 rds
Refined Palate
Ranged
Cooldown (1 rd)
Only Usable in Bloodlust Form
ACC : 83.75 / CRIT: 8% / DMG : 2-3
Stun (110% Base)
Stress +10
Choice Cut
Melee
Cooldown (1 rd)
Only Usable in Bloodlust Form
ACC : 83.75 / CRIT: 8% / DMG : 2-6
Bleed (120% Base) 3pts/rd for 3 rds
Refined Palate
Ranged
Cooldown (1 rd)
Only Usable in Bloodlust Form
ACC : 97.5 / CRIT: 11% / DMG : 2-5
Stun (120% Base)
Stress +10
Choice Cut
Melee
Cooldown (1 rd)
Only Usable in Bloodlust Form
ACC : 97.5 / CRIT: 11% / DMG : 3-8
Bleed (140% Base) 3pts/rd for 3 rds
Unstable Resonance
Ranged
ACC : 92.5 / Cannot CRIT / DMG : 10-15
Kill Self
Blight (100% Base) 2 pts/rd for 3 rds
Stress +8
If a Crystalline Aberration is killed by a Hero
Hero: Heal 2
If a Crystalline Aberration is killed by a Hero
Hero: Heal 4
If a Crystalline Aberration is killed by a Hero
Hero: Heal 5
Explosive Undoing
Melee
ACC : 92.5 / Cannot CRIT / DMG : 2-4
Kill Self
Horror 3 stress/rd for 3 rds
Unstable Resonance
Ranged
ACC : 97.5 / Cannot CRIT / DMG : 12-16
Kill Self
Blight (110% Base) 2 pts/rd for 3 rds
Stress +8
Explosive Undoing
Melee
ACC : 97.5 / Cannot CRIT / DMG : 3-6
Kill Self
Horror 3 stress/rd for 3 rds
Unstable Resonance
Ranged
ACC : 102.5 / Cannot CRIT / DMG : 20-25
Kill Self
Blight (120% Base) 3 pts/rd for 3 rds
Stress +8
Explosive Undoing
Melee
ACC : 102.5 / Cannot CRIT / DMG : 5-8
Kill Self
Horror 3 stress/rd for 3 rds
Sow the Seeds
Ranged
ACC : 85.5 / Cannot CRIT / DMG : 1
Blight (100% Base) 2 pts/rd for 3 rds
Stress +10
Ceaseless Labor
Melee
ACC : 77.5 / CRIT: 2% / DMG : 3-5
Riposte Attack
Melee
ACC : 92.5 / Cannot CRIT / DMG : 2-4
Hidden Modifier:
Riposte: -40% DMG
Pause From Labor
Support
Cooldown (2 rds)
Self: Heal 4
Buff Self:
+3 SPD (2 rds)
Sow the Seeds
Ranged
ACC : 91.75 / Cannot CRIT / DMG : 1-2
Blight (120% Base) 3 pts/rd for 3 rds
Stress +10
Ceaseless Labor
Melee
ACC : 83.75 / CRIT: 6% / DMG : 4-7
Riposte Attack
Melee
ACC : 98.75 / CRIT: 4% / DMG : 3-5
Hidden Modifier:
Riposte: -40% DMG
Pause From Labor
Support
Cooldown (2 rds)
Self: Heal 5
Buff Self:
+4 SPD (2 rds)
Ceaseless Labor
Melee
ACC : 95 / CRIT: 9% / DMG : 5-9
Sow the Seeds
Ranged
ACC : 103 / Cannot CRIT / DMG : 2-3
Blight (140% Base) 4 pts/rd for 3 rds
Stress +10
Riposte Attack
Melee
ACC : 110 / CRIT: 6% / DMG : 4-7
Hidden Modifier:
Riposte: -40% DMG
Pause From Labor
Support
Cooldown (2 rds)
Self: Heal 7
Buff Self:
+5 SPD (2 rds)
Reality Bend
Ranged
Extra Target 1 (20% Chance)
ACC : 92.5 / Cannot CRIT / DMG : 1-2
Stress +8
Debuff Target:
-25% Healing Received (2 rds) (120% Base)
-10 ACC (2 rds) (100% Base)
+35% Random Target Chance (2 rds) (100% Base)
Riposte Attack
Melee
ACC : 87.5 / CRIT: 2% / DMG : 3-5
Hidden Modifier:
Riposte: -40% DMG
Debuff Target:
+20% Stress (3 rds) (85% Base)
Reality Bend
Ranged
Extra Target 1 (20% Chance)
ACC : 98.75 / CRIT: 4% / DMG : 1-2
Stress +8
Debuff Target:
-25% Healing Received (3 rds) (120% Base)
-11 ACC (2 rds) (120% Base)
+35% Random Target Chance (2 rds) (120% Base)
Riposte Attack
Melee
ACC : 93.75 / CRIT: 6% / DMG : 4-7
Hidden Modifier:
Riposte: -40% DMG // +2% CRIT
Debuff Target:
+20% Stress (3 rds) (105% Base)
Reality Bend
Ranged
Extra Target 1 (20% Chance)
ACC : 110 / CRIT: 7% / DMG : 1-3
Stress +8
Debuff Target:
-25% Healing Received (4 rds) (140% Base)
-12 ACC (2 rds) (140% Base)
+35% Random Target Chance (2 rds) (140% Base)
Riposte Attack
Melee
ACC : 105 / CRIT: 9% / DMG : 6-8
Hidden Modifier:
Riposte: -40% DMG // +4% CRIT
Debuff Target:
+20% Stress (3 rds) (125% Base)
Haunting Revelation
Ranged
Cooldown (2 rds)
ACC : 87.5 / CRIT: 6% / DMG : 1-3
Horror 3 stress/rd for 3 rds
Flail The Crops
Melee
ACC : 87.5 / Cannot CRIT / DMG : 3-7
Blight (100% Base) 2 pts/rd for 3 rds
Haunting Revelation
Ranged
Cooldown (2 rds)
ACC : 93.75 / CRIT: 12% / DMG : 2-4
Horror 4 stress/rd for 3 rds
Flail The Crops
Melee
ACC : 93.75 / CRIT: 6% / DMG : 4-7
Blight (120% Base) 3 pts/rd for 3 rds
Haunting Revelation
Ranged
Cooldown (1 rd)
ACC : 105 / CRIT: 14% / DMG : 2-5
Horror 4 stress/rd for 3 rds
Flail The Crops
Melee
ACC : 105 / CRIT: 6% / DMG : 6-12
Blight (140% Base) 4 pts/rd for 3 rds

Roots
Melee
Cooldown (6 rds)
ACC : 100 / CRIT: 7% / DMG : 4-6
Debuff Target:
-5 SPD (2 rds) (140% Base)
-12 ACC (2 rds) (140% Base)
Shard of Growth
Support
Cooldown (3 rds)
Restoration 5 hp/rds for 2 rds
Paw The Ground
Support
Back 4
Self: Stealth (2 rds)
Trample
Melee
Forward 4
ACC : 92.5 / CRIT: 4% / DMG : 2-4
-45% DMG vs rank 4 // -30% DMG vs rank 3
-15% DMG vs rank 2
Shuffle Party (80% Base)
Self: Destealth
Rearing Strike
Melee
Cooldown (1 rd)
ACC : 87.5 / CRIT: 4% / DMG : 3-7
Stun (100% Base)
Bleed (100% Base) 1 pt/rd for 3 rds
Bestial Scream
Ranged
ACC : 102.5 / Cannot CRIT / DMG : 0
Stress +8
Trample
Melee
Forward 4
ACC : 98.75 / CRIT: 10% / DMG : 3-5
-45% DMG vs rank 4 // -30% DMG vs rank 3
-15% DMG vs rank 2
Shuffle Party (100% Base)
Self: Destealth
Rearing Strike
Melee
Cooldown (1 rd)
Extra Target 1 (25% Chance)
ACC : 93.75 / CRIT: 8% / DMG : 5-9
Stun (120% Base)
Bleed (120% Base) 2 pts/rd for 3 rds
Bestial Scream
Ranged
ACC : 108.75 / Cannot CRIT / DMG : 0
Stress +8
Trample
Melee
Forward 4
ACC : 110 / CRIT: 12% / DMG : 4-7
-45% DMG vs rank 4 // -30% DMG vs rank 3
-15% DMG vs rank 2
Shuffle Party (120% Base)
Self: Destealth
Rearing Strike
Melee
Cooldown (1 rd)
Extra Target 1 (33% Chance)
ACC : 105 / CRIT: 11% / DMG : 6-12
Stun (140% Base)
Bleed (140% Base) 3 pts/rd for 3 rds
Bestial Scream
Ranged
ACC : 120 / Cannot CRIT / DMG : 0
Stress +8
Farmhand Spawn Buff
Buff
At Round End:
For every Farmhand Spawned:
Buff Self:
+1 SPD (2 rds)
Farmhand Spawn Buff
Buff
At Round End:
For every Farmhand Spawned:
Buff Self:
+2 SPD (2 rds)
Farmhand Spawn Buff
Buff
At Round End:
For every Farmhand Spawned:
Buff Self:
+3 SPD (2 rds)
Stir The Rabble
Free Action (Round Start)
Cooldown (2 rds)
Buff Target:
+10% Blight Skill Chance (2 rds)
+50% Blight Duration (2 rds)
+3 SPD (2 rds)
Activate Riposte
Riposte: -40% DMG
Stir The Rabble
Free Action (Round Start)
Cooldown (2 rds)
Buff Target:
+10% Blight Skill Chance (2 rds)
+50% Blight Duration (2 rds)
+3 SPD (2 rds)
Activate Riposte
Riposte: -40% DMG
Stir The Rabble
Free Action (Round Start)
Cooldown (2 rds)
Buff Target:
+15% Blight Skill Chance (2 rds)
+50% Blight Duration (2 rds)
+3 SPD (2 rds)
Activate Riposte
Riposte: -40% DMG
Many Hands
Support
Cooldown (2 rds)
Buff Target:
+1 SPD (2 rds)
+20% PROT (3 rds)
Many Hands
Support
Cooldown (2 rds)
Buff Target:
+2 SPD (2 rds)
+22% PROT (3 rds)
Many Hands
Support
Cooldown (2 rds)
Buff Target:
+3 SPD (2 rds)
+25% PROT (3 rds)
No Trespassers
Melee
ACC : 82.5 / CRIT: 2% / DMG : 5-9
Bleed (100% Base) 2 pts/rd for 3 rds
Debuff Target:
+20% Stress (3 rds) (100% Base)
Mark Target (3 rds)
No Trespassers
Melee
ACC : 88.75 / CRIT: 6% / DMG : 7-12
Bleed (120% Base) 3 pts/rd for 3 rds
Debuff Target:
+20% Stress (3 rds) (120% Base)
Mark Target (3 rds)
No Trespassers
Melee
ACC : 100 / CRIT: 9% / DMG : 9-16
Bleed (140% Base) 4 pts/rd for 3 rds
Debuff Target:
+20% Stress (3 rds) (140% Base)
Mark Target (3 rds)
Beyond Time and Space
Teleport
ACC : 152.5 / Cannot CRIT / DMG : 0
Teleports Party to another Room
Teleportation occurs regardless of Dodges
Beyond Time and Space
Teleport
ACC : 158.75 / Cannot CRIT / DMG : 0
Teleports Party to another Room
Teleportation occurs regardless of Dodges
Beyond Time and Space
Teleport
ACC : 170 / Cannot CRIT / DMG : 0
Teleports Party to another Room
Teleportation occurs regardless of Dodges
Warning Rattle
Support
Cooldown (2 rds)
Guard Ally (3 rds)
Buff Self: +10% PROT (3 rds)
Activate Riposte (2 rds)
Riposte: -60% DMG -3% CRIT
Snakebite
Melee
ACC : 92.5 / CRIT: 2% / DMG : 3-7
Bleed (100% Base) 2pts/rd for 3 rds
Slither Forward
Melee
Forward 2
ACC : 77.5 / Cannot CRIT / DMG : 1-3
Riposte
Melee
ACC : 82.5 / Cannot CRIT / DMG : 1-4
Hidden Modifier:
Riposte: -60% DMG -3% CRIT
Snakebite
Melee
ACC : 98.75 / CRIT: 6% / DMG : 5-9
Bleed (120% Base) 3pts/rd for 3 rds
Slither Forward
Melee
Forward 2
ACC : 83.75 / CRIT: 2% / DMG : 2-3
Riposte
Melee
ACC : 88.75 / CRIT: 2% / DMG : 2-5
Hidden Modifier
Riposte: -60% DMG -3% CRIT
Snakebite
Melee
ACC : 112.5 / CRIT: 9% / DMG : 6-13
Bleed (140% Base) 4pts/rd for 3 rds
Slither Forward
Melee
Forward 2
ACC : 97.5 / CRIT: 5% / DMG : 2-5
Riposte
Melee
ACC : 102.5 / CRIT: 4% / DMG : 2-7
Hidden Modifier:
Riposte: -60% DMG -3% CRIT
undefined
Buff
If Stealthed: +12% CRIT
Venomous Gleek
Ranged
ACC : 92.5 / CRIT: 2% / DMG : 1
Blight (100% Base) 2pts/rd for 3 rds
Infuse
Melee
ACC : 92.5 / CRIT: 6% / DMG : 3-5
Blight (100% Base) 3pts/rd for 3 rds
Venomous Gleek
Ranged
ACC : 98.75 / CRIT: 8% / DMG : 2
Blight (120% Base) 3pts/rd for 3 rds
Infuse
Melee
ACC : 98.75 / CRIT: 12% / DMG : 4-7
Blight (120% Base) 4pts/rd for 3 rds
Venomous Gleek
Ranged
ACC : 112.5 / CRIT: 10% / DMG : 2
Blight (140% Base) 4pts/rd for 3 rds
Infuse
Melee
ACC : 112.5 / CRIT: 14% / DMG : 5-10
Blight (140% Base) 4pts/rd for 3 rds

Molt
Support
Cooldown (1 rd)
Self: Heal 8
Cure Blight / Bleed / Debuffs
Buff Self:
+10% Blight Skill Chance (3 rds)
+10% DMG (3 rds)
Adder's Fang
Ranged
ACC : 92.5 / CRIT: 2% / DMG : 2-4
Blight (100% Base) 3pts/rd for 4 rds
Paralyzing Quills
Melee
ACC : 97.5 / CRIT: 2% / DMG : 5-9
Stun (120% Base)
Molt
Support
Cooldown (1 rd)
Self: Heal 12
Cure Blight / Bleed / Debuffs
Buff Self:
+10% Blight Skill Chance (3 rds)
+10% DMG (3 rds)
Adder's Fang
Ranged
ACC : 98.75 / CRIT: 6% / DMG : 3-5
Blight (120% Base) 4pts/rd for 4 rds
Paralyzing Quills
Melee
ACC : 103.75 / CRIT: 6% / DMG : 6-13
Stun (140% Base)
Molt
Support
Cooldown (1 rd)
Self: Heal 16
Cure Blight / Bleed / Debuffs
Buff Self:
+10% Blight Skill Chance (3 rds)
+10% DMG (3 rds)
Adder's Fang
Ranged
ACC : 112.5 / CRIT: 9% / DMG : 4-7
Blight (140% Base) 4pts/rd for 4 rds
Paralyzing Quills
Melee
ACC : 117.5 / CRIT: 9% / DMG : 9-17
Stun (160% Base)
Rend for the New God
Melee
Forward 1
ACC : 93.75 / CRIT : 20% / DMG : 4-9
+50% DMG vs Marked
Bleed (150% Base) 6 pts/rd for 3 rds
Debuff Target:
+20% Stress (3 rds) (150% Base)
Stumbling Scratch
Melee
Forward 1
ACC : 63.75 / Cannot CRIT / DMG : 4-9
Fate's Reveal
Ranged
ACC : 103.75 / Cannot CRIT / DMG : 1-3
Stress +20
Torch -10
Mark Target (Until Combat End)
Fate's Pull
Ranged
Cooldown (3 rds)
ACC : 103.75 / CRIT : 15% / DMG : 1-3
Pull 2 (150% Base)
Stress +8
Fate's Push
Ranged
Cooldown (3 rds)
ACC : 103.75 / CRIT : 15% / DMG : 1-3
Knockback 2 (150% Base)
Stress +8
Flesh Wall
Support
Cooldown (2 rds)
Guard Ally (3 rds)
Flesh to Flesh
Support
Heal Ally : 10-18 (Cannot Target Self)
Death Lash
Melee
ACC : 113.75 / CRIT: 10% / DMG : 4-7
Stress +5
Debuff Target:
-23% Bleed Resist (3 rds) (150% Base)
The Finger
Ranged
Cooldown (1 rd)
ACC : 113.75 / CRIT: 20% / DMG : 7-14
Stress +15
Bleed (150% Base) 6 pts/rd for 3 rds
Maul the Flesh
Melee
ACC : 103.75 / CRIT: 12% / DMG : 8-15
Bleed (150% Base) 4 pts/rd for 3 rds
Daze the Mind
Melee
ACC : 113.75 / CRIT: 10% / DMG : 4-9
Stun (150% Base)
Grand Guard
Support
Cooldown (2 rds)
Guard Ally (3 rds)
Buff Self:
+33% PROT (4 rds)
Bolster
Support
Buff Target:
+5 SPD (4 rds)
+10 ACC (4 rds)
+10% CRIT (4 rds)
Ritualic Restoration
Support
Heal Ally : 10-18 (Cannot Target Self)
Unbearable Tremors
Ranged
ACC : 113.75 / Cannot CRIT / DMG : 0
Stress +7 (90% Chance)
Gnash
Melee
ACC : 103.75 / CRIT: 15% / DMG : 6-13
+50% DMG vs Marked
Stress +5
Nibble
Melee
Forward 3
ACC : 83.75 / Cannot CRIT / DMG : 1-3
Fetch
Melee
ACC : 113.75 / CRIT: 10% / DMG : 4-9
Pull 2 (150% Base)
Stun (130% Base)

Venomous Phlegm
Ranged
Cooldown (2 rds)
ACC : 103.75 / CRIT: 15% / DMG : 4-9
Mark Target (3 rds)
Blight (150% Base) 6 pts/rd for 3 rds
Violent Hack
Ranged
Back 3
ACC : 83.75 / Cannot CRIT / DMG : 1-3

Banish
Melee
ACC : 113.75 / CRIT: 10% / DMG : 4-9
Knockback 2 (150% Base)
Stunning Secretion
Ranged
ACC : 113.75 / Cannot CRIT / DMG : 8-17
Stun (150% Base)
Torment
Melee
ACC : 103.75 / CRIT: 10% / DMG : 8-17
Torment
Melee
ACC : 103.75 / CRIT: 10% / DMG : 8-17
Stinger Stab
Melee
ACC : 103.75 / CRIT: 10% / DMG : 9-20
Blight (150% Base) 10pts/rd for 3 rds
Body Slam
Melee
Forward 1
Cooldown (1 rd)
ACC : 98.75 / CRIT: 16% / DMG : 8-18
Push 2 (150% Base)
Stun (150% Base)
Stinger Shot
Ranged
ACC : 113.75 / CRIT: 20% / DMG : 12-17
Blight (150% Base) 6pts/rd for 3 rds
Debuff Target:
-33% DMG (4 rds) (150% Base)
-10% CRIT (4 rds) (150% Base)
Doomsday
Ranged
ACC : 113.75 / CRIT: 10% / DMG : 5-8
Blight (150% Base) 4pts/rd for 3 rds
HP
SPD
Actions
DODGE
PROT
Blight
Move
Debuff
Bypass










The Flesh
He was unable to store such a prodigious amount of offal, nor was it possible for him to rid of it easily due to it being possessed by unnameable things from outer spheres.
However, When excavations beneath the manor broke through into an ancient network of aqueducts and tunnels, the Ancestor realized he had found a solution to the problem of disposal.
The spasmodically squirming, braying, and snorting half-corpses were heaped each upon the other, until at last the Ancestor was rid of them.
However, due to this the Warrens had become a landfill of snout and hoof, gristle and bone - a mountainous, twitching mass of misshapen flesh, fusing itself together in the darkness..
All Difficulties
All Skills
33.3% Chance to be used
Overview and Behavior
The Flesh is the second Warrens Boss you will encounter that is comprised of 4 Enemies that share a single HP Pool. Each Part of the Flesh has 1 Action per round.
The Flesh starts the Battle by changing its Parts which will be done at the start of every round. (Reference the Icon Next to Stats)
The Flesh Head can only be present in the Front 2 Positions and has Very High Prot alongside Decent Speed.
It uses Maws of Life, a High Accuracy Attack to deal Very High Damage and inflict Bleed to a Hero in the Front 2 Positions.
The Attack gains a Chance to Target both Front Rank Heroes from Veteran Difficulty Onwards (10% on Veteran // 20% on Champion)
The Flesh Butt can only be present in the Back 2 Positions and has Decently High Prot alongside High Speed.
It uses Undulating Invasion, a High Accuracy Attack to deal High Damage and inflict Blight to a Hero in the Back 2 Positions.
Thu Attack gains a Chance to Target both Back Rank Heroes from Veteran Difficulty Onwards (10% on Veteran // 20% on Champion)
The Flesh Bone can be present in any Position and has Extremely High Prot and Low Speed.
It uses Bone Zephyr, a Single Target Attack to deal Low Damage alongside potentially Stunning a Hero in any Position.
The Flesh Heart can be present in any Position and has Very High Speed and Lower Resistances compared to the other Flesh Parts.
It uses Sanguine Stroke to Heal the Flesh.Boss Strategy
The Flesh is a highly random Boss due to many of its Parts Changing to other ones at the start of every round.
The Flesh Head and the Flesh Butt are very threatening with them being able to dish out a large amount of Damage to your Heroes.
You should keep in mind that the Flesh Head can only target Heroes in the Front 2 Positions and the Flesh Butt can only Target ones in the Back 2 Positions and make your plays accordingly.
In addition, you may want to bring Heroes with Guard Skills to keep more squishy Heroes safe from the Flesh's Attacks.
Since most of the Flesh Parts have High Prot but Low Bleed & Blight Resist, AoE Attacks that inflict DoTs such as the Plague Doctor's Plague Grenade, the Flagellant's Rain of Sorrows, and the Houndmaster's Hound's Harry are quite effective.
This is due to each Part keeping its Bleed & Blight even after changing forms, letting the Damage stack up very quickly.
In addition, since the Flesh Parts don't have that High of a Stun Resist, AoE Attacks that inflict Stun such as the Plague Doctor's Blinding Gas and other Stun causing Attacks in general are very useful for shutting down threatening Parts such as the Flesh Head or Flesh Butt.
Due to the High Prot of many of the Flesh Parts, Armor Piercing Attacks such as the Grave Robber's Pick to the Face and the Shieldbreaker's Pierce can be nice to have.
While using Mark based Damage with Heroes such as the Bounty Hunter or Houndmaster can be troublesome and inconsistent due to the Flesh Parts constantly Changing, if you get lucky and your Heroes can land devastating Blows onto the Flesh Heart, letting you make short work of the Flesh.

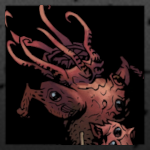
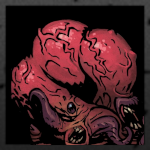
(Butt)
100 / 120
8
1
0
30%
40%
200%
20%
No
(Heart)
100 / 120
10
1
0
0%
0%
200%
0%
No
(Bone)
100 / 120
1
1
0
70%
20%
200%
20%
No
(Head)
100 / 120
5
1
0
50%
20%
200%
20%
No
Bone Zephyr
Sanguine Stroke
Undulating Invasion
(Butt)
152 / 183
9
1
8.75
40%
60%
220%
40%
No
(Heart)
152 / 183
11
1
8.75
0%
20%
220%
20%
No
(Bone)
152 / 183
2
1
8.75
80%
40%
220%
40%
No
(Head)
152 / 183
6
1
8.75
60%
40%
220%
40%
No
Bone Zephyr
Sanguine Stroke
Undulating Invasion
(Butt)
204 / 245
10
1
22.5
50%
80%
240%
60%
No
(Heart)
204 / 245
12
1
22.5
0%
40%
240%
40%
No
(Bone)
204 / 245
3
1
22.5
90%
60%
240%
60%
No
(Head)
204 / 245
7
1
22.5
70%
60%
240%
60%
No
Bone Zephyr
Sanguine Stroke
Undulating Invasion




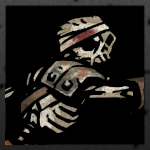
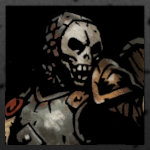
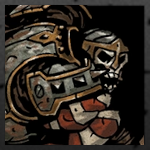
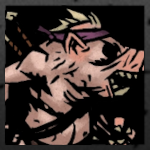
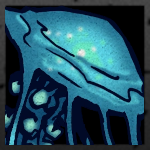
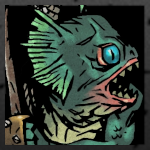
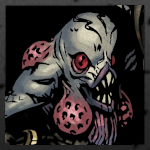
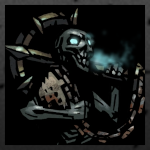


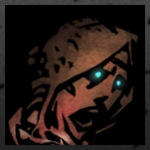
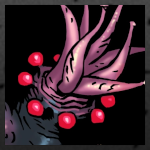

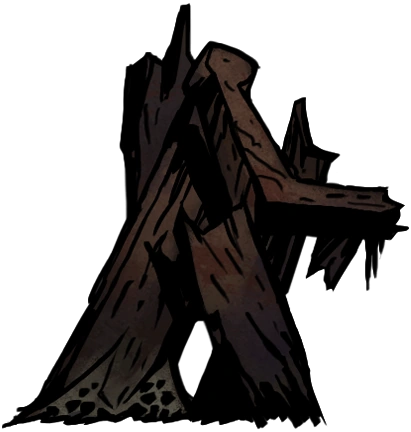
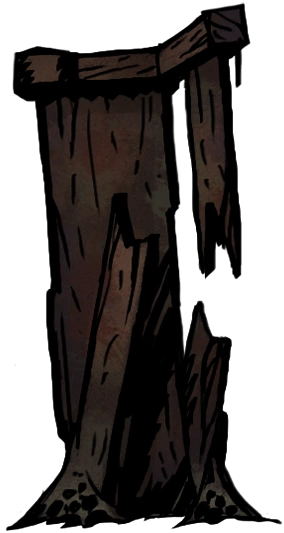
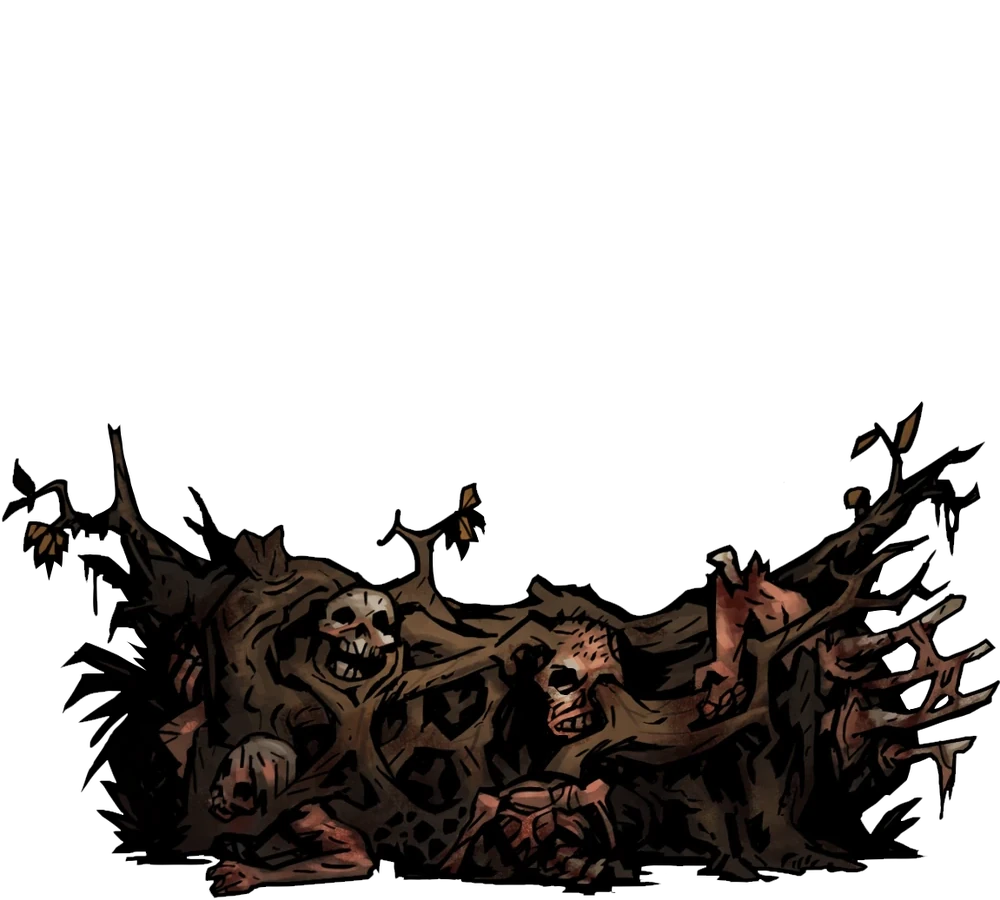



Trophy
+20% DMG vs Unholy
+8% CRIT vs Unholy
Trophy
+15 ACC if in position 4
+3 SPD if in position 4
-15% Stress if in position 4
Trophy
+30% Blight Skill Chance
+40% Blight Resist
+40% Disease Resist
Trophy
+2 SPD
+10% DMG Ranged Skills
+6% CRIT Ranged Skills
Shrieker
+7% CRIT
+33% Disease Resist if Torch below 75
+33% Bleed Skill Chance if Torch below 50
+15% Stress
Shrieker
+10 ACC
+33% Disease Resist if Torch below 75
+15% Scouting Chance if Torch below 50
+15% Stress
Shrieker
+4 SPD
+33% Disease Resist if Torch below 75
+33% Stun Resist if Torch below 50
+15% Stress
Shrieker
+10 DODGE
+33% Disease Resist if Torch below 75
+33% Move Resist if Torch below 50
+15% Stress
Trophy
+50% Stun Resist
+10 DODGE
Trophy
+50% Bleed Resist
+15% MAX HP
Trophy
+50% Debuff Resist
-20% Stress
Trophy
+50% Move Resist
+20% Healing Received
Very Rare
+25% DMG
-10% MAX HP
+20% Stress
Very Rare
+25% PROT
+20% Stress
Very Rare
+30% Healing Skills
+20% Stress
Ancestral
+25% Trap Disarm Chance
+25% Scouting Chance
+10% Stress
Ancestral
+25% MAX HP
+50% Food Consumed
+10% Stress
Ancestral
+15% DMG if Torch above 50
+2 SPD if Torch above 50
+5 DODGE if Torch above 50
+10% Stress
Ancestral
+20% Virtue Chance
+8% Death Blow Resist
Ancestral
+25% Healing Skills
+25% Stress Skills
+10% Stress
Trophy
+75% Debuff Resist if has Crimson Curse
+4 SPD if has Crimson Curse
-10% Stun Resist if has Crimson Curse
Trophy
+5% CRIT if has Crimson Curse
+100% Healing when Eating if has Crimson Curse
+100% Food Consumed if has Crimson Curse
Trophy
+50% Healing Received if has Crimson Curse
-25% Bleed Resist if has Crimson Curse
Thing
+4% CRIT if HP above 41%
+8% CRIT if HP below 40%
Obtained by killing a Thing From the Stars (6.7% > Chance)
Thing
+10% Stun Skill Chance if HP above 40%
+40% Stun Skill Chance if HP below 41%
Obtained by killing a Thing From the Stars (6.7% > Chance)
Thing
-15% Stress if HP above 41%
-50% Stress if HP below 40%
Obtained by killing a Thing From the Stars (6.7% > Chance)
Thing
+35% Blight Skill Chance vs Thing
+35% Bleed Skill Chance vs Thing
+12% CRIT vs Thing
Obtained by killing a Thing From the Stars (6.7% > Chance)
Trophy
+20% DMG vs Marked
+10 ACC vs Marked
+5% CRIT vs Size 2 or Above
Ancestral
+25% Trap Disarm Chance
+25% Scouting Chance
+10% Stress
Ancestral
+25% MAX HP
+50% Food Consumed
+10% Stress
Ancestral
+15% DMG if Torch above 50
+2 SPD if Torch above 50
+5 DODGE if Torch above 50
+10% Stress
Ancestral
+20% Virtue Chance
+8% Death Blow Resist
Ancestral
+25% Healing Skills
+25% Stress Skills
+10% Stress
The Flesh Is Willing
Melee
Back 1
ACC : 102.5 / CRIT : 6% / DMG : 4-8
Summon 1 Skeleton

The Clawing Dead
Ranged
Back 1
ACC : 102.5 / CRIT : 6% / DMG : 3-5
Summon 1 Skeleton
Six Feet Under
Ranged
Back 1
ACC : 102.5 / Cannot CRIT / DMG : 0
Summon 1 Skeleton
Stress +15
The Flesh Is Willing
Melee
Back 1
ACC : 108.75 / CRIT : 12% / DMG : 5-11
Summon 1 Skeleton
The Clawing Dead
Ranged
Back 1
ACC : 108.75 / CRIT : 12% / DMG : 4-7
Summon 1 Skeleton
Six Feet Under
Ranged
Back 1
ACC : 108.75 / Cannot CRIT / DMG : 0
Summon 1 Skeleton
Stress +15
The Flesh Is Willing
Melee
Back 1
ACC : 122.5 / CRIT : 14% / DMG : 7-15
Summon 1 Skeleton
The Clawing Dead
Ranged
Back 1
ACC : 122.5 / CRIT : 14% / DMG : 5-10
Summon 1 Skeleton
Six Feet Under
Ranged
Back 1
ACC : 122.5 / Cannot CRIT / DMG : 0
Summon 1 Skeleton
Stress +15
Prognostication
Ranged Free Action (Round Start)
Extra Target 1 (50% Chance)
ACC : 202.5 / Cannot CRIT / DMG : 0
Mark Target Ranks
Rubble of Ruin
Ranged Free Action (Round End)
ACC : 82.5 / Cannot CRIT / DMG : 11-23
Targets the Marked Ranks
Eye On You
Ranged
Extra Target 1 (50% Chance)
ACC : 92.5 / CRIT: 2% / DMG : 1
Stun (100% Base)
Stress +11
Fulminate
Ranged
ACC : 82.5 / CRIT: 6% / DMG : 1
Blight (100% Base) 1pt/rd for 2rds
Prognostication
Ranged Free Action (Round Start)
Extra Target 1 (55% Chance)
ACC : 208.75 / Cannot CRIT / DMG : 0
Mark Target Ranks
Rubble of Ruin
Ranged Free Action (Round End)
ACC : 88.75 / Cannot CRIT / DMG : 15-31
Targets the Marked Ranks
Eye On You
Ranged
Extra Target 1 (70% Chance)
ACC : 98.75 / CRIT: 6% / DMG : 1-2
Stun (120% Base)
Stress +11
Fulminate
Ranged
ACC : 88.75 / CRIT: 12% / DMG : 1-2
Blight (120% Base) 2pts/rd for 2rds
Prognostication
Ranged Free Action (Round Start)
Extra Target 1 (60% Chance)
ACC : 222.5 / Cannot CRIT / DMG : 0
Mark Target Ranks
Rubble of Ruin
Ranged Free Action (Round End)
ACC : 102.5 / Cannot CRIT / DMG : 21-42
Targets the Marked Ranks
Eye On You
Ranged
Extra Target 1 (80% Chance)
ACC : 112.5 / CRIT: 9% / DMG : 1-3
Stun (140% Base)
Stress +11
Fulminate
Ranged
ACC : 102.5 / CRIT: 14% / DMG : 1-3
Blight (140% Base) 3pts/rd for 2rds
Into The Pot!
Ranged
Cannot be used if there is only 1 Hero Remaining
ACC : 102.5 / Cannot CRIT / DMG : 0
Traps Hero in Cauldron
Heroes trapped inside the Cauldron suffer 8.75% HP DMG
Whenever the Hag or any Hero takes an action.
Into The Pot!
Ranged
Cannot be used if there is only 1 Hero Remaining
ACC : 108.75 / Cannot CRIT / DMG : 0
Traps Hero in Cauldron
Heroes trapped inside the Cauldron suffer 8.75% HP DMG
Whenever the Hag or any Hero takes an action.
Into The Pot!
Ranged
Cannot be used if there is only 1 Hero Remaining
ACC : 122.5 / Cannot CRIT / DMG : 0
Traps Hero in Cauldron
Heroes trapped inside the Cauldron suffer 8.75% HP DMG
Whenever the Hag or any Hero takes an action.
Meat Tenderizer
Melee
ACC : 87.5 / 6% / DMG : 2-4
Season to Perfection
Ranged
Only Usable if there is a Hero Trapped in the Cauldron
ACC : 102.5 / Cannot CRIT / DMG : 1
Debuff Target:
-10 ACC (4 rds) (100% Base)
-25% DMG (4 rds) (100% Base)
Stress +10
Taste the Stew
Ranged
Only Usable if there is a Hero Trapped in the Cauldron
Not used on Apprentice Difficulty
ACC : 102.5 / Cannot CRIT / DMG : 1
Target Hero: Stress +10
Self: Heal 6
Meat Tenderizer
Melee
ACC : 93.75 / CRIT: 12% / DMG : 3-5
Season to Perfection
Ranged
Only Usable if there is a Hero Trapped in the Cauldron
ACC : 108.75 / Cannot CRIT / DMG : 1-2
Debuff Target:
-10 ACC (4 rds) (120% Base)
-25% DMG (4 rds) (120% Base)
Stress +10
Taste the Stew
Ranged
Only Usable if there is a Hero Trapped in the Cauldron
Not used on Apprentice Difficulty
ACC : 108.75 / Cannot CRIT / DMG : 2
Target Hero: Stress +10
Self: Heal 10
Meat Tenderizer
Melee
ACC : 107.5 / CRIT: 14% / DMG : 4-7
Season to Perfection
Ranged
Only Usable if there is a Hero Trapped in the Cauldron
ACC : 122.5 / Cannot CRIT / DMG : 1-3
Debuff Target:
-10 ACC (4 rds) (140% Base)
-25% DMG (4 rds) (140% Base)
Stress +10
Taste the Stew
Ranged
Only Usable if there is a Hero Trapped in the Cauldron
Not used on Apprentice Difficulty
ACC : 122.5 / Cannot CRIT / DMG : 2
Target Hero: Stress +10
Self: Heal 14
Buff
25% Damage Resistance
Reinforcements!
Free Action (Round Start)
Summon Brigand Fuseman
Summon Brigands (55% Chance)
BOOOOOOOM!
Ranged
65% Chance to be Used
ACC : 82.5 / Cannot CRIT / DMG : 9-27
Stress +15
MISFIRE!
Ranged
35% Chance to be Used
ACC : 0 / Cannot CRIT / DMG : 0
Stress -10
Reinforcements!
Free Action (Round Start)
Summon Brigand Fuseman
Summon Brigands (60% Chance)
BOOOOOOOM!
Ranged
70% Chance to be Used
ACC : 88.75 / Cannot CRIT / DMG : 12-37
Stress +15
MISFIRE!
Ranged
30% Chance to be Used
ACC : 0 / Cannot CRIT / DMG : 0
Stress -10
Reinforcements!
Free Action (Round Start)
Summon Brigand Fuseman
Summon Brigands (67% Chance)
BOOOOOOOM!
Ranged
75% Chance to be Used
ACC : 102.5 / Cannot CRIT / DMG : 17-50
Stress +15
MISFIRE!
Ranged
25% Chance to be Used
ACC : 0 / Cannot CRIT / DMG : 0
Stress -10
Peck
Melee
Forward 4
Cooldown (1 action)
ACC : 87.5 / CRIT : 16% / DMG : 6-10
Bleed (100% Base) 2pts/rd for 3 rds
Caw
Ranged
ACC : 87.5 / CRIT : 2% / DMG : 1
Stress + 20
Call the Murder
Ranged
Back 4
ACC : 87.5 / CRIT : 2% / DMG : 1
Stress +12 (70% Chance)
Buff Self:
+6 SPD (3 rds)
Regurgitate
Ranged
Extra Target 1 (25% Chance)
ACC : 87.5 / CRIT : 2% / DMG : 1
Debuff Target:
-15 ACC (3 rds) (100% Base)
Disease (Any) (15% Chance)
Shrieking Flight
Ranged
Used as the Shrieker's 12th Action
ACC : 135.5 / CRIT : 2% / DMG : 1
Escapes from Battle
Stress +40
Cannot be Riposted
Peck
Melee
Forward 4
Cooldown (1 action)
ACC : 93.75 / CRIT : 22% / DMG : 9-13
Bleed (120% Base) 3pts/rd for 3 rds
Caw
Ranged
ACC : 93.75 / CRIT : 6% / DMG : 2
Stress + 23
Call the Murder
Ranged
Back 4
ACC : 93.75 / CRIT : 6% / DMG : 2
Stress +14 (70% Chance)
Buff Self:
+7 SPD (3 rds)
Regurgitate
Ranged
Extra Target 1 (33% Chance)
ACC : 93.75 / CRIT : 6% / DMG : 2
Debuff Target:
-15 ACC (3 rds) (120% Base)
Disease (Any) (15% Chance)
Shrieking Flight
Ranged
Used as the Shrieker's 12th Action
ACC : 141.75 / CRIT : 6% / DMG : 2
Escapes from Battle
Stress +45
Cannot be Riposted
Peck
Melee
Forward 4
Cooldown (1 action)
ACC : 107.5 / CRIT : 24% / DMG : 12-18
Bleed (140% Base) 4pts/rd for 3 rds
Caw
Ranged
ACC : 107.5 / CRIT : 9% / DMG : 2
Stress + 23
Call the Murder
Ranged
Back 4
ACC : 107.5 / CRIT : 9% / DMG : 2
Stress +16 (70% Chance)
Buff Self:
+8 SPD (3 rds)
Regurgitate
Ranged
Extra Target 1 (40% Chance)
ACC : 107.5 / CRIT : 9% / DMG : 2
Debuff Target:
-15 ACC (3 rds) (140% Base)
Disease (Any) (15% Chance)
Shrieking Flight
Ranged
Used as the Shrieker's 12th Action
ACC : 155.5 / CRIT : 9% / DMG : 2
Escapes from Battle
Stress +50
Cannot be Riposted
Peck
Melee
Forward 4
Cooldown (1 action)
ACC : 110 / CRIT : 20% / DMG : 12-18
Bleed (140% Base) 4pts/rd for 3 rds
Caw
Ranged
ACC : 110 / CRIT : 6% / DMG : 2
Stress + 23
Call the Murder
Ranged
Back 4
ACC : 110 / CRIT : 6% / DMG : 2
Stress +16 (70% Chance)
Buff Self:
+8 SPD (3 rds)
Regurgitate
Ranged
Extra Target 1 (40% Chance)
ACC : 110 / CRIT : 6% / DMG : 2
Debuff Target:
-15 ACC (3 rds) (140% Base)
Disease (Any) (15% Chance)
Shrieking Flight
Ranged
Used at the end of Round 4 or on the Shrieker's 12th Action
ACC : 158 / CRIT : 6% / DMG : 2
Escapes from Battle
Stress +15
Cannot be Riposted
Obliterate Body
Melee
ACC : 102.5 / CRIT : 12% / DMG : 5-9
+100% DMG vs Marked
Clears Mark on Hit if Target is Marked
Obliterate Masses
Melee
ACC : 102.5 / CRIT : 12% / DMG : 3-7
+100% DMG vs Marked
Clears Mark on Hit if Target is Marked
Enraged Destruction
Melee
ACC : 92.5 / CRIT : 6% / DMG : 5-9
Used as a Free Action if Wilbur takes non Riposte Direct Damage
Is used as its only action every round if Wilbur is Dead
Stun (100% Base)
Wild Flailing
Melee
ACC : 72.5 / CRIT : 12% / DMG : 5-9
Obliterate Body
Melee
ACC : 108.75 / CRIT : 16% / DMG : 6-13
+100% DMG vs Marked
Clears Mark on Hit if Target is Marked
Obliterate Masses
Melee
ACC : 108.75 / CRIT : 16% / DMG : 5-9
+100% DMG vs Marked
Clears Mark on Hit if Target is Marked
Enraged Destruction
Melee
ACC : 98.75 / CRIT : 12% / DMG : 6-13
Used as a Free Action if Wilbur takes non Riposte Direct Damage
Is used as its only action every round if Wilbur is Dead
Stun (120% Base)
Wild Flailing
Melee
ACC : 78.75 / CRIT : 16% / DMG : 6-13
Obliterate Body
Melee
ACC : 122.5 / CRIT : 19% / DMG : 9-17
+100% DMG vs Marked
Clears Mark on Hit if Target is Marked
Obliterate Masses
Melee
ACC : 122.5 / CRIT : 19% / DMG : 6-13
+100% DMG vs Marked
Clears Mark on Hit if Target is Marked
Enraged Destruction
Melee
ACC : 112.5 / CRIT : 14% / DMG : 9-17
Used as a Free Action if Wilbur takes non Riposte Direct Damage
Is used as its only action every round if Wilbur is Dead
Stun (140% Base)
Wild Flailing
Melee
ACC : 92.5 / CRIT : 19% / DMG : 9-17
Maws of Life
Melee
Used by Flesh Head
ACC : 92.5 / CRIT : 2% / DMG : 6-12
Bleed (100% Base) 2pts/rd for 3 rds
Bone Zephyr
Melee
Used by Flesh Bone
ACC : 82.5 / CRIT : 1% / DMG : 2-4
Stun (100% Base)
Sanguine Stroke
Support
Used by Flesh Heart
Heal 4-8
Undulating Invasion
Melee
Used by Flesh Butt
ACC : 92.5 / CRIT : 6% / DMG : 5-9
Blight (100% Base) 2pts/rd for 3 rds
Maws of Life
Melee
Used by Flesh Head
Extra Target 1 (10% Chance)
ACC : 98.75 / CRIT : 6% / DMG : 8-16
Bleed (120% Base) 3pts/rd for 3 rds
Bone Zephyr
Melee
Used by Flesh Bone
ACC : 88.75 / CRIT : 1% / DMG : 3-5
Stun (110% Base)
Sanguine Stroke
Support
Used by Flesh Heart
Heal 5-10
Undulating Invasion
Melee
Used by Flesh Butt
Extra Target 1 (10% Chance)
ACC : 98.75 / CRIT : 12% / DMG : 6-13
Blight (120% Base) 3pts/rd for 3 rds
Maws of Life
Melee
Used by Flesh Head
Extra Target 1 (20% Chance)
ACC : 112.5 / CRIT : 9% / DMG : 11-22
Bleed (140% Base) 4pts/rd for 3 rds
Bone Zephyr
Melee
Used by Flesh Bone
ACC : 102.5 / CRIT : 1% / DMG : 4-7
Stun (120% Base)
Sanguine Stroke
Support
Used by Flesh Heart
Heal 6-12
Undulating Invasion
Melee
Used by Flesh Butt
Extra Target 1 (20% Chance)
ACC : 112.5 / CRIT : 14% / DMG : 9-17
Blight (140% Base) 4pts/rd for 3 rds
High Tide
Support
Summon Aquatic Monster
Deep Stinger (25% Chance)
Pelagic Grouper (25% Chance)
Pelagic Guardian (50% Chance)
Song of Desire
Ranged
ACC : 102.5 / Cannot CRIT / DMG : 0
Take Control of Target (2 Rounds) (70% Chance)
Controlled Hero: Stress +10 (On their turn)
On Control Release at End of Round: Return at Position 4
Pressure Crash
Ranged
ACC : 82.5 / Cannot CRIT / DMG : 1
Stress +10
Devour
Ranged
ACC : 82.5 / CRIT : 2% / DMG : 1
Bleed (100% Base) 1pt/rd for 3 rds
Song of Desire
Ranged
ACC : 108.75 / Cannot CRIT / DMG : 0
Take Control of Target (2 Rounds) (70% Chance)
Controlled Hero: Stress +10 (On their turn)
On Control Release at End of Round: Return at Position 4
Pressure Crash
Ranged
ACC : 88.75 / Cannot CRIT / DMG : 1-2
Stress +10
Devour
Ranged
ACC : 88.75 / CRIT : 6% / DMG : 1-2
Bleed (120% Base) 2pts/rd for 3 rds
Song of Desire
Ranged
ACC : 122.5 / Cannot CRIT / DMG : 0
Take Control of Target (2 Rounds) (70% Chance)
Controlled Hero: Stress +10 (On their turn)
On Control Release at End of Round: Return at Position 4
Pressure Crash
Ranged
ACC : 102.5 / Cannot CRIT / DMG : 1-3
Stress +10
Devour
Ranged
ACC : 102.5 / CRIT : 9% / DMG : 1-3
Bleed (140% Base) 3pts/rd for 3 rds
All Hands on Deck!
Melee Free Action(Round Start)
ACC : 102.5 / Cannot CRIT / DMG : 0
Summon 1 Drowned Anchorman
Pull 3 (100% Base)
Mutiny
Ranged
ACC : 82.5 / Cannot CRIT / DMG : 1
Debuff Target:
-10% CRIT (4 rds) (100% Base)
-33% DMG (4 rds) (100% Base)
Drink with the Dead
Ranged
ACC : 82.5 / Cannot CRIT / DMG : 1
Stress +10
Boarding Clutch
Ranged
ACC : 82.5 / CRIT : 2% / DMG : 3-7
Bleed (100% Base) 2pts/rd for 3 rds
All Hands on Deck!
Melee Free Action(Round Start)
ACC : 108.75 / Cannot CRIT / DMG : 0
Summon 1 Drowned Anchorman
Pull 3 (120% Base)
Mutiny
Ranged
ACC : 88.75 / Cannot CRIT / DMG : 1-2
Debuff Target:
-10% CRIT (4 rds) (120% Base)
-33% DMG (4 rds) (120% Base)
Drink with the Dead
Ranged
ACC : 88.75 / Cannot CRIT / DMG : 1-2
Stress +10
Boarding Clutch
Ranged
ACC : 88.75 / CRIT : 6% / DMG : 5-9
Bleed (120% Base) 3pts/rd for 3 rds
All Hands on Deck!
Melee Free Action(Round Start)
ACC : 122.5 / Cannot CRIT / DMG : 0
Summon 1 Drowned Anchorman
Pull 3 (140% Base)
Mutiny
Ranged
ACC : 102.5 / Cannot CRIT / DMG : 1-3
Debuff Target:
-10% CRIT (4 rds) (140% Base)
-33% DMG (4 rds) (140% Base)
Drink with the Dead
Ranged
ACC : 102.5 / Cannot CRIT / DMG : 1-3
Stress +10
Boarding Clutch
Ranged
ACC : 102.5 / CRIT : 9% / DMG : 6-13
Bleed (140% Base) 4pts/rd for 3 rds
Collect Call
Support
Summon 1 Collected Highwayman in Position 1 if less than 2 are Present
Summon 2 Random Collected in Position 1
Show Collection
Melee
ACC : 92.5 / Cannot CRIT / DMG : 1
Stress +10 (80% Chance)
Life Steal
Ranged
ACC : 82.5 / CRIT : 16% / DMG : 3-7
Bleed (100% Base) 2pts/rd for 3 rds
Mark Target (2 rds)
Self: Heal 10
Show Collection
Melee
ACC : 98.75 / Cannot CRIT / DMG : 1-2
Stress +10 (80% Chance)
Life Steal
Ranged
ACC : 88.75 / CRIT : 22% / DMG : 5-9
Bleed (110% Base) 2pts/rd for 3 rds
Mark Target (2 rds)
Self: Heal 14
Show Collection
Melee
ACC : 112.5 / Cannot CRIT / DMG : 1-3
Stress +10 (80% Chance)
Life Steal
Ranged
ACC : 102.5 / CRIT : 24% / DMG : 6-13
Bleed (120% Base) 3pts/rd for 3 rds
Mark Target (2 rds)
Self: Heal 18
Obdurous Advancement
Melee
Forward 1
ACC : 82.5 / CRIT : 2% / DMG : 1
Bleed (100% Base) 2pts/rd for 3 rds
Summon Shambler Tentacles in Front until All Ranks are Occupied
Undulating Withdrawal
Ranged
Back 1
ACC : 82.5 / CRIT : 2% / DMG : 1
Blight (100% Base) 2pts/rd for 3 rds
Summon Shambler Tentacles in Front until All Ranks are Occupied
Stentorious Lament
Ranged
ACC : 82.5 / CRIT : 2% / DMG : 1
Stress +10
Shuffle Party (80% Base)
Obdurous Advancement
Melee
Forward 1
ACC : 88.75 / CRIT : 6% / DMG : 1-2
Bleed (120% Base) 3pts/rd for 3 rds
Summon Shambler Tentacles in Front until All Ranks are Occupied
Undulating Withdrawal
Ranged
Back 1
ACC : 88.75 / CRIT : 6% / DMG : 1-2
Blight (120% Base) 3pts/rd for 3 rds
Summon Shambler Tentacles in Front until All Ranks are Occupied
Stentorious Lament
Ranged
ACC : 92.5 / CRIT : 6% / DMG : 1-2
Stress +10
Shuffle Party (90% Base)
Obdurous Advancement
Melee
Forward 1
ACC : 102.5 / CRIT : 9% / DMG : 1-3
Bleed (140% Base) 4pts/rd for 3 rds
Summon Shambler Tentacles in Front until All Ranks are Occupied
Undulating Withdrawal
Ranged
Back 1
ACC : 102.5 / CRIT : 9% / DMG : 1-3
Blight (140% Base) 4pts/rd for 3 rds
Summon Shambler Tentacles in Front until All Ranks are Occupied
Stentorious Lament
Ranged
ACC : 100 / CRIT : 9% / DMG : 1-3
Stress +10
Shuffle Party (100% Base)
Obdurous Advancement
Melee
Forward 1
ACC : 115 / CRIT : 14% / DMG : 2-3
Bleed (150% Base) 5pts/rd for 3 rds
Summon Shambler Tentacles in Front until All Ranks are Occupied
Undulating Withdrawal
Ranged
Back 1
ACC : 115 / CRIT : 14% / DMG : 2-3
Blight (150% Base) 5pts/rd for 3 rds
Summon Shambler Tentacles in Front until All Ranks are Occupied
Stentorious Lament
Ranged
ACC : 112.5 / CRIT : 14% / DMG : 2-3
Stress +10
Shuffle Party (110% Base)
Swarming Corruption
Ranged
Cooldown (1 action)
ACC : 82.5 / Cannot CRIT / DMG : 1-6
Stress +8 (90% Chance)
Debuff Target:
-10 ACC (1 rd) (100% Base)
Swarming Corruption
Ranged
Cooldown (1 action)
ACC : 88.75 / Cannot CRIT / DMG : 2-7
Stress +10 (90% Chance)
Debuff Target:
-12 ACC (1 rd) (120% Base)
Swarming Corruption
Ranged
Cooldown (1 action)
ACC : 102.5 / Cannot CRIT / DMG : 3-10
Stress +12 (90% Chance)
Debuff Target:
-15 ACC (1 rd) (140% Base)
Swarming Corruption
Ranged
Cooldown (1 action)
ACC : 102.5 / Cannot CRIT / DMG : 3-10
Stress +12 (90% Chance)
Debuff Target:
-15 ACC (1 rd) (140% Base)

Teeth Rake
Melee
ACC : 92.5 / CRIT : 6% / DMG : 4-8
Bleed (100% Base) 2pts/rd for 3 rds
Stress +9 (80% Chance)
Pull 2 (115% Base)
Teeth Rake
Melee
ACC : 98.75 / CRIT : 12% / DMG : 5-11
Bleed (120% Base) 3pts/rd for 3 rds
Stress +10 (80% Chance)
Pull 2 (135% Base)
Teeth Rake
Melee
ACC : 112.5 / CRIT : 14% / DMG : 7-15
Bleed (140% Base) 4pts/rd for 3 rds
Stress +12 (80% Chance)
Pull 2 (155% Base)
Teeth Rake
Melee
ACC : 112.5 / CRIT : 14% / DMG : 7-15
Bleed (140% Base) 4pts/rd for 3 rds
Stress +12 (80% Chance)
Pull 2 (155% Base)
Submerge
Support
Cooldown (1 action)
Self: Heal 12 (Cannot Crit Heal)
Buff Self:
+35 DODGE (2 rds)
Submerge
Support
Cooldown (1 action)
Self: Heal 15 (Cannot Crit Heal)
Buff Self:
+45 DODGE (2 rds)
Submerge
Support
Cooldown (1 action)
Self: Heal 18 (Cannot Crit Heal)
Cure Bleed & Blight
Buff Self:
+55 DODGE (2 rds)
Submerge
Support
Cooldown (1 action)
Self: Heal 18 (Cannot Crit Heal)
Cure Bleed & Blight
Buff Self:
+55 DODGE (2 rds)

Lurking Fear
Support
If at Rank 4 - Forward 1
If at Rank 1 - Back 1
Buff Self:
+20% DMG (4 rds)
+10% PROT (4 rds)
Lurking Fear
Support
If at Rank 4 - Forward 1
If at Rank 1 - Back 1
Buff Self:
+22% DMG (4 rds)
+15% PROT (4 rds)
Lurking Fear
Support
If at Rank 4 - Forward 1
If at Rank 1- Back 1
Buff Self:
+25% DMG (4 rds)
+15% PROT (4 rds)
Lurking Fear
Support
If at Rank 4 - Forward 1
If at Rank 1 - Back 1
Buff Self:
+25% DMG (4 rds)
+15% PROT (4 rds)
Apex Predator
Melee
Forward 4
Extra Target 1 (35% Chance)
ACC : 99.5 / CRIT : 12% / DMG : 11-13
Apex Predator
Melee
Forward 4
Extra Target 2 (40% Chance)
ACC : 105.75 / CRIT : 16% / DMG : 14-18
Apex Predator
Melee
Forward 4
Extra Target 2 (45% Chance)
ACC : 119.5 / CRIT : 19% / DMG : 20-24
Apex Predator
Melee
Forward 4
Extra Target 2 (45% Chance)
ACC : 119.5 / CRIT : 19% / DMG : 20-24
Sentence Rendered
Melee
Back 4
Cooldown (2 actions)
ACC : 102.5 / Cannot CRIT / DMG : 1
Traps Hero in Pyre(Full)
Heroes trapped inside the Pyre suffer 6% HP DMG
Whenever the Fanatic or any Hero takes an action.
Righteous Condemnation
Melee
Back 4
Cooldown (2 actions)
ACC : 92.5 / Cannot CRIT / DMG : 1
Stress +5 (70% Chance)
Buff Self:
+25% PROT (5 rds)
Holy Stake
Melee
Forward 4
Cooldown (1 action)
ACC : 92.5 / CRIT: 6% / DMG : 3-7
+33% DMG vs Marked
+10% DMG vs Crimson Curse
Bleed (100% Base) 4pts/rd for 2 rds
Debuff Target:
-3 SPD (4 rds) (100% Base)
Brand the Tainted
Melee
Cooldown (3 actions)
ACC : 102.5 / Cannot CRIT / DMG : 1-2
Mark Target (3 rds)
Horror 4 stress/rd for 3 rds
Strike the Heretic
Melee
Forward 4
Cooldown (1 action)
ACC : 92.5 / CRIT: 6% / DMG : 2-4
Stun (100% Base)
Knockback 2 (100% Base)
Stress +15
Fury of the Righteous
Melee
Forward 4
Cooldown (2 actions)
ACC : 92.5 / Cannot CRIT / DMG : 4-6
-75% DMG vs Rank 4 //-40% DMG vs Rank 3 // -20% DMG vs Rank 2
Stress +7 (70% Chance)
Sentence Rendered
Melee
Back 4
Cooldown (2 actions)
ACC : 108.75 / Cannot CRIT / DMG : 1-2
Traps Hero in Pyre(Full)
Heroes trapped inside the Pyre suffer 8% HP DMG
Whenever the Fanatic or any Hero takes an action.
Righteous Condemnation
Melee
Back 4
Cooldown (2 actions)
ACC : 98.75 / Cannot CRIT / DMG : 1-2
Stress +5 (70% Chance)
Buff Self:
+25% PROT (5 rds)
Holy Stake
Melee
Forward 4
Cooldown (1 action)
ACC : 98.75 / CRIT: 12% / DMG : 5-9
+33% DMG vs Marked
+10% DMG vs Crimson Curse
Bleed (100% Base) 4pts/rd for 2 rds
Debuff Target: -3 SPD (4 rds) (100% Base)
Brand the Tainted
Melee
Cooldown (3 actions)
ACC : 108.75 / Cannot CRIT / DMG : 1-2
Mark Target (3 rds)
Horror 4 stress/rd for 3 rds
Strike the Heretic
Melee
Forward 4
Cooldown (1 action)
ACC : 98.75 / CRIT: 12% / DMG : 3-5
Stun (100% Base)
Knockback 2 (120% Base)
Stress +15
Fury of the Righteous
Melee
Forward 4
Cooldown (2 actions)
ACC : 98.75 / Cannot CRIT / DMG : 6-8
-75% DMG vs Rank 4 //-40% DMG vs Rank 3 // -20% DMG vs Rank 2
Stress +7 (70% Chance)
Sentence Rendered
Melee
Back 4
Cooldown (2 actions)
ACC : 111.25 / Cannot CRIT / DMG : 1-2
Traps Hero in Pyre(Full)
Heroes trapped inside the Pyre suffer 9% HP DMG
Whenever the Fanatic or any Hero takes an action.
Righteous Condemnation
Melee
Back 4
Cooldown (2 actions)
ACC : 112.5 / Cannot CRIT / DMG : 1-3
Stress +5 (70% Chance)
Buff Self:
+25% PROT (5 rds)
Holy Stake
Melee
Forward 4
Cooldown (1 action)
ACC : 112.5 / CRIT: 14% / DMG : 6-13
+33% DMG vs Marked
+10% DMG vs Crimson Curse
Bleed (100% Base) 4pts/rd for 2 rds
Debuff Target: -3 SPD (4 rds) (100% Base)
Brand the Tainted
Melee
Cooldown (3 actions)
ACC : 122.5 / Cannot CRIT / DMG : 1-3
Mark Target (3 rds)
Horror 4 stress/rd for 3 rds
Strike the Heretic
Melee
Forward 4
Cooldown (1 action)
ACC : 112.5 / CRIT: 14% / DMG : 4-7
Stun (100% Base)
Knockback 2 (140% Base)
Stress +15
Fury of the Righteous
Melee
Forward 4
Cooldown (2 actions)
ACC : 112.5 / Cannot CRIT / DMG : 8-11
-75% DMG vs Rank 4 //-40% DMG vs Rank 3 // -20% DMG vs Rank 2
Stress +7 (70% Chance)
The Show Begins
Free Action (Round Start)
Baron Hides in one Pulsating Egg while creating an additional one
Shuffle Self
The Second Act
Free Action (Round Start)
Used if HP is below 66%
Baron Spawns 4 Pulsating Eggs and hides in one of them
Shuffle Self
The Third Act
Free Action (Round Start)
Used if HP is below 33%
Baron Spawns 4 Pulsating Eggs and hides in one of them
Shuffle Self
Crowd Pleaser
Melee
Forward 3
ACC : 93.75 / CRIT: 6% / DMG : 5-6
-85% DMG vs rank 4 // -67% DMG vs rank 3 // -33% DMG vs rank 2
Necessary Discipline
Melee
Back 2
ACC : 103.75 / CRIT: 12% / DMG : 5-11
Stress +20 (95% Chance)
Horror 4 stress/rd for 2 rds
Bleed (120% Base) 4pts/rd for 3 rds
Pull 1 (120% Base)
The Thirst
Melee
Forward 3
Cooldown (3 actions)
ACC : 103.75 / CRIT: 6% / DMG : 5-9
Self: Heal 18
Debuff Self:
-23% Bleed Resist (3 rds)
-15 ACC (4 rds)
Buff Self: +3 SPD (4 rds)
Forced Enthusiasm
Support
Cannot Target Self or Pulsating Eggs
Buff Target:
+10% DMG (3 rds)
+4 SPD (3 rds)
+5% CRIT (3 rds)
Guests of Honor
Free Action (Round End)
Destroys all Pulsating Eggs if no Eggs have been destroyed for an entire Round
Miserly Morsel
Support
Cooldown (3 actions)
Consumes 1 extra Action
Self: Heal 15 (Cannot CRIT Heal) // Cure Bleed & Blight
Steal all Bleed & Blight on Emaciated Body
Buff Self:
+5% CRIT (3 rds)
Debuff Self:
-25% DMG (3 rds)
Square Meal
Support
Cooldown (3 actions)
Self: Heal 35 (Cannot CRIT Heal) // Cure Bleed & Blight
Steal all Bleed & Blight on the Body
Buff Self:
+20 ACC (3 rds)
+25 DODGE (3 rds)
+6 SPD (3 rds)
Ravenous Feast
Support
Cooldown (4 actions)
Consumes 1 extra Action
Self: Heal 50 (Cannot CRIT Heal) // Cure Bleed & Blight
Steal all Bleed & Blight on Bloodstuffed Body
Buff Self:
+50% DMG (3 rds)
Debuff Self:
-25 DODGE (3 rds) // -20 ACC (3 rds) // -4 SPD (3 rds)
Hungry Eyes
Ranged
Cooldown (1 action)
Extra Target 2 (40% Chance)
ACC : 97.5 / CRIT: 5% / DMG : 2-5
Stress +15 (95% Chance)
Activates Riposte (3 rds)
Riposte: -15% DMG // Riposte: +2% CRIT
Buff Self: +20 ACC (3 rds)
Shuffle Self
Riposte Attack
Melee
ACC : 102.5 / CRIT: 9% / DMG : 6-13
Hidden Modifier:
Riposte: -15% DMG // Riposte: +2% CRIT
Stress +5 (90% Chance)
Refined Pairing
Melee
Cooldown (1 action)
Extra Target 1 (60% Chance)
ACC : 97.5 / CRIT: 19% / DMG : 5-14
Stress +8 (90% Chance)
Bleed (140% Base) 3pts/rd for 3 rds
Served Rare
Melee
Cooldown (2 actions)
Extra Target 1 (60% Chance)
ACC : 102.5 / CRIT: 3% / DMG : 7-12
Stress +10 (90% Chance)
Push 3 (140% Base)
Love Letter
Melee
Cooldown (1 action)
ACC : 120 / CRIT: 15% / DMG : 6-10
Inject Target with a Parasite Egg
Self: Take 10 HP DMG
Cannot be Riposted
Sway With Me
Ranged
Cooldown (4 actions)
ACC : 115 / Cannot CRIT / DMG : 4
Stress +25
Stumble(2 rds) (155% Base)
At the start of their turn affected Hero gets Shuffled
Blight (140% Base) 6pts/rd for 2 rds
Cannot be Riposted
Disrobe
Melee
ACC : 115 / CRIT: 10% / DMG : 8-16
Flushed
Support
Starting Cooldown (3 actions)
Self:
Change Form to Flushed
Cure Bleed & Blight
Debuff Self:
-40% Stun Resist (2 rds) // -40% Blight Resist (2 rds)
-40% Bleed Resist (2 rds) // -40% Debuff Resist (2 rds)
Using Attacking Skills will trigger the Hatching or Gestation and progress the Effects
Turn 1: Gestation: 4 DMG // Hatching (25% Chance) - 15 DMG
Debuff Target (100% Base) -2 SPD (3 rds) // -10 ACC (3 rds)
Turn 2: Gestation: 6 DMG // Hatching (50% Chance) - 18 DMG
Debuff Target (120% Base) -3 SPD (3 rds) // -20 ACC (3 rds)
Turn 3: Gestation: 8 DMG // Hatching (95% Chance) - 24 DMG
Debuff Target (120% Base) -3 SPD (3 rds) // -20 ACC (3 rds)
Turn 4: Hatching (100% Chance) - 24 DMG
Debuff Target (140% Base) -4 SPD -30 ACC (3 rds)
Hatching Effect (All Turns): Buff Countess: +3 SPD +15% PROT (5 rds)
Momentary Overexertion
Support
Cooldown (1 rd)
Buff Self:
+10% Stun Resist (2 rds)
+10% Blight Resist (2 rds)
+10% Bleed Resist (2 rds)
+10% Debuff Resist (2 rds)
Metamorphosis
Ranged
Starting Cooldown (1 rd)
ACC : 0 / Cannot CRIT / DMG : 0
Self: Change Form to Bloodlust
Cure Bleed & Blight
Horror 5 stress/rd for 3 rds
Cannot be Riposted
Indecent Proposal
Melee
Cooldown (3 actions)
ACC : 115 / CRIT: 3% / DMG : 3-13
Bleed (140% Base) 3pts/rd for 4 rds
-45% DMG vs Rank 4 // -30% DMG vs Rank 3 // -15% DMG vs Rank 2
Disrobe
Melee
ACC : 110 / CRIT: 15% / DMG : 10-14
The Thirst
Melee
Cooldown (1 action)
ACC : 110 / CRIT: 2% / DMG : 7-17
Self: Heal 20
Throes of Ecstasy
Ranged
Cooldown (1 action)
Extra Target 1 (33% Chance)
ACC : 118 / CRIT: 5% / DMG : 2-4
Stun (140% Base)
Courtship Renewed
Support
Starting Cooldown (3 actions)
Self: Change Form to Thirsty
Hatred Beyond Time
Free Action (Round End)
Used Every Round if Stone Shield is dead
Buff Self:
+10% DMG (1 battle)
+5 ACC (1 battle)
+3% CRIT (1 battle)
Annihilating Glare
Ranged Free Action (Round Start)
ACC : 102.5 / CRIT: 14% / DMG : 9-13
Used Every Round if Stone Shield is dead
Stress + 5
First time that Return to the Stars has been used
Buff Self:
+80% PROT // +6 SPD // +40% DMG // +13% CRIT
When Below 45% HP (1 Battle)
Return to the Stars
Ranged Free Action (Round Start)
ACC : 202.5 / Cannot CRIT / DMG : 0
Stress +7 (60% Chance)
Summon 1 Crystalline Aberration
Self: -5 HP // Cure Bleed & Blight
Phase Gnaw
Melee
ACC : 92.5 / CRIT: 2% / DMG : 3-5
Armor Piercing
Stress +14
Blight (110% Base) 5pts/rd for 3 rds
Disease - Sky Taint (20% Chance)
Vorpal Strike
Melee
ACC : 97.5 / CRIT: 10% / DMG : 6-9
Stress +9
Paralysing Shard
Ranged
Cooldown (1 action)
ACC : 97.5 / CRIT: 6% / DMG : 1
Stress +11
Stun (115% Base)
Weakening Shard
Ranged
Cooldown (1 action)
ACC : 102.5 / CRIT: 6% / DMG : 1
Stress +11
Debuff Target:
-20% Stun Resist (4 rds) (115% Base)
-20% Bleed Resist (4 rds) (115% Base)
-20% Blight Resist (4 rds) (115% Base)
-20% Debuff Resist (4 rds) (115% Base)
Transfixing Shard
Ranged
Cooldown (1 action)
ACC : 97.5 / CRIT: 6% / DMG : 1
Stress +11
Debuff Target:
-4 SPD (4 rds) (115% Base)
-25% DMG (4 rds) (115% Base)
Return to the Stars
Ranged Free Action (Round Start)
ACC : 208.75 / Cannot CRIT / DMG : 0
Stress +7 (60% Chance)
Summon 1 Crystalline Aberration
Self: -5 HP // Cure Bleed & Blight
Phase Gnaw
Melee
ACC : 98.75 / CRIT: 6% / DMG : 5-6
Armor Piercing
Stress +14
Blight (130% Base) 6pts/rd for 3 rds
Disease -Sky Taint (22% Chance)
Vorpal Strike
Melee
ACC : 103.75 / CRIT: 11% / DMG : 9-12
Stress +9
Paralysing Shard
Ranged
Cooldown (1 action)
ACC : 103.75 / CRIT: 12% / DMG : 2
Stress +11
Stun (135% Base)
Weakening Shard
Ranged
Cooldown (1 action)
ACC : 108.75 / CRIT: 12% / DMG : 2
Stress +11
Debuff Target:
-20% Stun Resist (4 rds) (135% Base)
-20% Bleed Resist (4 rds) (135% Base)
-20% Blight Resist (4 rds) (135% Base)
-20% Debuff Resist (4 rds) (135% Base)
Transfixing Shard
Ranged
Cooldown (1 action)
ACC : 103.75 / CRIT: 12% / DMG : 2
Stress +11
Debuff Target:
-5 SPD (4 rds) (115% Base)
-25% DMG (4 rds) (135% Base)
Return to the Stars
Ranged Free Action (Round Start)
ACC : 220 / Cannot CRIT / DMG : 0
Stress +7 (60% Chance)
Summon 1 Crystalline Aberration
Self: -5 HP // Cure Bleed & Blight
Phase Gnaw
Melee
ACC : 110 / CRIT: 9% / DMG : 6-8
Armor Piercing
Stress +14
Blight (150% Base) 7pts/rd for 3 rds
Disease - Sky Taint (25% Chance)
Vorpal Strike
Melee
ACC : 115 / CRIT: 12% / DMG : 11-16
Stress +9
Paralysing Shard
Ranged
Cooldown (1 action)
ACC : 115 / CRIT: 14% / DMG : 2
Stress +11
Stun (155% Base)
Weakening Shard
Ranged
Cooldown (1 action)
ACC : 120 / CRIT: 14% / DMG : 2
Stress +11
Debuff Target:
-20% Stun Resist (4 rds) (155% Base)
-20% Bleed Resist (4 rds) (155% Base)
-20% Blight Resist (4 rds) (155% Base)
-20% Debuff Resist (4 rds) (155% Base)
Transfixing Shard
Ranged
Cooldown (1 action)
ACC : 117.5 / CRIT: 14% / DMG : 2
2X Chance to Target Marked Hero
Stress +11
Debuff Target:
-6 SPD (4 rds) (115% Base)
-25% DMG (4 rds) (155% Base)
The Reaping
Melee
ACC : 103.75 / CRIT: 8% / DMG : 6-10
6-10 vs Rank 1 // 5-8 vs Rank 2
5-7 vs Rank 3 // 2-4 vs Rank 4
The Reaping
Melee
ACC : 115 / CRIT: 10% / DMG : 8-14
8-14 vs Rank 1 // 7-12 vs Rank 2 & 3 // 4-7 vs Rank 4
The Harvest
Melee
Back 2
Cooldown (4 actions)
ACC : 103.75 / Cannot CRIT / DMG : 3-5
Target: Stress -5
Self: Heal 15
Buff Self:
+15% PROT (2 rds)
The Harvest
Melee
Back 2
Cooldown (4 actions)
ACC : 115 / Cannot CRIT / DMG : 4-7
Target: Stress -7
Self: Heal 20
Buff Self:
+15% PROT (2 rds)
The Master Beckons
Support
Summon Farmhand
Cooldown - 8 actions
Summon Scarecrow
Cooldown - 7 actions
Summon Sleeper's Herald
Cooldown - 5 actions
Winter's Breath
Support
Cooldown (6 actions)
Transform Farmhand into Frozen Farmhand
Immortal Beloved
Ranged
Cooldown (5 actions)
ACC : 208.75 / Cannot CRIT / DMG : 2
Targets Hero with the Mildred's Locket equipped
Buff Target:
-15% Stress (3 rds)
Debuff Self:
-20% PROT (3 rds)
Immortal Beloved
Ranged
Cooldown (5 actions)
ACC : 222.5 / Cannot CRIT / DMG : 2
Targets Hero with the Mildred's Locket equipped
Buff Target:
-15% Stress (3 rds)
Debuff Self:
-20% PROT (3 rds)
Seeds of Despair
Free Action(Start of Round 1)
Summon 3 Focus Points
Vile Focusing
Support
Cooldown (1 action)
Summon 1 Focus Point
Slow the Sands
Ranged
ACC : 105 / CRIT: 7% / DMG : 3-5
Stun (100% Base)
Debuff Target:
-2 SPD (2 rds) (130% Base)
Blooming Chaos
Support
Used if HP is Below 20%
Kill all other Enemies
Transform into The Sleeper
Befouling Tint
Support
Grow Focus Point into Unfinished Aberration (Traumatic) (20% Chance)
Grow Focus Point into Unfinished Aberration (Temporal) (20% Chance)
Grow Focus Point into Unfinished Aberration (Unstable) (20% Chance)
Grow Focus Point into Unfinished Aberration (Pestilential) (20% Chance)
Grow Focus Point into Unfinished Aberration (Adamantite) (20% Chance)
Ceaseless Expansion
Support
Grow Target Unfinished Aberration into corresponding Finished Aberration
The Sleeper Awakens
Ranged
Cooldown (1 rd)
ACC : 120 / CRIT: 3% / DMG : 14-22
Stress +20
The Sleeper Stirs
Ranged
ACC : 115 / CRIT: 19% / DMG : 6-14
Blight (100% Base) 4pts/rd for 5 rds
Horror 3 stress/rd for 5 rds
Bombs Away
Ranged Free Action (Round Start)
Ignores Stealth
ACC : 112.5 / Cannot CRIT / DMG : 0
Mark Target Rank
Succeeds regardless of Dodges
Time's Up!
Ranged Free Action (Round End)
Ignores Stealth
ACC : 222.5 / CRIT: 10% / DMG : 23-45
Targets Marked Ranks
Not used if the Barrel O' Bombs is destroyed
Get Them!
Melee
ACC : 112.5 / CRIT: 10% / DMG : 2-5
Summon Barrel O' Bombs
Summon 1 Brigand Raider
Summon Additional Brigand Raider (33%)
Stun (140% Base)
Tower Shield
Support
Cooldown (2 actions)
Guard a Brigand Raider (3 rds)
Summon 1 Brigand Raider
Summon Additional Brigand Raider (75%)
Warcry
Ranged
Extra Target 1
ACC : 112.5 / Cannot CRIT / DMG : 0
Stress +8
Lacerate
Melee
Cooldown (1 action)
Extra Target 1
ACC : 110 / CRIT: 5% / DMG : 5-9
Bleed (150% Base) 4pts/rd for 3 rds
Echoing Disassembly
Ranged
ACC : 120 / CRIT: 10% / DMG : 1-3
Stress +15
Torch -25
Summon at Position 4
Cultist Priest (50% Chance)
Defensive Growth (50% Chance)
Undulations
Ranged
Cooldown (1 action)
ACC : 110 / Cannot CRIT / DMG : 1
Shuffle Party (140% Base)
Torment
Melee
ACC : 103.75 / CRIT: 10% / DMG : 8-17
Revelation
Ranged
ACC : 123.75 / Cannot CRIT / DMG : 16-26
Stress +40
Torment
Melee
ACC : 103.75 / CRIT: 10% / DMG : 8-17
Revelation
Ranged
ACC : 123.75 / Cannot CRIT / DMG : 16-26
Stress +40
Stinger Stab
Melee
ACC : 103.75 / CRIT: 10% / DMG : 9-20
Blight (150% Base) 10pts/rd for 3 rds
Body Slam
Melee
Forward 1
ACC : 98.75 / CRIT: 16% / DMG : 8-18
Push 2 (150% Base)
Stun (150% Base)
Stinger Shot
Ranged
ACC : 113.75 / CRIT: 20% / DMG : 12-17
Blight (150% Base) 6pts/rd for 3 rds
Debuff Target:
-33% DMG (3 rds) (150% Base)
-10% CRIT (3 rds) (150% Base)
Doomsday
Ranged
ACC : 113.75 / CRIT: 10% / DMG : 5-8
Blight (150% Base) 4pts/rd for 3 rds
Bulging Gaze
Ranged
Extra Target 1 (25% Chance)
ACC : 113.75 / Cannot CRIT / DMG : 8-13
Stress +15 (80% Chance)
Debuff Target:
-20 DMG (3 rds) (150% Base)
Digestion
Ranged
Extra Target 1 (25% Chance)
ACC : 113.75 / CRIT: 6% / DMG : 8-17
Blight (150% Base) 8pts/rd for 3 rds
Revivify
Support
Cooldown (2 actions)
Self: Heal 10-20
Buff Self:
+25% DMG (4 rds)
Summon
Support
Summon White Cell Stalk at Position 4
Perfect Replication
Support
Summon 3 Perfect Reflections
in Front until all positions are occupied
Imperfect Reproduction
Support
Summon Perfect Reflections (50%) or Imperfect Reflections (50%)
in Front until all positions are occupied
Sporadic Reproduction
Support
Summon Perfect Reflections (66.7%) or Imperfect Reflections (33.3%)
in Front until all positions are occupied
Time Heals All
Support
Heal Allies : 7-11
Refashion Them
Ranged
Extra Target 1
ACC : 113.75 / CRIT: 15% / DMG : 5-14
Stress +7
Bleed (140% Base) 5pts/rd for 3 rds
On Stygian / Bloodmoon
Stress +9
Bleed (140% Base) 6pts/rd for 3 rds
Shuffle Self (All Difficulties)
Unmake Them All
Ranged
Ignores Stealth
ACC : 113.75 / CRIT: 10% / DMG : 2-7
Stress +7
Bleed (135% Base) 3pts/rd for 3 rds
On Stygian / Bloodmoon
Stress +9
Bleed (135% Base) 4pts/rd for 3 rds
Shuffle Self (All Difficulties)
Embrace Futility
Ranged
ACC : 113.75 / Cannot CRIT / DMG : 1-3
Stress +18 (+20 on Stygian / Bloodmoon)
Shuffle (150% Base)
Debuff Target:
-20% DMG (4 rds) (150% Base)
-5 SPD (4 rds) (150% Base)
-10% CRIT (4 rds) (150% Base)
Dispersion
Ranged
Ignores Stealth
ACC : 113.75 / Cannot CRIT / DMG : 0
Blight (140% Base) 2pts/rd for 3 rds
On Stygian / Bloodmoon
Blight (140% Base) 3pts/rd for 3 rds
On Being Hit:
Target: Heal 12
Blight (150% Base) 2pts/rd for 3 rds
On Stygian / Bloodmoon
Target: Heal 4
Blight (150% Base) 6pts/rd for 3 rds
If Killed before its 3rd Turn
On Death: Transform into Heart of Darkness
Heart of Darkness will start with 75% of its MAX HP
Ascension
Support
Used on Third Turn
Transform into Heart of Darkness
Come Unto Your Maker
Ranged Free Action (During Round)
ACC : Cannot Miss / CRIT: 15% / DMG : 11-23
Used once if HP below 67% & 4 Heroes are Present
and again if HP below 33% & 3 Heroes are Present
Instantly Kills Selected Hero
Know This
Melee
Cooldown (1 rd)
Ignores Stealth
ACC : 113.75 / Cannot CRIT / DMG : 0
Stress +22 (+24 on Stygian / Bloodmoon)
Puncture
Ranged
Cooldown (1 rd)
Ignores Stealth
ACC : 113.75 / CRIT: 15% / DMG : 13-16
Stress +10 // Bleed (150% Base) 5pts/rd for 3 rds
On Stygian / Bloodmoon
Stress +12 // Bleed (150% Base) 6pts/rd for 3 rds
Dissolution
Ranged
Cooldown (1 rd)
ACC : 113.75 / CRIT: 15% / DMG : 13-16
Stun (160% Base) (All Difficulties)
Stress +10 // Blight (150% Base) 5pts/rd for 3 rds
On Stygian / Bloodmoon
Stress +12 // Blight (150% Base) 6pts/rd for 3 rds
Bump in the Night
Melee
ACC : 62.5 / CRIT : 2% / DMG : 2-5
Tic-Toc
Melee
Forward 1
ACC : 42.5 / Cannot CRIT / DMG : 2-5
Bump in the Night
Melee
ACC : 68.75 / CRIT : 6% / DMG : 2-6
Debuff Target:
-7 DODGE (3 rds) (120% Base)
Tic-Toc
Melee
Forward 1
ACC : 48.75 / Cannot CRIT / DMG : 2-6
Bump in the Night
Melee
ACC : 82.5 / CRIT : 9% / DMG : 3-8
Debuff Target:
-10 DODGE (3 rds) (140% Base)
Tic-Toc
Melee
Forward 1
ACC : 62.5 / Cannot CRIT / DMG : 3-8
Graveyard Slash
Melee
ACC : 82.5 / CRIT : 6% / DMG : 3-8
Graveyard Slash
Melee
ACC : 88.75 / CRIT : 12% / DMG : 4-11
Graveyard Slash
Melee
ACC : 102.5 / CRIT : 14% / DMG : 5-14
Graveyard Stumble
Melee
Forward 1
ACC : 42.5 / Cannot CRIT / DMG : 2-5
Graveyard Stumble
Melee
Forward 1
ACC : 48.75 / Cannot CRIT / DMG : 2-6
Graveyard Stumble
Melee
Forward 1
ACC : 62.5 / Cannot CRIT / DMG : 3-8
Axeblade
Melee
ACC : 72.5 / CRIT : 6% / DMG : 3-5
Axeblade
Melee
ACC : 78.75 / CRIT : 12% / DMG : 4-7
Debuff Target:
-20% Stun Resist (3 rds) (120% Base)
-20% Move Resist (3 rds) (120% Base)
Axeblade
Melee
ACC : 92.5 / CRIT : 14% / DMG : 5-10
Debuff Target:
-30% Stun Resist (3 rds) (140% Base)
-30% Move Resist (3 rds) (140% Base)
Dead Weight
Melee
ACC : 82.5 / CRIT : 6% / DMG : 2-4
Stun (100% Base)
Knockback 1 (100% Base)
Dead Weight
Melee
ACC : 88.75 / CRIT : 12% / DMG : 3-5
Stun (120% Base)
Knockback 1 (120% Base)
Dead Weight
Melee
ACC : 102.5 / CRIT : 14% / DMG : 4-7
Stun (140% Base)
Knockback 1 (140% Base)
Clumsy Axeblade
Melee
Forward 1
ACC : 42.5 / Cannot CRIT / DMG : 2-4
Clumsy Axeblade
Melee
Forward 1
ACC : 48.75 / Cannot CRIT / DMG : 3-5
Clumsy Axeblade
Melee
Forward 1
ACC : 62.5 / Cannot CRIT / DMG : 4-7
Foul Warding
Support
Cooldown (2 rds)
Guard Ally (3 rds)
Buff Self:
+25% PROT (2 rds)
Foul Warding
Support
Cooldown (2 rds)
Guard Ally (3 rds)
Buff Self:
+25% PROT (2 rds)
Crushing Blow
Melee
ACC : 88.75 / CRIT : 16% / DMG : 8-16
Debuff Target:
-30% Stun Resist (3 rds) (120% Base)
Ground Pound
Ranged
ACC : 88.75 / CRIT : 12% / DMG : 3-5
Stun (80% Base)
Crushing Blow
Melee
ACC : 102.5 / CRIT : 19% / DMG : 11-22
Debuff Target:
-40% Stun Resist (3 rds) (140% Base)
Ground Pound
Ranged
ACC : 102.5 / CRIT : 14% / DMG : 4-7
Stun (100% Base)
The Hero inside the Cauldron takes 8.75% HP Dmg
after any action taken by your Heroes or the Hag
Once the Trapped Hero hits Death's Door,or the Cauldron hits 0 HP the Hero is released at position 1
Fire In the Hole
Support
Lets the Pounder use BOOOOOOOM! (65% Chance)
or MISFIRE! (35% Chance)
Hot Shot
Melee
ACC : 77.5 / CRIT : 2% / DMG : 1
Has an Extremely Low Chance (1/1000) to be Used
Fire In the Hole
Support
Lets the Pounder use BOOOOOOOM! (70% Chance)
or MISFIRE! (30% Chance)
Hot Shot
Melee
ACC : 83.75 / CRIT : 2% / DMG : 1-2
Has an Extremely Low Chance (1/1000) to be Used
Fire In the Hole
Support
Lets the Pounder use BOOOOOOOM! (75% Chance)
or MISFIRE! (25% Chance)
Hot Shot
Melee
ACC : 97.5 / CRIT : 2% / DMG : 1-3
Has an Extremely Low Chance (1/1000) to be Used
Slice and Dice
Melee
ACC : 72.5 / CRIT : 12% / DMG : 3-5
Debuff Target:
-15% Bleed Resist (3 rds) (100% Base)
Uppercut Slice
Melee
ACC : 72.5 / CRIT : 6% / DMG : 2-4
Knockback 1 (100% Base)
Shank
Melee
ACC : 72.5 / CRIT : 6% / DMG : 4-8
Bleed (100% Base) 1 pt/rd for 3 rds
Harmless Poke
Melee
Forward 1
ACC : 42.5 / Cannot CRIT / DMG : 2-4
On Attack Hit:
Buff Self:
+2 SPD (3 rds)
Slice and Dice
Melee
ACC : 78.75 / CRIT : 16% / DMG : 4-7
Debuff Target:
-25% Bleed Resist (3 rds) (120% Base)
Uppercut Slice
Melee
ACC : 78.75 / CRIT : 12% / DMG : 3-5
Knockback 1 (120% Base)
Shank
Melee
ACC : 82.5 / CRIT : 12% / DMG : 5-11
Bleed (120% Base) 2 pts/rd for 3 rds
Harmless Poke
Melee
Forward 1
ACC : 52.5 / Cannot CRIT / DMG : 3-5
On Attack Hit:
Buff Self:
+2 SPD (3 rds)
Slice and Dice
Melee
ACC : 92.5 / CRIT : 19% / DMG : 5-10
Debuff Target:
-35% Bleed Resist (3 rds) (140% Base)
Uppercut Slice
Melee
ACC : 92.5 / CRIT : 14% / DMG : 4-7
Knockback 1 (140% Base)
Shank
Melee
ACC : 90 / CRIT : 14% / DMG : 7-15
Bleed (140% Base) 3 pts/rd for 3 rds
Harmless Poke
Melee
Forward 1
ACC : 60 / Cannot CRIT / DMG : 4-7
On Attack Hit:
Buff Self:
+2 SPD (3 rds)
Rain of Whips
Melee
ACC : 88.75 / CRIT : 4% / DMG : 1-2
Bleed (120% Base) 2 pts/rd for 3 rds
Stress + 5
Punishment
Melee
ACC : 88.75 / CRIT : 16% / DMG : 3-5
Bleed (120% Base) 3 pts/rd for 3 rds
Stress + 5
Point Blank Shot
Ranged
ACC : 92.5 / CRIT : 22% / DMG : 5-14
Knockback 1 (120% Base)
Debuff Self:
-2 SPD (3 rds)
Rain of Whips
Melee
ACC : 102.5 / CRIT : 7% / DMG : 1-3
Bleed (140% Base) 3 pts/rd for 3 rds
Stress + 5
Punishment
Melee
ACC : 102.5 / CRIT : 19% / DMG : 4-7
Bleed (140% Base) 4 pts/rd for 3 rds
Stress + 5
Point Blank Shot
Ranged
ACC : 100 / CRIT : 24% / DMG : 7-20
Knockback 1 (140% Base)
Debuff Self:
-2 SPD (3 rds)
Blanket Fire
Ranged
ACC : 72.5 / Cannot CRIT / DMG : 1-3
Debuff Target:
-2 DODGE (3 rds) (100% Base)
Rushed Shot
Melee
Back 1
ACC : 62.5 / CRIT : 6% / DMG : 2-4
Blanket Fire
Ranged
ACC : 78.75 / CRIT : 4% / DMG : 1-4
Debuff Target:
-4 DODGE (3 rds) (120% Base)
Rushed Shot
Melee
Back 1
ACC : 68.75 / CRIT : 12% / DMG : 3-5
Blanket Fire
Ranged
ACC : 92.5 / CRIT : 7% / DMG : 2-5
Debuff Target:
-6 DODGE (3 rds) (140% Base)
Rushed Shot
Melee
Back 1
ACC : 82.5 / CRIT : 14% / DMG : 4-7

Squeal
Ranged
Back 3
ACC : 102.5 / CRIT: 1% / DMG : 1
Stun (100% Base)
End This One
Ranged
ACC : 102.5 / Cannot CRIT / DMG : 1
Mark Target (2 rds)

End These Two
Ranged
ACC : 102.5 / Cannot CRIT / DMG : 1
Mark Target (2 rds)
Bit'o Squeal
Ranged
Only Used from Veteran Difficulty
ACC : 102.5 / CRIT: 2% / DMG : 1
Stun (100% Base)
Squeal
Ranged
Back 3
ACC : 108.75 / CRIT: 1% / DMG : 2
Stun (120% Base)
End This One
Ranged
ACC : 108.75 / Cannot CRIT / DMG : 2
Mark Target (2 rds)
End These Two
Ranged
ACC : 108.75 / Cannot CRIT / DMG : 2
Mark Target (2 rds)
Bit'o Squeal
Ranged
ACC : 108.75 / CRIT: 6% / DMG : 2
Always used as Wilbur's First Action of the Round
Stun (120% Base)
Squeal
Ranged
Back 3
ACC : 122.5 / CRIT: 1% / DMG : 2
Stun (140% Base)
End This One
Ranged
ACC : 122.5 / Cannot CRIT / DMG : 2
Mark Target (2 rds)
End These Two
Ranged
ACC : 122.5 / Cannot CRIT / DMG : 2
Mark Target (2 rds)
3X chance to be used
Bit'o Squeal
Ranged
Extra Target 1 (28% Chance)
ACC : 122.5 / CRIT: 9% / DMG : 2
Always used as Wilbur's First Action of the Round
Stun (140% Base)
Seaward Slash
Melee
ACC : 77.5 / CRIT : 2% / DMG : 5-9
Seaward Slash
Melee
ACC : 83.75 / CRIT : 6% / DMG : 6-13
Seaward Slash
Melee
ACC : 97.5 / CRIT : 9% / DMG : 9-17
Spearfishing
Melee
ACC : 77.5 / CRIT : 6% / DMG : 3-7
Spearfishing
Melee
ACC : 83.75 / CRIT : 12% / DMG : 5-9
Pull 1 (120% Base)
Spearfishing
Melee
ACC : 97.5 / CRIT : 14% / DMG : 6-13
Pull 1 (140% Base)
Octocestus
Melee
ACC : 77.5 / CRIT : 6% / DMG : 3-5
Bleed (100% Base) 2 pts/rd for 3 rds
Octocestus
Melee
ACC : 83.75 / CRIT : 12% / DMG : 4-7
Bleed (120% Base) 3 pts/rd for 3 rds
Octocestus
Melee
ACC : 97.5 / CRIT : 14% / DMG : 5-10
Bleed (140% Base) 4 pts/rd for 3 rds
Barnacle Barrier
Support
Cooldown (2 rds)
Guard Ally (3 rds)
Buff Self:
+25% PROT (3 rds)
Barnacle Barrier
Support
Cooldown (2 rds)
Guard Ally (3 rds)
Buff Self:
+25% PROT (3 rds)
Barnacle Barrier
Support
Cooldown (2 rds)
Guard Ally (3 rds)
Buff Self:
+25% PROT (3 rds)
Shocker
Melee
ACC : 92.5 / CRIT : 6% / DMG : 1
Stun (100% Base)
Disease (Any) (6% Chance)
Debuff Target:
-20% Bleed Resist (3 rds) (100% Base)
Salty Gouge
Melee
ACC : 92.5 / CRIT : 6% / DMG : 2-4
Bleed (100% Base) 2 pts/rd for 3 rds
Disease (Any) (6% Chance)
Debuff Target:
-5 DODGE (3 rds) (100% Base)
Shocker
Melee
ACC : 98.75 / CRIT : 12% / DMG : 1-2
Stun (120% Base)
Disease (Any) (6% Chance)
Debuff Target:
-30% Bleed Resist (3 rds) (120% Base)
Salty Gouge
Melee
ACC : 98.75 / CRIT : 12% / DMG : 3-5
Bleed (120% Base) 3 pts/rd for 3 rds
Disease (Any) (6% Chance)
Debuff Target:
-7 DODGE (3 rds) (120% Base)
Shocker
Melee
ACC : 112.5 / CRIT : 14% / DMG : 1-3
Stun (140% Base)
Disease (Any) (6% Chance)
Debuff Target:
-40% Bleed Resist (3 rds) (140% Base)
Salty Gouge
Melee
ACC : 112.5 / CRIT : 14% / DMG : 4-7
Bleed (140% Base) 4 pts/rd for 3 rds
Disease (Any) (6% Chance)
Debuff Target:
-10 DODGE (3 rds) (140% Base)
Buff
+50% PROT
+25% Stun Resist
+50% Bleed Resist
+50% Blight Resist
Heave To!
Melee
ACC : 102.5 / Cannot CRIT / DMG : 0
Fails if used vs Virtued Heroes
Transfers Self Buff to Drowned Crew
Buff lasts until the Chained Hero is Unchained if Chained Hero hits 100 or 200 Stress or the Anchorman is dead
Heal Self to Full
After any Action taken by Heroes or Crew:
+6 Stress to Chained Hero
Heal Drowned Crew for 2.5% of Max HP
Heave To!
Melee
ACC : 108.75 / Cannot CRIT / DMG : 0
Fails if used vs Virtued Heroes
Transfers Self Buff to Drowned Crew
Buff lasts until the Chained Hero is Unchained if Chained Hero hits 100 or 200 Stress or the Anchorman is dead
Heal Self to Full
After any Action taken by Heroes or Crew:
+6 Stress to Chained Hero
Heal Drowned Crew for 3% of Max HP
Heave To!
Melee
ACC : 122.5 / Cannot CRIT / DMG : 0
Fails if used vs Virtued Heroes
Transfers Self Buff to Drowned Crew
Buff lasts until the Chained Hero is Unchained if Chained Hero hits 100 or 200 Stress or the Anchorman is dead
Heal Self to Full
After any Action taken by Heroes or Crew:
+6 Stress to Chained Hero
Heal Drowned Crew for 3.5% of Max HP
Headhunt
Melee
ACC : 87.5 / CRIT: 12% / DMG : 5-11
75% Chance to be used vs Marked Heroes
Bleed (100% Base) 2 pts/rd for 3 rds
Headhunt
Melee
ACC : 93.75 / CRIT: 16% / DMG : 7-15
75% Chance to be used vs Marked Heroes
Bleed (120% Base) 3 pts/rd for 3 rds
Headhunt
Melee
ACC : 107.5 / CRIT: 19% / DMG : 10-20
75% Chance to be used vs Marked Heroes
Bleed (140% Base) 4 pts/rd for 3 rds
Head Games
Support
Only usable if there is another Collected apart from itself
41.6% Chance to Guard Collector
41.6% Chance to Guard Collected Highwayman
Guard Ally (2 rds)
Buff Self:
+25% PROT (4 rds)
Head Knocker
Melee
ACC : 92.5 / CRIT: 2% / DMG : 3-7
Stun (100% Base)
Head Knocker
Melee
ACC : 98.75 / CRIT: 6% / DMG : 5-9
Stun (110% Base)
Head Knocker
Melee
ACC : 112.5 / CRIT: 9% / DMG : 6-13
Stun (120% Base)
Headache
Support
40% Chance to be used
28.6% Chance to be used on Collector
57.1% Chance to be used on Collected Highwaymen
Buff Target:
+10 ACC (4 rds)
+10% CRIT (4 rds)
+50% DMG (4 rds)
Headstrong
Support
20% Chance to be used
62.5% Chance to be used on the Collector
25% Chance to Target Ally with Lowest HP %
Target:
Heal 6-12
Head Rush
Ranged
ACC : 97.5 / CRIT: 2% / DMG : 2-4
40% Chance to be used
50% Chance to Target Most Stressed Hero
Stress +10
Headstrong
Support
20% Chance to be used
62.5% Chance to be used on the Collector
25% Chance to Target Ally with Lowest HP %
Target:
Heal 8-14
Head Rush
Ranged
ACC : 103.75 / CRIT: 6% / DMG : 3-5
40% Chance to be used
50% Chance to Target Most Stressed Hero
Stress +10
Headstrong
Support
20% Chance to be used
62.5% Chance to be used on the Collector
25% Chance to Target Ally with Lowest HP %
Target:
Heal 10-18
Head Rush
Ranged
ACC : 117.5 / CRIT: 9% / DMG : 4-7
40% Chance to be used
50% Chance to Target Most Stressed Hero
Stress +10
Clapperclaw
Melee
ACC : 82.5 / CRIT: 2% / DMG : 2-4
60% Chance to Target Marked Heroes
Stress +10
On Attack Hit:
Buff Self:
+20 ACC, +5% CRIT (4 rds)
+50% DMG, +25% PROT (4 rds)
Clapperclaw
Melee
ACC : 88.75 / CRIT: 6% / DMG : 3-5
66.7% Chance to Target Marked Heroes
Stress +10
On Attack Hit:
Buff Self:
+20 ACC, +5% CRIT (4 rds)
+50% DMG, +25% PROT (4 rds)
Clapperclaw
Melee
ACC : 102.5 / CRIT: 9% / DMG : 4-7
71.4% Chance to Target Marked Heroes
Stress +10
On Attack Hit:
Buff Self:
+20 ACC, +5% CRIT (4 rds)
+50% DMG, +25% PROT (4 rds)
Clapperclaw
Melee
ACC : 115 / CRIT: 14% / DMG : 5-9
71.4% Chance to Target Marked Heroes
Stress +10
On Attack Hit:
Buff Self:
+20 ACC, +5% CRIT (4 rds)
+50% DMG, +25% PROT (4 rds)
The Hero inside the Pyre takes 6% HP Dmg
after any action taken by your Heroes or the Fanatic
Once the Trapped Hero hits Death's Door,or the Pyre hits 0 HP the Hero is released at position 1
The Hero inside the Pyre takes 8% HP Dmg
after any action taken by your Heroes or the Fanatic
Once the Trapped Hero hits Death's Door,or the Pyre hits 0 HP the Hero is released at position 1
The Hero inside the Pyre takes 9% HP Dmg
after any action taken by your Heroes or the Fanatic
Once the Trapped Hero hits Death's Door,or the Pyre hits 0 HP the Hero is released at position 1
Pulsating Eggs Passive
Debuff
Disable all Healing Skills
Gather the Blood
Melee
Forward 4
ACC : 83.75 / CRIT: 4% / DMG : 2-6
Apply Crimson Curse (31% Chance)
Predigestion
Melee
Forward 1
ACC : 83.75 / CRIT: 9% / DMG : 2-6
Blight (120% Base) 3 pts/rd for 3 rds
Debuff Target:
-25% Bleed Resist (3 rds) (120% Base)
Buried Blast
Ranged
Cooldown (3 rds)
Extra Target 1
ACC : 88.75 / Cannot CRIT / DMG : 5-9
Stun (105% Base)
Debuff Target:
-40 DODGE (3 rds) (120% Base)
Subterranean Skewer
Melee
Back 1
ACC : 88.75 / CRIT: 12% / DMG : 8-11
Bleed (120% Base) 3 pts/rd for 3 rds
Debuff Target:
-25% Bleed Resist (3 rds) (120% Base)
Maddening Whine
Ranged
Back 4
Cooldown (1 rd)
Usable in Thirsty Form
ACC : 88.75 / CRIT: 8% / DMG : 3
Stress + 11
The Thirst
Melee
Forward 4
Usable in Thirsty Form
ACC : 98.75 / CRIT: 6% / DMG : 3-5
Change to Bloodlust Form
Apply Crimson Curse (31% Chance)
> Stress + 8 (85% Chance)
Self: Heal 4 & Receive Target Blight
Buff Self:
+25% Stun Skill Chance (6 rds)
The Thirst
Melee
Forward 4
Cooldown (1 rd)
Only Usable in Bloodlust Form
ACC : 98.75 / CRIT: 12% / DMG : 6-8
Apply Crimson Curse (31% Chance)
Stress + 12 (85% Chance)
Self: Heal 6 & Receive Target Blight
Debuff Self:
-18 ACC (3 rds) // -3 SPD (3 rds)
Deafening Whine
Ranged
Back 4
Cooldown (1 rd)
Only Usable in Bloodlust Form
ACC : 88.75 / CRIT: 10% / DMG : 2
Stun (100% Base)
Stress +5
Bombing Run
Ranged
Forward 4
Extra Target 1 (25% Chance)
Only Usable in Bloodlust Form
ACC : 83.75 / CRIT: 6% / DMG : 4-5
Bleed (120% Base) 3pts/rd for 3 rds
Rib Cracker
Ranged
Back 2
Usable in Thirsty Form
ACC : 88.75 / CRIT: 8% / DMG : 4-7
Push 1 (110% Base)
Debuff Target:
-2 SPD (4 rds) (120% Base)
The Thirst
Melee
Forward 4
Cooldown (1 rd) // Usable in Thirsty Form
ACC : 98.75 / CRIT: 6% / DMG : 2-6
Change to Bloodlust Form
Apply Crimson Curse (45% Chance)
Stress + 8 (85% Chance)
Self: Heal 8 & Receive Target Blight
Debuff Self: -18 ACC (3 rds) // -3 SPD (3 rds)
Clear Riposte
Skewering Repartee
Melee
Forward 2
Cooldown (2 rds)
Only Usable in Thirsty Form
ACC : 93.75 / CRIT: 6% / DMG : 6-10
-75% DMG vs rank 4 // -40% DMG vs rank 3
-20% DMG vs rank 2
Bleed (120% Base) 3pts/rd for 3 rds
Activate Riposte (2 rds)
Riposte: -75% DMG // -3% CRIT
Riposte Attack
Melee
ACC : 88.75 / CRIT: 6% / DMG : 6-8
Hidden Modifiers:
Riposte: -75% DMG // Riposte: -3% CRIT
The Thirst
Melee
Cooldown (4 rds)
Only Usable in Bloodlust Form
ACC : 88.75 / CRIT: 8% / DMG : 5-9
Apply Crimson Curse (45% Chance)
Stress + 12 (85% Chance)
Self: Heal 8 & Receive Target Blight
Debuff Self:
-18 ACC (3 rds) // -3 SPD (3 rds)
Piercing Foreleg
Melee
Forward 2
Only Usable in Bloodlust Form
ACC : 93.75 / CRIT: 6% / DMG : 8-14
-80% DMG vs rank 4 //-65% DMG vs rank 3 //
-30% DMG vs rank 2
Debuff Target:
-23% Bleed Resist (3 rds) (120% Base)
Needling Execration
Melee
Back 2
Only Usable in Bloodlust Form
ACC : 88.75 / CRIT: 12% / DMG : 3-8
Stress +10 (90% Chance)
Bleed (120% Base) 3pts/rd for 3 rds
Mark Target (3 rds)
Feed the Soil
Ranged
Extra Target 1
ACC : 102.5 / CRIT: 9% / DMG : 5-6
Stress +10
Bleed (140% Base) 2pts/rd for 3 rds
Skyward Shield
Support
Change to Offscreen Mode and become untargettable
Plummeting Doom
Ranged
Extra Target 1 (40% Chance)
ACC : 132.5 / CRIT: 19% / DMG : 9-11
Change to OnScreen Mode and become targettable
Stun (140% Base)
Push 2 (140% Base)
Support
If OnScreen Mode: Guard Garden Guardian
Unstable Resonance
Ranged
ACC : 92.5 / Cannot CRIT / DMG : 10-15
Kill Self
Blight (100% Base) 2 pts/rd for 3 rds
Stress +8
If a Crystalline Aberration is killed by a Hero, said Hero Heals 2 HP
If a Crystalline Aberration is killed by a Hero, said Hero Heals 4 HP
If a Crystalline Aberration is killed by a Hero, said Hero Heals 5 HP
Explosive Undoing
Melee
ACC : 92.5 / Cannot CRIT / DMG : 2-4
Kill Self
Horror 3 stress/rd for 3 rds
Unstable Resonance
Ranged
ACC : 97.5 / Cannot CRIT / DMG : 12-16
Kill Self
Blight (110% Base) 2 pts/rd for 3 rds
Stress +8
Explosive Undoing
Melee
ACC : 97.5 / Cannot CRIT / DMG : 3-6
Kill Self
Horror 3 stress/rd for 3 rds
Unstable Resonance
Ranged
ACC : 102.5 / Cannot CRIT / DMG : 20-25
Kill Self
Blight (120% Base) 3 pts/rd for 3 rds
Stress +8
Explosive Undoing
Melee
ACC : 102.5 / Cannot CRIT / DMG : 5-8
Kill Self
Horror 3 stress/rd for 3 rds
Sow the Seeds
Ranged
ACC : 91.75 / Cannot CRIT / DMG : 1-2
Blight (120% Base) 3 pts/rd for 3 rds
Stress +10
Ceaseless Labor
Melee
ACC : 83.75 / CRIT: 6% / DMG : 4-7
Riposte Attack
Melee
ACC : 98.75 / CRIT: 4% / DMG : 3-5
Hidden Modifier:
Riposte: -40% DMG
Riposte Attack
Melee
ACC : 110 / CRIT: 6% / DMG : 4-7
Hidden Modifier:
Riposte: -40% DMG
Pause From Labor
Support
Cooldown (2 rds)
Self: Heal 5
Buff Self:
+4 SPD (2 rds)
Pause From Labor
Support
Cooldown (2 rds)
Self: Heal 7
Buff Self:
+5 SPD (2 rds)
Ceaseless Labor
Melee
ACC : 95 / CRIT: 9% / DMG : 5-9
Sow the Seeds
Ranged
ACC : 103 / Cannot CRIT / DMG : 2-3
Blight (140% Base) 4 pts/rd for 3 rds
Stress +10
Hollow Keening
Ranged
ACC : 92.5 / CRIT: 0% / DMG : 0
Stress +5
Horror 5 stress/rd for 3 rds
Hollow Keening
Ranged
ACC : 102.5 / CRIT: 0% / DMG : 0
Stress +8
Horror 6 stress/rd for 3 rds
The Soil Thaws
Support
Starting Cooldown (3 rounds)
Transform Back into a Farmhand
Frozen Farmhand Passive
Support / Debuff
Permanently Guards the Miller
All Heroes: Disable Guard Skills
Haunting Revelation
Ranged
Cooldown (2 rds)
ACC : 93.75 / CRIT: 12% / DMG : 2-4
Horror 4 stress/rd for 3 rds
Flail The Crops
Melee
ACC : 93.75 / CRIT: 6% / DMG : 5-9
Blight (120% Base) 3 pts/rd for 3 rds
Haunting Revelation
Ranged
Cooldown (1 rd)
ACC : 105 / CRIT: 14% / DMG : 2-5
Horror 4 stress/rd for 3 rds
Flail The Crops
Melee
ACC : 105 / CRIT: 6% / DMG : 6-12
Blight (140% Base) 4 pts/rd for 3 rds
Roots
Melee
Cooldown (6 rds)
ACC : 100 / CRIT: 7% / DMG : 4-6
Debuff Target:
-5 SPD (2 rds) (140% Base)
-12 ACC (2 rds) (140% Base)
Shard of Growth
Support
Cooldown (3 rds)
Restoration 5 hp/rds for 2 rds
Reality Bend
Ranged
Extra Target 1 (20% Chance)
ACC : 98.75 / CRIT: 4% / DMG : 1-2
Stress +8
Debuff Target:
-25% Healing Received (3 rds) (120% Base)
-11 ACC (2 rds) (120% Base)
+35% Random Target Chance (2 rds) (120% Base)
Riposte Attack
Melee
ACC : 93.75 / CRIT: 6% / DMG : 4-7
Hidden: Riposte: -40% DMG // Riposte: +2% CRIT
Debuff Target:
+20% Stress (3 rds) (105% Base)
Reality Bend
Ranged
Extra Target 1 (20% Chance)
ACC : 110 / CRIT: 7% / DMG : 1-3
Stress +8
Debuff Target:
-25% Healing Received (4 rds) (140% Base)
-12 ACC (2 rds) (140% Base)
+35% Random Target Chance (2 rds) (140% Base)
Riposte Attack
Melee
ACC : 105 / CRIT: 9% / DMG : 6-8
Hidden: Riposte: -40% DMG // Riposte: +4% CRIT
Debuff Target:
+20% Stress (3 rds) (125% Base)
Adamantite Passive
Support
When alive: Permanently Guards the Fracture
Eternal Blossom
Ranged
Used by Traumatic Aberration
ACC : 115 / CRIT: 2% / DMG : 3-5
Kill Self
Horror 3 stress/rd for 6 rds
Debuff Target:
-75% Healing Received (2 rds) (140% Base)
Eternal Blossom
Ranged
Used by Temporal Aberration
ACC : 125 / CRIT: 5% / DMG : 5-11
Kill Self
Stun(140% Base)
Eternal Blossom
Ranged
Used by Unstable Aberration
ACC : 100 / CRIT: 1% / DMG : 4-6
Kill Self
Heal Fracture for Damage Dealt
Eternal Blossom
Ranged
Used by Pestilential Aberration
ACC : 125 / CRIT: 2% / DMG : 6-10
Kill Self
Blight (140% Base) 5 pts/rd for 3 rds
Riposte Attack
Melee
ACC : 120 / CRIT : 12% / DMG : 6-8
Slice and Dice
Melee
ACC : 93.75 / CRIT : 20% / DMG : 6-11
Debuff Target:
-35% Bleed Resist (3 rds) (160% Base)
Uppercut Slice
Melee
ACC : 93.75 / CRIT : 15% / DMG : 4-9
Knockback 1 (140% Base)
Shank
Melee
ACC : 92.5 / CRIT : 11% / DMG : 7-15
Bleed (140% Base) 3 pts/rd for 3 rds
Mark Target (3 rds)
Harmless Poke
Melee
Forward 1
ACC : 62.5 / Cannot CRIT / DMG : 4-9
On Attack Hit:
Buff Self:
+2 SPD (3 rds)
Death Lash
Melee
ACC : 113.75 / CRIT: 10% / DMG : 4-7
Stress +5
Debuff Target:
-23% Bleed Resist (3 rds) (150% Base)
The Finger
Ranged
Cooldown (1 rd)
ACC : 113.75 / CRIT: 20% / DMG : 7-14
Stress +15
Bleed (150% Base) 6 pts/rd for 3 rds
Grand Guard
Support
Cooldown (2 rds)
Guard Ally (3 rds)
Buff Self:
+33% PROT (3 rds)
Bolster
Support
Buff Target:
+5 SPD (3 rds)
+10 ACC (3 rds)
+10% CRIT (3 rds)
Ritualic Restoration
Support
Heal Ally : 10-18 (Cannot Target Self)
Unbearable Tremors
Ranged
ACC : 113.75 / Cannot CRIT / DMG : 0
Stress +7 (90% Chance)
Gnash
Melee
ACC : 103.75 / CRIT: 15% / DMG : 6-13
+50% DMG vs Marked
Stress +5
Nibble
Melee
Forward 3
ACC : 83.75 / Cannot CRIT / DMG : 1-3
Fetch
Melee
ACC : 113.75 / CRIT: 10% / DMG : 4-9
Pull 2 (150% Base)
Stun (130% Base)
Venomous Phlegm
Ranged
Cooldown (2 rds)
ACC : 103.75 / CRIT: 15% / DMG : 4-9
Mark Target (3 rds)
Blight (150% Base) 6 pts/rd for 3 rds
Violent Hack
Ranged
Back 3
ACC : 83.75 / Cannot CRIT / DMG : 1-3
Banish
Melee
ACC : 113.75 / CRIT: 10% / DMG : 4-9
Knockback 2 (150% Base)
Reconstitute
Support
Heal Target: 8-18
Buff Target:
+15% PROT (3 rds)
+3 SPD (3 rds)
Teleport
Ranged
ACC : Cannot MISS / Cannot CRIT / DMG : 0
Cannot be used on Round 1
Teleports Party to random Room
Displace
Ranged
ACC : 113.75 / Cannot CRIT / DMG : 1-3
Shuffle (100% Base)
Debuff Target:
-5 SPD (4 rds) (150% Base)
Reunion
Ranged
ACC : 113.75 / CRIT: 10% / DMG : 5
83.3% Chance to Target Marked Heroes
+50% DMG vs Marked
Stress +8
(+12 on Stygian / Bloodmoon)
Bleed (150% Base) 3pts/rd for 3 rds
We Are the Same
Ranged
ACC : 113.75 / CRIT: 10% / DMG : 2
50% Chance to Target Most Stressed Hero
Stress +18
(+22 on Stygian / Bloodmoon)
It Chooses
Melee
Cooldown (2 rds)
ACC : 113.75 / Cannot CRIT / DMG : 1-3
Not used if any Marked Heroes are present
Mark Target (3 rds)
Stun (150% Base)
We Are the Same
Melee
ACC : 113.75 / Cannot CRIT / DMG : 2
75% Chance to target Most Stressed Hero
Stress +8
(+12 on Stygian / Bloodmoon)
On Death: Ancestor takes 1 DMG

(Does not Apply to Dungeons with Fixed Layouts)
1. Furthest Room Away (only count rooms not individual tiles)
2. Downmost Room if there are multiple rooms tied for furthest
3. Rightmost room if there are multiple rooms tied for downmost
Hallway Bosses:
All Hallway Bosses can only spawn once per expedition outside of Curio Interactions
All Signature Trinkets are unique - only 1 of each can be obtained in an estate
Apprentice: Bone Rabble (33.3%) Bone Soldier (66.7%)
Veteran: Bone Rabble (20%) Bone Soldier (60%) Bone Defender (20%)
Champion: Bone Soldier (57%) Bone Defender (29%) Bone Captain (14%)
Minions are Summoned in Front of the Necromancer
[Only 1 of each Brigand can be present at any time & Multiple Brigands may be Summoned at a time]
(EX) Chance for Both Brigands to be summoned on Apprentice difficulty: 55% * 0.5^2
Apprentice
Chance to roll to Summon Additional Brigands: 55%
If at least 1 Empty Space - Summon Brigand Cutthroat (0.5) // Summon Brigand Fusilier (0.5)
Veteran
Chance to roll to Summon Additional Brigands: 60%
If 2 Empty Spaces - Summon Brigand Bloodletter (0.10)
If at least 1 Empty Space - Summon Brigand Cutthroat (0.5) // Summon Brigand Fusilier (0.5)
Champion
Chance to roll to Summon Additional Brigands: 67%
If 2 Empty Spaces - Summon Brigand Bloodletter (0.15)
If at least 1 Empty Space - Summon Brigand Cutthroat (0.5) // Summon Brigand Fusilier (0.5)
Apprentice: 1 Puzzling Trapezohedron
Veteran: 1-3 Puzzling Trapezohedrons
Champion: 3-5 Puzzling Trapezohedrons
Collected Vestal (1) // Collected Man-at-Arms (1) // Collected Highwayman (2)
Summon Chances
Collected Highwayman (43%) // Collected Man-at-Arms (28.5%) // Collected Vestal (28.5%)
Positive Quirks
Corvid's Eye: +8 ACC, +8% Scouting Chance
Corvid's Grace: +6 DODGE, +25% Move Resist
Corvid's Resilience: +33% Disease Resist
Negative Quirks
Corvid's Blindness: -10 ACC if Torch above 50
Corvid's Appetite: +100% Food Consumed, 33% Chance to Interact with Body Curios
Corvid's Curiosity: 27.5% Chance to Interact with All Curios
Flesh Head -> Flesh Head (50%) // Flesh Heart (25%) // Flesh Bone (25%)
Flesh Butt -> Flesh Butt (50%) // Flesh Heart (25%) // Flesh Bone (25%)
If Front 2 Positions
Flesh Heart -> Flesh Head (50%) // Flesh Bone (50%)
Flesh Bone -> Flesh Head (50%) // Flesh Heart (50%)
If Back 2 Positions
Flesh Heart -> Flesh Butt (50%) // Flesh Bone (50%)
Flesh Bone -> Flesh Butt (50%) // Flesh Heart (50%)
Head Trinkets Not Collected
Puzzling Trapezohedron (75%) or a Head Trinket(25%)
Head Trinkets All Collected
Puzzling Trapezohedron (100%)
Chance to replace a Hallway Battle if 13 or more Inventory Slots are Filled
Apprentice: 3% Chance
Veteran: 4% Chance
Champion: 5% Chance
Apprentice: 1% Chance
Veteran: 8% Chance
Champion: 12% Chance
2 Heroes with the Crimson Curse: 20% Chance
3 Heroes with the Crimson Curse: 33% Chance
4 Heroes with the Crimson Curse: 75% Chance
These Quirks will be obtained following the listed Order
(These Quirks are limited to 1 Hero per Roster)
Prismatic Isolation: +25% Debuff Resist
Prismatic Stability: +25% Move Resist
Prismatic Solidity: +25% Stun Resist
Prismatic Coagulation: +25% Bleed Resist
Prismatic Purity: +25% Blight Resist
Prismatic Calm: -30% Stress
Prismatic Force: +15% DMG
Prismatic Speed: +3 SPD
Prismatic Precision: +4% CRIT
Prismatic Eye: +8 ACC
Husk Slayer: +10 ACC and +5% CRIT vs Husk
Scythemaster: +15% DMG vs Husk
After The Show Begins has been used
Sycophant (50%) // Supplicant (50%)
After The Second Act has been used
Sycophant (40%) // Supplicant (40%) // Chevalier (20%)
After The Third Act has been used
Esquire (50%) // Supplicant (37.5%) // Chevalier (12.5%)




+5 DODGE
Color of Madness DLC
+25% Move Resistance
+8% Scouting Chance
+5% CRIT vs Eldritch
+5% CRIT vs Human
Color of Madness DLC
Color of Madness DLC
and +3 SPD when wearing no Trinkets
Color of Madness DLC
+5% CRIT vs Beast
Color of Madness DLC
+5% CRIT vs Unholy
-15% Stress vs Eldritch
-15% Stress vs Human
-15% Stress vs Beast
Additional Heroes with this Quirk can be obtained through Town Events
Color of Madness DLC
-15% Stress vs Unholy
Color of Madness DLC
Color of Madness DLC
+25% Healing Received
Color of Madness DLC
+25% Healing Received
Color of Madness DLC
+25% Stress Heal Received
Color of Madness DLC
+13.3% chance of winning Trinkets while Gambling
A Hero at Death's Door with a DoT applied to them could
move before the healer b/c of the speed from the Quirk
and end up taking a Death Blow check and possibly die
Color of Madness DLC
Color of Madness DLC
Color of Madness DLC
Color of Madness DLC
Color of Madness DLC
Color of Madness DLC
Color of Madness DLC
Color of Madness DLC
Color of Madness DLC
Color of Madness DLC
Color of Madness DLC
Color of Madness DLC
20% Chance of interacting with All Curios
20% Chance of interacting with All Curios
33% chance of interacting with 'Body' Curios
40% chance of interacting with 'Fountain' Curios
35% chance of interacting with 'Torture' Curios
40% chance of interacting with 'Torture' Curios
40% chance of interacting with 'Unholy' Curios
40% chance of interacting with 'Unholy' Curios
40% chance of interacting with 'Drink' Curios
40% chance of interacting with 'Reflective' Curios
Steals Loot
35% chance of interacting with 'Worship' Curios
40% chance of interacting with 'Worship' Curios
35% chance of interacting with 'Worship' Curios
40% chance of interacting with 'Treasure' Curios
35% chance of interacting with 'Treasure' Curios
Steals Loot
40% chance of interacting with 'Body' Curios
40% chance of interacting with 'Haunted' Curios
40% chance of interacting with 'Treasure' Curios
40% chance of interacting with 'Food' Curios
-5 DODGE
Color of Madness DLC
-10 ACC vs Eldritch
-10 ACC vs Human
-10 ACC vs Beast
-10 ACC vs Unholy
4% Chance to Pass Turn
Color of Madness DLC
-10% Blight Resist
Color of Madness DLC
Color of Madness DLC
Color of Madness DLC
-10 DODGE
Color of Madness DLC
Color of Madness DLC
Color of Madness DLC
Color of Madness DLC
Color of Madness DLC
-20% Healing Received
Color of Madness DLC
-20% Healing Received
Color of Madness DLC
-20% Stress Heal Received
Color of Madness DLC
+13.3% Chance of losing Trinkets while Gambling
Hero will only undertake Endless Harvest Quest in The Farmstead
This Quirk Cannot be removed via Sanitarium
Color of Madness DLC




The Chance for Heroes to gain Quirks at the end of an Expedition is based on Quest Success and the Hero's current Stress Level, with Unsuccessful Expeditions and Higher Stress Levels leading to a Higher Chance to gain a Negative Quirk.
Negative Quirks will become Locked over time, and can be removed by using the Sanitarium, through Positive Curio Interactions, or being replaced by another. In addition, Heroes have a 25% Chance to get an existing Negative Quirk Reinforced after every Expedition.
Only up to 3 Positive Quirks can be manually reinforced using the Sanitarium at one time, with Auto Locked Quirks introduced with the Color of Madness DLC not counting towards the cap.
The Cost of removing and reinforcing Quirks using the Sanitarium gets more expensive the Higher the Hero's Resolve Level is.
33% Chance to Interact with Body Curios
Tavern
Bookshelf
Confession Booth
Decorative Urn
Iron Maiden
Sarcophagus
Suit of Armor
Ancient Coffin
Beast Carcass
Eerie Spiderweb
Troubling Effigy
Occult Scrawlings
Pile of Bones
Pile of Scrolls
Sacrificial Stone
Bas-Relief
Eerie Coral
Eldritch Altar
Stack of Books
Disturbing Diversion
Forgotten Delicacies
Wine Crate
These Quirks are unique in that they are limited to 1 per Estate, meaning that once a Hero has obtained the Quirk, no other Hero can gain said Quirk until it is Lost or Removed. They are also unique in that despite being treated like a Reinforced Quirk, they do not count towards the Reinforced Quirk Limit, letting a Hero potentially have 5 Reinforced Positive Quirks at once.
Prismatic Quirks are obtained by slaying the Thing from the Stars, after which One Prismatic Quirk is rewarded to a Random Hero at the end of the Expedition. These Quirks are gained in a fixed order, and the order in which they are obtained is identical to the order they have been listed on the Right.
Prismatic Quirks are lost if a Hero is slain during the Endless Harvest, in which case they become Lost in Time and Space, and the Quirk is re-added to the Thing from the Stars' Prismatic Quirk List.
Enlightened (7.5%) // Unquiet Mind (7.5%) // Calm (3.75%)
Bad Gambler (2.88%) // Skilled Gambler (2.88%)
No Provisions - Random Negative Quirk (6.7%)
No Provisions - Ruins Tactician (12.5%)
No Provisions - Weald Explorer (8.35%)
No Provisions - Slowdraw (10%)
No Provisions - Random Positive Quirk (18.75%)
No Provisions - Random Negative Quirk (18.75%)
No Provisions - Random Negative Quirk (16.7%)
No Provisions - Warrens Explorer (12.5%)
No Provisions - Warrens Scrounger (12.5%)
No Provisions - Random Negative Quirk (22.2%)
No Provisions - Purge Negative Quirk (10%)
No Provisions - Random Negative Quirk (11.1%)
No Provisions - Random Negative Quirk (15%)
12~18 Food
2 Shovels
0~1 Antivenom
0~2 Bandages
1~2 Medicinal Herbs
3~4 Keys
2~3 Holy Water
12~16 Torches
24 Food
3 Shovels
0~1 Antivenom
0~2 Bandages
2~4 Medicinal Herbs
4~5 Keys
3~5 Holy Water
20~24 Torches
36 Food
4 Shovels
0~1 Antivenom
0~2 Bandages
4 Medicinal Herbs
5 Keys
5 Holy Water
24~28 Torches


16~18 Food
4 Shovels
2~3 Antivenom
2~3 Bandages
1~2 Medicinal Herbs
2~3 Keys
1~2 Holy Water
16~18 Torches
24 Food
4 Shovels
3~4 Antivenom
3 Bandages
2~3 Medicinal Herbs
4 Keys
2 Holy Water
24 Torches
36 Food
4+ Shovels
4~5 Antivenom
3~4 Bandages
3 Medicinal Herbs
5 Keys
2~3 Holy Water
24~28 Torches
Blight (100% Base) 2pts/rd for 3 rds
Blight (110% Base) 2pts/rd for 3 rds
Blight (120% Base) 3pts/rd for 3 rds
12~16 Food
2 Shovels
1~2 Antivenom
2~3 Bandages
2~3 Medicinal Herbs
2 Keys
1~2 Holy Water
12~16 Torches
24 Food
2 Shovels
2~3 Antivenom
3~4 Bandages
4 Medicinal Herbs
3~4 Keys
2~3 Holy Water
16~24 Torches
36 Food
2~3 Shovels
3 Antivenom
4~5 Bandages
5 Medicinal Herbs
5 Keys
3 Holy Water
24 Torches
Bleed (100% Base) 2pts/rd for 3 rds
Bleed (110% Base) 2pts/rd for 3 rds
Bleed (120% Base) 3pts/rd for 3 rds
12~16 Food
4 Shovels
0~1 Antivenom
2 Bandages
2~3 Medicinal Herbs
2~3 Keys
1~2 Holy Water
12~16 Torches
24 Food
4 Shovels
0~1 Antivenom
3 Bandages
4 Medicinal Herbs
3~4 Keys
2~3 Holy Water
20~24 Torches
36 Food
4+ Shovels
0~1 Antivenom
4~5 Bandages
5 Medicinal Herbs
4~5 Keys
2~3 Holy Water
24~28 Torches
Debuff Hero
-5 SPD (12 rds) // -20 DODGE (12 rds)
Debuff Hero
-6 SPD (12 rds) // -25 DODGE (12 rds)
Debuff Hero
-8 SPD (12 rds) // -30 DODGE (12 rds)
Shovels: Clears Obstacles & Used to get Firewood
Antivenom: Bring if you have the space
Bandages: Useful for the Bleed Heavy Bloodsucker Enemies
Keys: Completely Useless
Med. Herbs: Cures Debuffs & has Useful Curio Interactions
Holy Water: Resistance Buffs & has Useful Curio Interactions
Torches: Clears Obstacles & Provides a Useful ACC Buff
The Blood: Unsurprisingly useful in The Courtyard
Laudanum: Minimal use outside of the Baron Boss Fight
Bleed (100% Base) 2pts/rd for 3 rds
Summon Sycophants and Supplicants (50% Chance)
Bleed (110% Base) 2pts/rd for 3 rds
Summon Sycophants, Supplicants, Chevaliers (50% Chance)
Bleed (120% Base) 3pts/rd for 3 rds
Summon Sycophants, Supplicants, Chevaliers (50% Chance)
Shovels & Torches: Completely Useless
Antivenom: Useful for Curing Blight
Bandages: Useful for Curing Bleed
Keys: Useful for the Cabinet Curio to gain more Provisions
Medicinal Herbs: Useful for Curing Debuffs
Holy Water: Useful Resistance Buffs
Laudanum: Decent for Curing Horror
Used to stave off Hunger Checks and when Camping
Heroes consume 1 Food per Hunger Check at Base
If manually consumed: Heals 5% of the Hero's MAX HP (Rounded Up)
A Hero may only consume 4 Food manually until a Battle is fought,
which refreshes the 4 Food Limit
Crimson Court DLC
4~10 additional Food given for any Expedition
+15% Healing from eating Food
Used to Clear Obstacles in Corridors
Used for many Curio Interactions
[Short: 4 / Medium: 6 / Long & Epic: 8 / Exhausting: 10]
Used to Cure Blight
Used for many Curio Interactions
Color of Madness DLC
Adds Effect:
+33% Blight Resist (3 rds)
Used to Cure Bleed
Used for many Curio Interactions
[Short: 6 / Medium: 9 / Long & Epic: 12 / Exhausting: 15]
Used to Cure Debuffs
Used for many Curio Interactions
Color of Madness DLC
Adds Effect:
+25% Disease Resist (3 rds)
Used for many Curio Interactions
[Short: 6 / Medium: 9 / Long & Epic: 12 / Exhausting: 15]
Used for many Curio Interactions
Used to Buff a Hero's Resistances
Buff Hero
+33% Bleed Resist (4 rds)
+33% Blight Resist (4 rds)
+33% Debuff Resist (4 rds)
+33% Disease Resist (4 rds)
Color of Madness DLC
Increase Buff Amount by 12%
Used to Cure Horror
Color of Madness DLC
Adds Effect:
-40% Stress (3 rds)
Used to raise the Light Level (+25 Each)
Used for a few Curio Interactions
Used to Clear an Obstacle - Shifting Mist
If Used by Right Clicking:
Buff Party
+3 ACC (1 Battle)
[Houndmaster Only]
+50% DMG (3 rds)
+15 ACC (3 rds)
Buff Hero
+25 DODGE (Until Camp)
Used to initiate Camping
[Short: 0 / Medium: 1 / Long: 2 / Epic: 0 / Exhausting: 4]
Used for a few Curio Interactions within The Courtyard
Suffer 33% HP DMG // Stress +20
Exhaust Hero
-8 SPD (3 rds) // -10 DODGE (3 rds)
[Short: 1 / Medium: 1.5 / Long: 2 / Epic: 2+ / Exhausting: 2+]
Crimson Court DLC
Only Dropped by the Fanatic
(Gives 2 "The Cure" Items as Loot when defeated)
Can be used on a Cursed Hero during an Expedition to Cure them
Crimson Court DLC
Grants a Hero 1 Block (Maximum of 2 Blocks at once per Hero)
Each Block Negates 1 instance of Non Zero Direct HP Damage inflicted on a Hero
Pilskin (50%), Rattler (50%), and Adder (100%)
Refreshes Limited Use Skills (All Uses)
All Exhaustion Debuffs last until Camp
Buff Hero (1 Battle) +2 SPD // +15% DMG
Exhaust Hero: +10% Stress // -10% Virtue Chance
Buff Hero (10 rds) +2 SPD // +15% DMG
Exhaust Hero: +20% Stress // -10% Virtue Chance
Buff Hero (5 rds) +2 SPD // +15% DMG // +9% CRIT
Color of Madness DLC
Bullmic
Creeping Cough
Ennui
Hemophilia
Hysterical Blindness
Lethargy
Rabies
Scurvy
Spasm of the Entrails
Spotted Fever
Syphilis
Tapeworm
The Ague
The Black Plague
The Fits
The Red Plague
The Runs
The Worries
Vampiric Spirits
Vertigo
Wasting Sickness
Color of Madness DLC
Grey Rot
Sky Taint
-10 ACC
-40% Move Resist
-10% DMG
-10% MAX HP
60% chance to interact with Food Curios
(Steals Loot)
-5% CRIT
-3 SPD
-10% MAX HP
-75% Disease Resist
-10% MAX HP
-5 SPD
-5 ACC
-5% CRIT
-10% MAX HP
-5% CRIT
-10% MAX HP
-10 ACC
-10% DMG
-20% Bleed Resist
-20% Blight Resist
Drinking The Blood
Buff Self: +7 DODGE (4 rds) // +4 SPD (4 rds)
-10% MAX HP // +1 SPD
-10% MAX HP // -10% Virtue Chance // +2 SPD
Forced Interaction on any Corridor Curio (10% Chance)
Drinking The Blood - Evolves into Bloodlust
1.89% Chance: Pass Own Turn (Uses up Turn)
3.77% Chance: Move Self Forward by 1 Space
1.89% Chance: Attack Teammate with Hero Specific Effects
10% Chance: Deny being Healed
5% Chance: Deal +6 Stress to Attacked Teammates
50% Chance: Deal +6 Stress to Heroes interacting with Curios
10% Chance: Deal +6 Stress to Heroes hit by Trap
50% Chance: Refuse to Eat While Camping
+25% DMG // +4 SPD
Drinking The Blood: Self: Stress +33
Buff Self: +50% DMG (4 rds) // +4 SPD (4 rds)
4.12% Chance: Use Random Skill (Uses up Turn)
4.12% Chance: Deal +6 Stress to Party
4.12% Chance: Move Self Forward by 1 Space
2.06% Chance: Attack Teammate with Hero Specific Effects
12% Chance: Deal +6 Stress to Attacked Teammates
15% Chance: Block Combat Retreat
-20% MAX HP // -4 SPD // -10% Death Blow Resist
Forced Interaction on any Corridor Curio (25% Chance)
Drinking The Blood - Return to Passive
8.3% Chance: Pass Own Turn (Uses up Turn)
4.17% Chance: Attack Self for 15% of MAX HP
50% Chance: Deal +6 Stress to Heroes interacting with Curios
10% Chance: Deal +6 Stress to Heroes hit by Trap
100% Chance: Refuse to Eat While Camping
Diseases can be removed through the Sanitarium or certain Camping Skills like the Grave Robber's Snuff Box or the Plague Doctor's Leeches Skill.
Each Hero may only have a Maximum of 3 Diseases at once, and new Diseases that have been acquired at that point replace existing ones akin to Quirks.
Heroes have a Chance to contract Diseases at the end of an Expedition if their Resolve Level is at 2 or higher.
32% - (33% * Hero's Disease Resist), with a Minimum Chance of 5%.
Buffs to Disease Resist from Holy Water and certain Camping Buffs can be used before ending the Expedition to lessen the chance of contracting a Disease at the end of an Expedition.
Swine Wretch - Vomit - Any Disease (15%)
Sea Maggot - Brine - Any Disease (8%)
Fungal Artillery - Rain of Blight - Any Disease (15%)
Deep Stinger - Salty Gouge & Shocker - Any Disease (6%)
Carrion Eater - Munch - Any Disease - Veteran (7%) // Champion (9%)
Crone - Fetid Censer - Any Disease - Veteran (7%) // Champion (9%)
The Shrieker - Regurgitate - Any Disease (15%)
Ghoul - Howl - The Worries (5%)
Rabid Gnasher - Rabid Rush - Rabies (10%)
Thing from the Stars - Phase Gnaw - Sky Taint
Apprentice (20%) // Veteran (22%) // Champion (25%)
Curios must be interacted with without Supplies to inflict Diseases
Iron Maiden - Any Disease (6.7%) // Tetanus (13.3%)
Beast Carcass - Any Disease (19.04%) // Rabies (9.52%)
Pile of Bones - Any Disease (25%)
Shallow Grave - Any Disease (50%)
Bas-Relief - Any Disease (11.1%)
Brackish Tide Pool - Any Disease (25%)
Dinner Cart - The Black Plague (12.5%)
Makeshift Dining Table - Tapeworm (25%)
Fish Carcass - The Red Plague (16.7%)
Brothel - Syphilis (About 3%)
Bloodflowers - Any Disease (2.56%) // Tetanus (5.12%)
Hooded Shrew - Any Disease (7.6%)
Wizened Shrew - Any Disease (7.6%)
Forgotten Delicacies - Any Disease (6.7%)
When a Hero contracts the Crimson Curse, all of their previous Diseases are wiped clean and is replaced by the Crimson Curse, which provides immunity from all other Diseases.
Cursed Heroes will naturally progress through the Passive, Craving, and Wasting state, eventually needing to drink a vial of The Blood to avoid death.
The Crimson Curse Progresses by 30 turns for Heroes in the Hamlet when you set out on an Expedition, and Wasting Heroes will automatically consume a vial of The Blood if there are any in reserve.
While the Crimson Curse can cause problems with potential Negative actouts and requiring The Blood, the Disease Immunity it gives alongside notable Stat Buffs states such as Bloodlust offers makes it potentially beneficial for your Heroes.
Sycophant - The Thirst - 31% Chance
Manservant - The Thirst - 31% Chance
Courtesan - The Thirst - 45% Chance
Damned Fountain - Crimson Curse (20%)
Pile of Strange Bones - Crimson Curse (10%)
Wine Crate - Crimson Curse (16.7%)
If you put a Hero without the Crimson Curse in the same Facility as Heroes with the Crimson Curse, there is an Increased Chance for the Non Cursed Hero to get infected with the Crimson Curse as well. The more Cursed Heroes are in the same Facility, the Higher the Chance.
2. Defeat the Countess and gain the ability to Cure the Crimson Curse via the Sanitarium.
3. You can bring 2+ Heroes on an Expedition to one of the 4 Non DLC Areas in order to Spawn the Fanatic, who will Reward you with 2 items of "The Cure" which can be used to Cure the Crimson Curse from a Hero.
This Method is not recommended due to the Fanatic being very risky to fight, and is likely to get your Heroes killed, alongside the fact that The Blood isn't difficult to accumulate, and there being other much safer options.
4. Pay 30 Shards during the Color of Madness DLC Exclusive Town Event - They Made a Tonic to Cure any Diseases from all of your Heroes, including the Crimson Curse.



























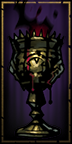












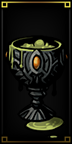


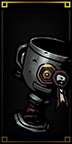


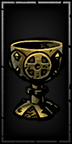
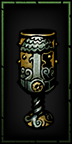
Very Common
Warrens Exclusive
+4 ACC
-1 SPD
Very Common
Weald Exclusive
+20% Bleed Skill Chance
-1 SPD
Very Common
+20% Bleed Skill Chance
-1 SPD
Very Common
+20% Blight Resist
-2 DODGE
Very Common
+20% Blight Skill Chance
-1 SPD
Very Common
Warrens Exclusive
-3% CRIT
-1 SPD
Very Common
+20% Debuff Resist
-2 DODGE
Very Common
Warrens Exclusive
+15% Debuff Skill Chance
-1 SPD
Very Common
+20% Disease Resist
-2 DODGE
Very Common
Ruins Exclusive
+4 DODGE
-1 SPD
Very Common
+10% MAX HP
-1 SPD
Very Common
Weald Exclusive
+20% Move Resist
-1 SPD
Very Common
+15% Move Skill Chance
-1 SPD
Very Common
+5% PROT
-1 SPD
Very Common
Warrens Exclusive
+20% Stun Resist
-2 DODGE
Very Common
+10% Stun Skill Chance
-1 SPD
Common
+5 ACC Ranged Skills
-1 SPD
Common
+20% Blight Resist
+20% Bleed Resist
-20% Disease Resist
Common
-20% Chance Party Surprised
-1 SPD
Common
Weald Exclusive
+10% Scouting Chance
-10 SPD on First Round
Common
+10% DMG
-4 DODGE
Common
+10% Stun Skill Chance
Common
Weald Exclusive
+10 DODGE if HP above 75%
-6 DODGE if HP below 50%
Common
Weald Exclusive
+5 ACC
-2 DODGE
Common
+4 DODGE
-20% Move Resist
Common
-10% Stress
Common
Ruins Exclusive
+1 SPD
Common
+10% Scouting Chance
+10% Trap Disarm Chance
-1 SPD
Common
+10% DMG Melee Skills
-4 DODGE
Common
+5 ACC Melee Skills
Uncommon
+20% Bleed Skill Chance
+20% Bleed Resist
-20% Blight Resist
Uncommon
+20% Blight Skill Chance
+20% Blight Resist
-20% Bleed Resist
Uncommon
+30% Bleed Resist
Uncommon
-100% Food Consumed
+10% MAX HP
-25% Healing Received
Uncommon
+30% Blight Resist
+30% Disease Resist
-1 SPD
Uncommon
-20% Stress
-10% Death Blow Resist
Uncommon
Weald Exclusive
+20% DMG if HP below 33%
+8% CRIT if HP below 33%
-10% Bleed Resist
-10% Blight Resist
Uncommon
-10% Stress
+4 ACC
-4 DODGE
Uncommon
+15 DODGE if Torch above 75
-20% Stun Resist
Uncommon
Ruins Exclusive
-15% Stress
-1 SPD
Uncommon
+15% Healing Skills
Uncommon
+8% CRIT if Torch below 26
+5 DODGE if Torch below 26
-10% DMG if Torch above 51
Uncommon
+30% Debuff Skill Chance
+30% Debuff Resist
-4 DODGE
Uncommon
+15% MAX HP
-10% Death Blow Resist
Uncommon
+40% Move Resist
+20% PROT
-2 SPD
Uncommon
+20% MAX HP
-1 SPD
Uncommon
+20% Move Skill Chance
+30% Move Resist
-10% Debuff Resist
Uncommon
Ruins Exclusive
+15% Scouting Chance
-1 SPD
Uncommon
Ruins Exclusive
+8 DODGE
-33% Healing Received
Uncommon
Warrens Exclusive
+4% CRIT if Torch above 75
+5 DODGE if Torch above 75
-5% CRIT if Torch below 50
-6 DODGE if Torch below 51
Uncommon
+10 ACC Ranged Skills
-2 DODGE
Uncommon
+10% Stun Skill Chance
+20% Stun Resist
-4 DODGE
Uncommon
Warrens Exclusive
+8% CRIT Melee Skills
+5 ACC Melee Skills
-20% Move Resist
-10% Debuff Resist
Uncommon
+2 SPD
-20% Move Resist
Uncommon
Ruins Exclusive
+10% Death Blow Resist
+5 DODGE
-5% CRIT
Uncommon
+10% Virtue Chance
-10% Stress
-1 SPD
Rare
+25% DMG vs Beast
-8 DODGE
Rare
Warrens Exclusive
+3 SPD
+15% DMG
+15% Stress
-5 ACC
-10% Virtue Chance
Rare
+25% DMG if in position 1
-5% CRIT
-1 SPD
Rare
Weald Exclusive
-25% Stress if Torch below 26
+15% Virtue Chance if Torch below 26
Rare
+25% DMG vs Eldritch
-8 DODGE
Rare
Warrens Exclusive
-100% Food Consumed
-100% DMG Inflicted When Starving
+5 DODGE
Rare
+2 SPD
+8 DODGE
-20% Stun Resist
-20% Move Resist
Rare
+25% DMG vs Human
-8 DODGE
Rare
+15% PROT if Torch below 26
+10 DODGE if Torch below 26
+10% Stress
Rare
+15% DMG if Torch below 26
+10 ACC if Torch below 26
+10% Stress
Rare
+8 SPD on First Round
+12% CRIT on First Round
-3 SPD after First Round
Rare
+40% Healing Received
Rare
+15 ACC if in position 4
+4% CRIT if in position 4
-2 SPD
Rare
-20% Stress if Torch above 75
Rare
+5% PROT if Torch above 75
+10 DODGE if Torch above 75
+10% Stress
Rare
+10% DMG if Torch above 75
+5 ACC if Torch above 75
+10% Stress
Rare
+25% DMG vs Unholy
-8 DODGE
Very Rare
-20% Stress
Very Rare
Warrens Exclusive
+40% Blight Resist
+40% Bleed Resist
+40% Debuff Resist
-15% Blight Skill Chance
-15% Bleed Skill Chance
-15% Debuff Skill Chance
Ethereal Crucifix
Very Rare
+25% DMG vs Eldritch
+30% Bleed Resist
-20% MAX HP
Very Rare
+10 ACC
+5% CRIT
-8 DODGE
Fortifying Garlic
Very Rare
+33% Blight Resist
+33% Bleed Resist
+33% Disease Resist
Very Rare
+25% Virtue Chance
Very Rare
+20% DMG
-1 SPD
+10% Stress
Very Rare
+60% DMG at Death's Door
+14% CRIT at Death's Door
+12% Death Blow Resist
+15% MAX HP
Very Rare
+10% PROT
+15% MAX HP
-15% DMG
+10% Stress
Ancestor's Bottle
Ancestral
+25% MAX HP
+50% Food Consumed
+10% Stress
Ancestor's Candle
Ancestral
+15% DMG if Torch above 50
+2 SPD if Torch above 50
+5 DODGE if Torch above 50
+10% Stress
Ancestral
+15 DODGE
+10% Stress
Ancestral
+50% Disease Resist
+50% Bleed Resist
+10% Stress
Ancestral
-20% Chance Party Surprised
+20% Chance Monsters Surprised
+10% Stress
Ancestor's Map
Ancestral
+25% Trap Disarm Chance
+25% Scouting Chance
+10% Stress
Ancestral
+50% Debuff Resist
+50% Blight Resist
+10% Stress
Ancestral
Weald Exclusive
+10% DMG Ranged Skills
+8% CRIT Ranged Skills
+10% Stress
Ancestral
+10% DMG Melee Skills
+8% CRIT Melee Skills
+10% Stress
Ancestral
+15 ACC Ranged Skills
+3 SPD
+10% Stress
Ancestral
+50% Resolve XP
+10% Stress
Ancestor's Scroll
Ancestral
+25% Healing Skills
+25% Stress Skills
+10% Stress
Ancestral
+10 ACC
+10% PROT
+10% Stress
Ancestor's Tentacle Idol
Ancestral
+20% Virtue Chance
+8% Death Blow Resist
Talisman of the Flame
Darkest Dungeon
Revelation: -100% Stress
Negates only 80% Stress due to Stress Reducing Buffs being capped at 80%
Revelation: -100% DMG Taken
Trophy
+20% DMG vs Unholy
+8% CRIT vs Unholy
Trophy
+15 ACC if in position 4
+3 SPD if in position 4
-15% Stress if in position 4
Trophy
+30% Blight Skill Chance
+40% Blight Resist
+40% Disease Resist
Trophy
+2 SPD
+10% DMG Ranged Skills
+6% CRIT Ranged Skills
Trophy
+50% Stun Resist
+10 DODGE
Trophy
+50% Bleed Resist
+15% MAX HP
Trophy
+50% Debuff Resist
-20% Stress
Trophy
+50% Move Resist
+20% Healing Received
Trophy
+20% DMG vs Marked
+10 ACC vs Marked
+5% CRIT vs Size 2 or Above
or from Secret Rooms
(3 rolls with 25% chance each)
Barristan's Head
Very Rare
+25% PROT
+20% Stress
or from Secret Rooms
(3 rolls with 25% chance each)
Dismas' Head
Very Rare
+25% DMG
-10% MAX HP
+20% Stress
or from Secret Rooms
(3 rolls with 25% chance each)
Junia's Head
Very Rare
+30% Healing Skills
+20% Stress
(about 4% Chance)
Aria Box
Very Rare
-25% Stress
(about 4% Chance)
Crescendo Box
Very Rare
+2 SPD
+15% DMG
+10% Stress
(about 4% Chance)
Overture Box
Very Rare
+15% MAX HP
+8 DODGE
-2 ACC
(about 4.5% Chance)
Tempting Goblet
Very Rare
+20% MAX HP
+3 SPD
+8 DODGE
+25% Stress
-10% Virtue Chance
Town Event
Callous Talon
Shrieker
+7% CRIT
+33% Disease Resist if Torch below 75
+33% Bleed Skill Chance if Torch below 50
+15% Stress
Town Event
Distended Crowseye
Shrieker
+10 ACC
++33% Disease Resist if Torch below 75
+15% Scouting Chance if Torch below 50
+15% Stress
Town Event
Molted Tailfeather
Shrieker
+4 SPD
+33% Disease Resist if Torch below 75
+33% Stun Resist if Torch below 50
+15% Stress
Town Event
Molted Wingfeather
Shrieker
+10 DODGE
+33% Disease Resist if Torch below 75
+33% Move Resist if Torch below 50
+15% Stress
Ancestor's Vintage
Very Rare
Delayed Crimson Curse Craving
(By 69 Turns/Tiles)
Coven Signet
Very Rare
-25% Stress if has Crimson Curse
Dazzling Mirror
Very Rare
+4 SPD if Bloodsuckers are Present
+20% Stun Skill Chance vs Bloodsucker
Mantra of Fasting
Very Rare
+40% MAX HP if Crimson Curse - Wasting
++7 SPD if Crimson Curse - Wasting
Mercurial Salve
Very Rare
+25% DMG vs Bloodsuckers
Pagan Talisman
Very Rare
+25% DMG vs Fanatic
-10% Stress
Rat Carcass
Very Rare
Immune to death by Crimson Curse
Works on Heroes in the Hamlet
Sanguine Snuff
Very Rare
+8% CRIT if Crimson Curse - Bloodlust
+15 DODGE if Crimson Curse - Bloodlust
Sculptor's Tools
Very Rare
+40% DMG vs Stonework
Trophy
+75% Debuff Resist if has Crimson Curse
+4 SPD if has Crimson Curse
-10% Stun Resist if has Crimson Curse
Trophy
+5% CRIT if has Crimson Curse
+100% Healing when Eating if has
Crimson Curse
+100% Food Consumed if has Crimson Curse
Trophy
+50% Healing Received if has Crimson Curse
-25% Bleed Resist if has Crimson Curse
Lens of the Comet
Crystalline
Ignores Stealth
-20% Virtue Chance
+5% CRIT if Shard Dust in inventory
Crystal Pendant
Crystalline
+15% Shards Given
+15% Stress
Cluster Pendant
Crystalline
+25% Shards Given
+15% Stress
Costs 180 Shards
Coat Of Many Colors
Crystalline
On Monster Kill:
Buff Self:
-2% Stress (2 Battles)
+2 ACC (2 Battles)
Hero Killed:
Party:
Stun (120% Base)
Stress +45
Costs 180 Shards
Miller's Pipe
Crystalline
On Monster Kill:
Stress -2
All Monsters: Blight (120% Base)
2 pts/rd for 3 rds
Hero Killed:
Party: Stress +45
Debuff Party (Until Quest End)
-20% PROT (100% Base)
-2 SPD (100% Base)
Mildred's Locket
Keepsake
Miller: The Reaping: -100% DMG Taken
+40% Blight Resist
+3 SPD
+40% DMG vs Miller
Causes the Miller to use Immortal Beloved if equipped
(6.7% > Chance)
Thing's Mesmerizing Eye
Thing
+4% CRIT if HP above 41%
+8% CRIT if HP below 40%
(6.7% > Chance)
Crystalline Fang
Thing
+10% Stun Skill Chance if HP above 40%
+40% Stun Skill Chance if HP below 41%
(6.7% > Chance)
Phase Shifting Hide
Thing
-15% Stress if HP above 41%
-50% Stress if HP below 40%
(10% > Chance)
Prismatic Heart Crystal
Thing
+35% Blight Skill Chance vs Thing
+35% Bleed Skill Chance vs Thing
+12% CRIT vs Thing
Common
[Abomination only]
+10% Virtue Chance
Uncommon
[Abomination only]
+20% Stun Skill Chance
+20% Blight Skill Chance
Uncommon
[Abomination only]
+15% PROT
-1 SPD
Rare
[Abomination only]
+10% DMG
+3 SPD
-10% MAX HP
Very Rare
[Abomination only]
Transform: -40% Stress Inflicted on Party
-40% Self Stress While Transformed
Crimson Court
[Abomination only]
-15% Stress
+10 DODGE
"I must hide from the world."
+20% DMG if in position 1
Crimson Court
[Abomination only]
+20% DMG Ranged Skills
+8% CRIT Ranged Skills
"I must hide from the world."
+20% DMG if in position 1
Broken Key
Crystalline
[Abomination only]
+15 ACC
+35% Stun Skill Chance
+10% Stress
Common
[Antiquarian only]
+10 DODGE
Uncommon
[Antiquarian only]
+33% Healing Received
Uncommon
[Antiquarian only]
+25% PROT
Rare
[Antiquarian only]
+4 SPD
+20% Debuff Skill Chance
Very Rare
[Antiquarian only]
+50% Healing Skills
+15% MAX HP
Crimson Court
[Antiquarian only]
+50% Healing Skills
+35% Blight Skill Chance
+35% Debuff Skill Chance
"It will be mine - whatever the cost!"
+4 SPD
+10 DODGE
Crimson Court
[Antiquarian only]
+50% DMG vs Blighted
+8% CRIT vs Blighted
"It will be mine - whatever the cost!"
+4 SPD
+10 DODGE
Smoking Skull
Crystalline
[Antiquarian only]
+35 DODGE if Shard Dust in inventory
-15 ACC
-15% Blight Resist
Common
[Arbalest only]
+30% Move Resist
+30% Move Skill Chance
-1 SPD
Common
[Arbalest only]
+3% CRIT
Uncommon
[Arbalest only]
+33% Healing Skills
Rare
[Arbalest only]
+8 ACC
+5% CRIT
-4 DODGE
Very Rare
[Arbalest only]
Warrens Exclusive
+25% DMG if in position 4
+30% Debuff Skill Chance
-50% Healing Skills
Crimson Court
[Arbalest only]
+30% Healing Skills
+20% Healing Skills while Camping
-15% Stress
"I remember my father's kindly eyes."
+25% PROT
Crimson Court
[Arbalest only]
+15 ACC vs Marked
+8% CRIT vs Marked
+35% Debuff Skill Chance
+35% Move Skill Chance
"I remember my father's kindly eyes."
+25% PROT
Keening Bolts
Crystalline
[Arbalest only]
+20% DMG
+7% CRIT Ranged Skills
On Attack:
Self: Stress +3 (25% chance)
Common
[Musketeer only]
+30% Move Resist
+30% Move Skill Chance
-1 SPD
Common
[Musketeer only]
+3% CRIT
Uncommon
[Musketeer only]
+33% Healing Skills
Rare
[Musketeer only]
+8 ACC
+5% CRIT
-4 DODGE
Very Rare
[Musketeer only]
Warrens Exclusive
+25% DMG if in position 4
+30% Debuff Skill Chance
-50% Healing Skills
Crimson Court
[Musketeer only]
+30% Healing Skills
+20% Healing Skills while Camping
-15% Stress
"I...I missed!? But how...?"
+25% PROT
Crimson Court
[Musketeer only]
+15 ACC vs Marked
+8% CRIT vs Marked
+35% Debuff Skill Chance
+35% Move Skill Chance
"I...I missed!? But how...?"
+25% PROT
Icosahedric Musket Balls
Crystalline
[Musketeer only]
+20% DMG
+20% Random Target Chance
Common
[Bounty Hunter only]
+1 SPD
+4 DODGE
Common
[Bounty Hunter only]
+30% Move Resist
+20% Move Skill Chance
Uncommon
[Bounty Hunter only]
+20% Stress Heal Received while Camping
+10% Scouting Chance
Rare
[Bounty Hunter only]
Warrens Exclusive
+6% CRIT
+10% ACC
+50% Food Consumed
Very Rare
[Bounty Hunter only]
+25% DMG Melee Skills
-25% Move Skill Chance
-20% Stun Skill Chance
Crimson Court
[Bounty Hunter only]
+20% DMG vs Marked
+20% DMG vs Stunned
+20% DMG vs Bleeding
-10 DODGE
"They. Will. Pay."
+5% CRIT vs Marked
+5% CRIT vs Stunned
+5% CRIT vs Bleeding
Crimson Court
[Bounty Hunter only]
+50% Move Skill Chance
+35% Bleed Skill Chance
+15 ACC Ranged Skills
"They. Will. Pay."
+5% CRIT vs Marked
+5% CRIT vs Stunned
+5% CRIT vs Bleeding
Mask Of The Timeless
Crystalline
[Bounty Hunter only]
+2 SPD
+15 DODGE
+5% Stress
Common
[Crusader only]
+5% PROT
-3% CRIT
Common
[Crusader only]
+10% MAX HP
Common
[Crusader only]
+10% DMG Melee Skills
-50% Healing Skills
Uncommon
[Crusader only]
+20% Stun Skill Chance
-2 DODGE
Rare
[Crusader only]
+15% Stress Heal Received
+33% Healing Skills
-10% DMG
Very Rare
[Crusader only]
+15% Virtue Chance
-20% Stress
+12% Death Blow Resist
-20% Blight Resist
-20% Bleed Resist
Crimson Court
[Crusader only]
+15% PROT
+35% Move Resist
-15% Stress
-2 SPD
"I will forget them. Regret is sin."
+20% MAX HP
Crimson Court
[Crusader only]
+20% Healing Skills
+20% Stress Skills
"I will forget them. Regret is sin."
+20% MAX HP
Non-Euclidean Hilt
Crystalline
[Crusader only]
+15% MAX HP
+5% Random Target Chance
+25% Stun Skill Chance if Holy Water in inventory
On Attack Hit: Blight (120% Base)
2 pts/rd for 2 rds
Common
[Flagellant only]
+4 SPD if HP below 40%
Uncommon
[Flagellant only]
+33% Healing Skills
-15% Bleed Skill Chance
Uncommon
[Flagellant only]
+20% Bleed Skill Chance
-20% Healing Skills
+15% DMG if HP below 40%
Rare
[Flagellant only]
+20% Bleed Resist if HP below 40%
+20% Blight Resist if HP below 40%
+10% MAX HP
Very Rare
[Flagellant only]
+10% Death Blow Resist
+20 DODGE at Death's Door
+20% DMG if Stress above 85
Crimson Court
[Flagellant only]
+20% MAX HP
+35% Move Resist
"We're all falling apart..."
+10% Death Blow Resist
Acidic Husk Ichor
Crystalline
[Flagellant only]
-25% MAX HP
+30% DMG
+30% Bleed Skill Chance vs Husk
+25% Healing Received if HP below 20%
Common
[Grave Robber only]
+2 SPD
Common
[Grave Robber only]
+20% DMG vs Blighted
Uncommon
[Grave Robber only]
+25% Blight Skill Chance
+1 SPD
-4 DODGE
Rare
[Grave Robber only]
+12 DODGE
+10 ACC Ranged Skills
+10% Stress
Very Rare
[Grave Robber only]
Warrens Exclusive
+5% CRIT
+30% Trap Disarm Chance
+2 SPD
+15% Scouting Chance
-10% MAX HP
Crimson Court
[Grave Robber only]
+35% Disease Resist
+35% Blight Resist
+35% Blight Skill Chance
-10% MAX HP
"Poise makes perfect, darling!"
5% CRIT
Topshelf Tonic
Crystalline
[Grave Robber only]
+15 DODGE if Medicinal Herbs in inventory
+3 SPD
-20% Blight Resist
+50% Blight Duration
Common
[Hellion only]
+15% Bleed Skill Chance
Common
[Hellion only]
Weald Exclusive
-15% Stress
Uncommon
[Hellion only]
+15% MAX HP
-20% Stun Resist
Rare
[Hellion only]
Cove Exclusive
-25% Stress if Torch above 75
+10 ACC if Torch above 75
Very Rare
[Hellion only]
+10% CRIT if Torch below 25
+15 ACC if Torch below 25
-10% Debuff Resist
-10% Bleed Resist
Crimson Court
[Hellion only]
+20% DMG if HP below 75%
+20% DMG if HP below 50%
+20% DMG if HP below 25%
+10% Stress
"Outcast. Alone. Shamed."
+7 ACC
+7 DODGE
Crimson Court
[Hellion only]
+2 SPD
+35% Bleed Skill Chance
+15% Death Blow Resist
-15% Healing Received
"Outcast. Alone. Shamed."
+7 ACC
+7 DODGE
Thirsting Blade
Crystalline
[Hellion only]
+15 ACC
-20% Bleed Resist
+2 SPD
+8% CRIT vs Bleeding
On Attack Miss:
Self: Lose 5 HP
Common
[Highwayman only]
+10% Trap Disarm Chance
+4 DODGE
-5% Stress Heal Received
Common
[Highwayman only]
+10% DMG Ranged Skills
-20% Stun Resist
Common
[Highwayman only]
+5% CRIT
+5% Stress
-3% Virtue Chance
Uncommon
[Highwayman only]
+8 DODGE
+1 SPD
-10 ACC Ranged Skills
Very Rare
[Highwayman only]
Ruins Exclusive
+20% DMG Ranged Skills
+15 ACC Ranged Skills
-10% DMG Melee Skills
-5% CRIT Melee Skills
Crimson Court
[Highwayman only]
+2 SPD
+10 DODGE
"A reflex - I didn't mean to..."
+45% Virtue Chance
Crimson Court
[Highwayman only]
+10 ACC
+5% CRIT
+15% Stress
"A reflex - I didn't mean to..."
+45% Virtue Chance
Crystalline Gunpowder
Crystalline
[Highwayman only]
+20% DMG
+3 SPD
-15% Stun Resist
Common
[Houndmaster only]
+4 DODGE
+1 SPD
-20% Debuff Resist
Common
[Houndmaster only]
+20% Scouting Chance if Torch below 51
+20% Trap Disarm Chance
Uncommon
[Houndmaster only]
+25% Stun Skill Chance
-1 SPD
Rare
[Houndmaster only]
+12 DODGE
+15% DMG
Very Rare
[Houndmaster only]
Warrens Exclusive
+20% DMG
+30% Bleed Skill Chance
-50% Healing Skills
-20% Healing Received
Crimson Court
[Houndmaster only]
+25% Scouting Chance
-15% Chance Party Surprised
+10% Stress
"Even the Chief was in on it."
+25% DMG vs Bleeding
+5% CRIT vs Bleeding
Crimson Court
[Houndmaster only]
+15 ACC Ranged Skills
+50% Stress Skills while Camping
+25% Healing Skills
-20% Stun Resist
-20% Debuff Resist
"Even the Chief was in on it."
+25% DMG vs Bleeding
+5% CRIT vs Bleeding
Huskfang Whistle
Crystalline
[Houndmaster only]
+50% Bleed Skill Chance if Dog Treats in inventory
+40% Stress Skills while Guarding
-10 DODGE
+66% Guard Duration
Common
[Jester only]
+30% Bleed Skill Chance
-10% Bleed Resist
Common
[Jester only]
+4 ACC
+4 DODGE
Uncommon
[Jester only]
+7% CRIT
Rare
[Jester only]
+20% Stress Skills
-25% Stress if Torch above 75
+15% Stress if Torch below 51
Very Rare
[Jester only]
+12% Death Blow Resist
-25% Stress if Torch below 26
+10% Virtue Chance if Torch below 26
Crimson Court
[Jester only]
+33% Stress Skills
+25% Stress
"Heh. The last laugh is mine!"
+33% Stress Skills while Camping
Crimson Court
[Jester only]
+3 SPD if in position 1
+20 DODGE if in position 1
"Heh. The last laugh is mine!"
+33% Stress Skills while Camping
Dirge For The Devoured
Crystalline
[Jester only]
+25% Stress Skills
+25% DMG if Laudanum in inventory
+10% Stress
Common
[Leper only]
+20% Healing Received
Common
[Leper only]
+15% DMG if in position 1
-3% Virtue Chance
Uncommon
[Leper only]
+8 ACC
+3% CRIT
+10% Stress
Rare
[Leper only]
+40% Stun Resist
+30% Blight Resist
+30% Bleed Resist
-10% MAX HP
Very Rare
[Leper only]
+8% CRIT
+3 SPD
-10% Virtue Chance
-33% Healing Received
Crimson Court
[Leper only]
+15% PROT
+15% MAX HP
-10% Death Blow Resist
"The last treasures of a King."
+15 ACC if HP above 60%
Crimson Court
[Leper only]
-20% Stress
+33% Stress Skills while Camping
"The last treasures of a King."
+15 ACC if HP above 60%
Petrified Amulet
Crystalline
[Leper only]
+10 ACC if Bandage in inventory
+15% MAX HP
-15% Bleed Resist
Common
[Man-at-Arns only]
Weald Exclusive
+30% Blight Resist
+20% Disease Resist
-2 DODGE
Common
[Man-at-Arns only]
+4 DODGE
-20% Stun Resist
-10% Move Resist
Uncommon
[Man-at-Arns only]
+15% MAX HP
-2 SPD
Rare
[Man-at-Arns only]
+40% Move Skill Chance
+30% Stun Skill Chance
-15% DMG
Very Rare
[Man-at-Arns only]
+10% PROT if in position 4
+50% Healing Received if in position 4
+10 DODGE if in position 4
Crimson Court
[Man-at-Arns only]
+15% Stun Skill Chance
+20% Debuff Skill Chance
+15% Death Blow Resist
+10% Stress
"Glory days? Hmph."
Riposte: +25% DMG
Riposte: +10 ACC
Crimson Court
[Man-at-Arns only]
+10% PROT
+5% CRIT
"Glory days? Hmph."
Riposte: +25% DMG
Riposte: +10 ACC
Mirror Shield
Crystalline
[Man-at-Arns only]
+10 DODGE
30% Damage Reflection
+20% Stun Resist
Common
[Occultist only]
+6% CRIT vs Eldritch
+15% DMG vs Eldritch
Common
[Occultist only]
+8 DODGE
-1 SPD
Uncommon
[Occultist only]
+40% Debuff Skill Chance
+20% Move Skill Chance
-10% MAX HP
Rare
[Occultist only]
+20% DMG
+10% Stress
Very Rare
[Occultist only]
+30% Stun Skill Chance
+40% Debuff Skill Chance
+3% CRIT
-10% Virtue Chance
+15% Stress
Crimson Court
[Occultist only]
+4 SPD if Torch below 60
+25% DMG if Torch below 60
-25% Bleed Skill Chance
-10% MAX HP
"The bargain is struck!"
+15 DODGE
Crimson Court
[Occultist only]
+20% Debuff Skill Chance
+20% Stun Skill Chance
+20% Move Skill Chance
+20% Stun Resist
"The bargain is struck!"
+15 DODGE
Petrified Skull
Crystalline
[Occultist only]
+40% PROT When Attacked By Husk
-20% Healing Received
+30% PROT When Attacked By Eldritch
+15% MAX HP
Common
[Plague Doctor only]
+40% Disease Resist
Common
[Plague Doctor only]
+8 ACC
-5% MAX HP
Common
[Plague Doctor only]
+15% Stun Skill Chance
Uncommon
[Plague Doctor only]
+40% Blight Skill Chance
-15% MAX HP
Rare
[Plague Doctor only]
+10 ACC Melee Skills
+30% Bleed Skill Chance
+20% DMG Melee Skills
Very Rare
[Plague Doctor only]
+10 ACC Ranged Skills
+20% Stun Skill Chance
+20% Blight Skill Chance
+25% Stress
Crimson Court
[Plague Doctor only]
+25% MAX HP
+35% Disease Resist
"Those fools at the University..."
+15% Blight Skill Chance
+15% Stun Skill Chance
Crimson Court
[Plague Doctor only]
+35% Bleed Skill Chance
+25% DMG
"Those fools at the University..."
+15% Blight Skill Chance
+15% Stun Skill Chance
Ashen Distillation
Crystalline
[Plague Doctor only]
+20 DODGE
+25% Blight Skill Chance
+20% Healing Received if Medicinal Herbs in inventory
Common
[Vestal only]
+10% Virtue Chance
-5% MAX HP
Uncommon
[Vestal only]
+8 SPD on First Round
+2 SPD after First Round
-25% Stun Skill Chance
Uncommon
[Vestal only]
Ruins Exclusive
+20% MAX HP
-10% DMG
Rare
[Vestal only]
Ruins Exclusive
+15% DMG
+10% PROT if in position 2
+33% Healing Skills if in position 2
+15% Stress
Rare
[Vestal only]
+25% Healing Skills
+15% MAX HP
Very Rare
[Vestal only]
-10% Stress
+33% Healing Skills
-10% Stun Skill Chance
-33% DMG
Crimson Court
[Vestal only]
+15% DMG Melee Skills
+8% CRIT Melee Skills
-15% Virtue Chance
"I fear the whispers of my mind!"
+35% Debuff Skill Chance
+35% Stun Skill Chance
Crimson Court
[Vestal only]
+33% Stress Skills while Camping
+25% Healing Skills
"I fear the whispers of my mind!"
+35% Debuff Skill Chance
+35% Stun Skill Chance
Heretical Passage
Crystalline
[Vestal only]
+20% Healing Skills if Holy Water in inventory
+25% DMG vs Husk
+25% DMG vs Eldritch
+10% Stress
Venomous Vial
Common
[Shieldbreaker only]
+30% Blight Skill Chance
-10% Blight Resist
Shimmering Scale
Uncommon
[Shieldbreaker only]
+10% PROT
+5% Stress
Dancer's Footwraps
Uncommon
[Shieldbreaker only]
+40% Move Resist
+2 SPD
Fanged Spear Tip
Rare
[Shieldbreaker only]
+35% DMG vs Marked
-10% DMG
Cuirboilli
Very Rare
[Shieldbreaker only]
+33% MAX HP
-2 SPD
Obsidian Dagger
Crimson Court
[Shieldbreaker only]
+40% Debuff Skill Chance
+40% Blight Skill Chance
"Broken and Beautiful."
+15% MAX HP
+10% PROT
Cannot be Guarded
Severed Hand
Crimson Court
[Shieldbreaker only]
+50% Blight Resist
-10% Stress
"Broken and Beautiful."
+15% MAX HP
+10% PROT
Cannot be Guarded
Spectral Speartip
Crystalline
[Shieldbreaker only]
+15% DMG
+20% Blight Skill Chance
+15% MAX HP
+5% Random Target Chance


A Hero can equip up to 2 Trinkets at once. and 2 of the same Trinket cannot be equipped at the same time. Identical Trinkets do not stack in your Inventory.
Enemy Specific, Ancestral, Trophy, all DLC Trinkets (With the exception of Rat Carcass), and some Very Rare Trinkets are limited to 1 per Estate.
Non Shambler Ancestral Trinkets only appear as Quest Rewards in Normal Dungeons if they are Champion Level Long Dungeons. They can also be randomly dropped in Veteran and Champion Difficulties
Trinkets that have been lost are collected by the Shrieker, and a Quest to reclaim them by confronting the bird appears once 8 or more has been lost. The difficulty of the battle is determined by the Highest Rarity Trinket that has been lost. Trophy Trinkets return to your Trinket Inventory even if lost during an expedition.
Trinket Selling Prices (In Gold):
Very Common: 750 // Common: 1125 // Uncommon: 1500 // Rare: 2250
Very Rare: 3750 // Enemy Specific Very Rare: 2250 // Shrieker: 1
Ancestral: 7500 // Crimson Court: 7500
Darkest Dungeon, Trophy, Crystalline, Keepsake, Thing, and all Shieldbreaker Trinkets cannot be sold

[Value: 250 Gold Each]
[Stack Value: 1250(1500)]
Gem
[Drop Chances]
Apprentice: 10/30
Veteran: 8/43
Champion: 5/39
[Value: 375 Gold Each]
[Stack Value: 1875(2250)]
Gem
[Drop Chances]
Apprentice: 10/30
Veteran: 8/43
Champion: 5/39
[Value: 500 Gold Each]
[Stack Value: 2500(3000)]
Gem
[Drop Chances]
Apprentice: 4/30
Veteran: 10/43
Champion: 8/39
[Value: 750 Gold Each]
[Stack Value: 3750(4500)]
Gem
[Drop Chances]
Apprentice: 4/30
Veteran: 10/43
Champion: 8/39
[Value: 1000 Gold Each]
[Stack Value: 5000(6000)]
Gem
[Drop Chances]
Apprentice: 1/30
Veteran: 3/43
Champion: 6/39
[Value: 1250 Gold Each]
[Stack Value: 6250(7500)]
Gem
[Drop Chances]
Apprentice: 1/30
Veteran: 3/43
Champion: 6/39
[Value: 3500 Gold Each]
[Stack Value: 3500(7000)]
Gem
Found by defeating the Collector or within Secret Rooms
Also can be found by destroying the Shrieker's Nest
(4750 Max)
Currency
Each Antiquarian in the party increases Gold stacking by 750
Used to Upgrade Heroes and use Town Facilities
[Value: 2500 Gold Each]
Valuables
One is dropped for each Pew that has been destroyed
during the Prophet Boss Fight as Battle Loot
[Value: 500 Gold Each]
[Stack Value: 10000]
Antique
For each Antiquarian in Party:
Obtainable after Battles (6/7 Chance)
If a Curio is interacted by an Antiquarian:
Obtained from Curio (6/7 Chance)
[Value: 1250 Gold Each]
[Stack Value: 6250]
Antique
For each Antiquarian in Party:
Obtainable after Battles (1/7 Chance)
If a Curio is interacted by an Antiquarian:
Obtained from Curio (1/7 Chance)
[Value: 4500 Gold Each]
Valuables
[Drop Chances]
Veteran: 1/43
Champion: 1/39
Heirloom
Used to upgrade Town Facilities and build Districts
More Common in The Cove
Heirloom
Used to upgrade Town Facilities and build Districts
More Common in The Ruins
Heirloom
Used to upgrade Town Facilities and build Districts
More Common in The Weald
Heirloom
Used to upgrade Town Facilities and build Districts
More Common in The Warrens
Heirloom
Used to build Districts
A Free Blueprint is given to you by around Week 10 from a Town Event
Obtained by defeating Veteran and Champion level Area Bosses (Barring The Flesh)
Crimson Court DLC
Invitation
Used to begin/continue the Plot Quest - Morbid Entertainment
Dropped by Gatekeepers if the mentioned Plot Quest is active
Crimson Court DLC
Invitation
Used to begin/continue the Plot Quest - Served Cold
Dropped by Gatekeepers if the mentioned Plot Quest is active
Crimson Court DLC
Invitation
Used to begin/continue the Plot Quest - A Bewitching Predator
Dropped by Gatekeepers if the mentioned Plot Quest is active
Crimson Court DLC
Currency
Used to purchase Shard Dust and Crystalline Trinkets
Used to build some Districts and can be exchanged for Heirlooms
Used in some Town Events
Obtained from/during Expeditions within The Farmstead
Obtained from slaying the Thing from the Stars
Color of Madness DLC
Heirloom
Used to build The Mill
Obtained from slaying The Sleeper during The Endless Harvest
Can be Obtained from slaying the Thing from the Stars from Veteran Difficulty Onwards
Color of Madness DLC
Color of Madness DLC District is built
3 Crests - 1 Bust/Deed // 6 Crests - 1 Portrait
2 Busts/Deeds - 3 Crests // 3 Busts - 2 Deeds // 3 Deeds - 2 Busts
1 Portrait - 3 Crests // 2 Portraits - 3 Busts/Deeds
3 Comet Shards - 2 Crests/1 Deed/1 Bust // 6 Comet Shards - 1 Portrait

50000
(25000)

750

1
(Gives no benefits)
There is an Achievement tied to building this District
"The Red Hook"
15000
(0)

50
1
5000
(1000)
300
1
+2.5% Scouting Chance
+5% Chance Monsters Surprised
-5% Chance Party Surprised
2500
(0)

60
1
Receive a small amount of Free Food for every Expedition (At least 4 and up to 10).
5000
(1000)
200
1
(Default Idle Stress relief is 5)
80
1
5000
(1000)
100
1
+5% Scouting Chance
5000
(100)

200
1
+10% Healing Skills
5000
(1000)
300
1
+10% MAX HP
2500
(1000)
110
1
+15% Debuff Skill Chance
Interacting with Knowledge Curios Heals 15 Stress.
2500
(1000)
75
1
Finale: +20% DMG
1000
(1000)
300
1

10
(Memories can be found in the Endless Harvest Quest.)

125
Affected Items:
Citrine, Jade, Onyx, Emerald, Sapphire, Ruby, Puzzling Trapezohedron
99
Increases Buff amount by 12%
(+45% to 4 Resists instead of +33%)
Buff Hero:
-40% Stress (3 rds)
99
Adds an On Use Effect:
Buff Hero:
+25% Disease Resist (3 rds)
Buff Hero:
+33% Blight Resist (3 rds)
+15% PROT
+8% Death Blow Resist
-33% Stress // +2 SPD
+10 ACC // +8% CRIT
+10 ACC (3 rds)
+10% CRIT (3 rds)
+25% DMG
+15% DMG (3 rds)
+4 SPD // +10% Total DODGE
+2 SPD // +10 DODGE
-25% DMG
Forced Interaction with any Hallway Worship Curio (50% Chance)
Steals Loot
10.5% Chance: Move Back 1
10.5% Chance: Pass Turn (Uses up Turn)
20% Chance: Deal 6 Stress to Ally if they are Attacked
20% Chance: Deal 6 Stress to Ally if they Miss their Attack
15% Chance: Deal 6 Stress to Party if Moved
33% Chance: Deal 6 Stress to Heroes interacting with Curio
33% Chance: Deny being Moved
33% Chance: Refuse to Use a Camping Skill
+2 SPD // +10 DODGE
-5 ACC // -25% DMG
9.38% Chance: Move Back 1
9.38% Chance: Use Random Skill (Uses up Turn)
3.11% Chance: Attack Random Ally
20% Chance: Deal 6 Stress to Ally if they are Attacked
15% Chance: Deal 6 Stress to Party if Moved
33% Chance: Deny being Moved
33% Chance: Deny being Healed
33% Chance: Deny Buffs given by Teammates
33% Chance: Deny Item Usage
33% Chance: Block Combat Retreat
33% Chance: Refuse to Eat While Camping
33% Chance: Refuse to Use a Camping Skill
33% Chance: Refuse to be the Target of a Camping Skill
-10% DMG // -5 ACC
+5 DODGE
Forced Interaction with any Hallway Treasure Curio (50% Chance)
Steals Loot
8.33% Chance: Move 1 (Front or Back)
8.33% Chance: Pass Own Turn (Uses up Turn)
8.33% Chance: Use Random Skill (Uses up Turn)
33% Chance: Deal 6 Stress to Ally if they Attack
15% Chance: Deal 6 Stress to Party if Moved
33% Chance: Deal 6 Stress to Heroes interacting with Curio
33% Chance: Refuse to Use a Camping Skill
-15 DODGE
Forced Interaction with any Hallway Torture Curio (50% Chance)
8.33% Chance: Move Forward 1
8.33% Chance: Pass Own Turn (Uses up Turn)
8.33% Chance: Mark Self (2 rds)
8.33% Chance: Attack Self (Suffers 10% MAX HP DMG)
33% Chance: Deal 6 Stress to Attacked Ally if they are Hit
15% Chance: Deal 6 Stress to Party if Moved
37.5% Chance: Deal 6 Stress to Heroes hit by Trap
33% Chance: Deal 6 Stress to Heroes interacting with Curio
33% Chance: Deny being Moved
33% Chance: Deny being Healed
33% Chance: Deny Buffs given by Teammates
33% Chance: Deny Item Usage
33% Chance: Block Combat Retreat
33% Chance: Refuse to Eat While Camping
33% Chance: Refuse to Use a Camping Skill
33% Chance: Refuse to be the Target of a Camping Skill
-5 ACC // -15 DODGE
+20% DMG
5.88% Chance: Attack Random Ally
20% Chance: Deal 6 Stress to Ally if they Attack
15% Chance: Deal 6 Stress to Party if Moved
33% Chance: Deny being Moved
33% Chance: Refuse to Use a Camping Skill
33% Chance: Refuse to be the Target of a Camping Skill
-5 ACC // -5 DODGE // -3 SPD
10% Chance: Move 1 (Front or Back)
5% Chance: Pass Own Turn (Uses up Turn)
5% Chance: Mark Self (2 rds)
5% Chance: Attack Self (Suffers 10% MAX HP DMG)
5% Chance: Use Random Skill (Uses up Turn)
37.5% Chance: Deal 6 Stress to Hero hit by Trap
33% Chance: Deal 6 Stress to Heroes interacting with Curio
33% Chance: Deny being Healed
33% Chance: Deny Buffs given by Teammates
33% Chance: Deny Item Usage
33% Chance: Block Combat Retreat
33% Chance: Refuse to Eat While Camping
33% Chance: Refuse to Use a Camping Skill
33% Chance: Refuse to be the Target of a Camping Skill
+2 SPD // -10% DMG // -5 ACC // -5 DODGE
Forced Interaction with any Hallway Curio (7.5% Chance)
5.21% Chance: Move 1 (Front or Back)
5.21% Chance: Pass Own Turn (Uses up Turn)
5.21% Chance: Mark Self (2 rds)
5.21% Chance: Attack Self (Suffers 10% MAX HP DMG)
5.21% Chance: Use Random Skill (Uses up Turn)
1.7% Chance: Attack Random Ally
20% Chance: Deal 6 Stress to Ally if they Attack or are Attacked
15% Chance: Deal 6 Stress to Party if Moved
37.5% Chance: Deal 6 Stress to Hero hit by Trap
33% Chance: Deal 6 Stress to Heroes interacting with Curio
33% Chance: Deny being Healed // Deny being Moved
33% Chance: Deny Buffs given by Teammates
33% Chance: Deny Item Usage
33% Chance: Block Combat Retreat
33% Chance: Refuse to Eat While Camping
33% Chance: Refuse to Use a Camping Skill
33% Chance: Refuse to be the Target of a Camping Skill
+25% DMG // +3 SPD
-20 DODGE
8.33% Chance: Move Forward 1
8.33% Chance: Use Random Skill (Uses up Turn)
8.33% Chance: Attack Self (Suffers 10% MAX HP DMG)
8.33% Chance: Attack Random Ally
15% Chance: Deal 6 Stress to Party if Moved
33% Chance: Deny being Healed
33% Chance: Deny being Moved
10% Chance: Deny Buffs given by Teammates
10% Chance: Deny Item Usage
33% Chance: Block Combat Retreat
33% Chance: Refuse to Use a Camping Skill
33% Chance: Refuse to be the Target of a Camping Skill
-15% to All Resists except Death Blow Resist // -10% MAX HP
+20% Stress // -5 SPD // Ignore Stealth
+15% Bleed & Blight Skill Chance
Act-out Attack: Horror 5 stress/rd for 3 rds
7.3% Chance: Move 1 (Front or Back)
7.3% Chance: Pass Own Turn (Uses up Turn)
7.3% Chance: Mark Self (2 rds)
7.3% Chance: Use a Random Item
2.4% Chance: Attack Random Ally
33% Chance: Deal 6 Stress to Attacked Ally if they are Hit
33% Chance: Deal 6 Stress to Ally if their Attack Hits
15% Chance: Deal 6 Stress to Party if Moved
33% Chance: Deal 6 Stress to Heroes hit by Trap
33% Chance: Deal 6 Stress to Heroes interacting with Curio
33% Chance: Deny being Healed
33% Chance: Deny Buffs given by Teammates
33% Chance: Refuse to Eat While Camping
33% Chance: Refuse to Use a Camping Skill
33% Chance: Refuse to be the Target of a Camping Skill


Heroes in a Dungeon with a Higher Level than their Resolve Level, lose 5% Virtue Chance per level gap (Capping at -33% if a Resolve Level 0 Hero is in a level 6 Dungeon).
Although Heroes usually have at least a 1% Virtue Chance (Which caps at 95%), there are 2 Cases where a Hero cannot Virtue.
The first case is with the Flagellant, who cannot Virtue, only being able to become Rapturous or Refracted and the second case is with any Shieldbreakers during a Nighmare Flashback.
Every time a Hero gains a Virtue or Affliction said Virtue or Affliction is more likely to be gained in future Resolve Checks.
Every Virtue & Affliction has a equal weight of 4 to be gained, with Refracted being an exception with a weight of 3, and Rapturous being exclusive to the Flagellant.Virtuous Heroes do not suffer a Heart Attack when reaching 200 Stress, instead losing their Virtue with their Stress being set to 0.
Virtues are removed upon entering the Hamlet, with the Hero carrying over the Stress they ended the Expedition with.
The Hero's Stress is set to 100 at the Hamlet if they ended the Expedition with more than 100 Stress, which is also the case with Afflicted Heroes.
All Virtues give a +25% Buff to the Hero's Resistances barring Death Blow Resist and prohibit the Hero from using Shard Dust until they lose said Virtue, although it is possible for a Hero who has already used Shard Dust to become Virtuous.
A Hero cannot perform 2 Negative Act-Outs in a row, and Act-outs outside of Passing their Turn or using a Random Skill will not use up the Hero's Turn.
When an Afflicted Hero refuses to use or benefit from a Camping Skill, the Skill's Respite Points will still be consumed.
Afflicted Heroes will continue gaining Stress, suffering a Heart Attack at 200 Stress , which sets their HP to 0 and their Stress to 170, instantly killing the Hero if they are already at Death's Door.
The Hero will also suffer a Quest-Long -3 ACC / -10% DMG / -2 SPD / +15% Stress Debuff which cannot be removed. This Debuff cannot be stacked with multiple Heart Attacks.
Unlike Virtues, Afflictions remain on the Hero until removed by having them partake in any Stress Relief Activity within the Hamlet or reaching 0 Stress at any point.
Antiquarian (5% MAX HP) - Debuff: -4 SPD (4 rds) (120% Base)
Arbalest (15% MAX HP) - Mark Target (3 rds)
Bounty Hunter (10% MAX HP) - Mark Target (3 rds)
Crusader (10% MAX HP) - Stun (120% Base)
Flagellant (20% MAX HP) - Bleed (120% Base) 3pts/rd for 3 rds
Grave Robber (10% MAX HP) - Blight (120% Base) 2pts/rd for 3 rds
Hellion (15% MAX HP) - Bleed (120% Base) 3pts/rd for 3 rds
Highwayman (20% MAX HP) - No Secondary Effect
Houndmaster (15% MAX HP) - Bleed (120% Base) 2pts/rd for 3 rds
Jester (10% MAX HP) - Stress +15
Leper (33% MAX HP) - No Secondary Effect
Man-at-Arms (10% MAX HP) - Stun (120% Base)
Musketeer (10% MAX HP) - Mark Target (3 rds)
Occultist (10% MAX HP) - Debuff: -10 DODGE (3 rds) (120% Base)
Plague Doctor (10% MAX HP) - Blight (120% Base) 4pts/rd for 3 rds
Shieldbreaker (15% MAX HP) - Debuff: -7 SPD (4 rds) (100% Base)
Vestal (10% MAX HP) - Debuff: -10 ACC (3 rds) (120% Base)
Refracted: Overrides Secondary Effect - Horror 5 stress/rd for 3 rds
Dim Light (51~75)
Shadowy (26~50)
Dark (1~25)
Black as Pitch (0)
Cartographer's Camp
Radiant Light (76+)
Dim Light (51~75)
Shadowy (26~50)
Dark (1~25)
Black as Pitch (0)
Farmstead Miasma
Blazing
Haunting
Gleaming
Splendorous
Endgame Conditions
Unbearable Reflection
Reflection of Decay
Sanguine Reflection
Reflection Obscura
Radiant - +7.5 DODGE
Darkest - +4 DODGE
Stygian & Bloodmoon - +2.5 DODGE
+7.5% Scouting Chance
Radiant - +4 DODGE
Darkest - +2.5 DODGE
+5% Stress Chance
+15% Chance to be Surprised
Curio: 25% chance of 1 bonus reward (Any Loot)
+15% Chance to be Surprised
+1% CRIT
Gold +10% / +4 Loot Draws
+10% Stress Chance
+10% Chance to be Surprised
+15% Chance to be Surprised
+1% CRIT
Gold +10% / +4 Loot Draws
+15% Stress Chance
Curio: 50% chance of 1 bonus reward (Any Loot)
+25% Chance to be Surprised
+2% CRIT
Gold +15% / +8 Loot Draws
+25% Stress Chance
+5% Chance to be Surprised
+25% Chance to be Surprised
+2.5% CRIT
Gold +20% / +8 Loot Draws
+30% Stress Chance
Curio: 75% chance of 1 bonus reward (Any Loot)
+40% Chance to be Surprised
+3% CRIT
Gold +30% / +12 Loot Draws
+35% Stress Chance
+40% Chance to be Surprised
+3% CRIT
Gold +30% / +12 Loot Draws
+40% Stress Chance
Curio: 95% chance of 1 bonus reward (Any Loot)
Heroes: +1% CRIT
Heroes: -5% Chance to be Surprised
Monsters: +5% Chance to be Surprised
Darkest: +4 DODGE -> +7.5 DODGE
Stygian & Bloodmoon: +2.5 DODGE -> +7.5 DODGE
Darkest: +2.5 DODGE -> +0 DODGE
Stygian & Bloodmoon: +0 DODGE -> +0 DODGE
Enhanced Loot Bonuses from Battles and Curios for all Light Levels
+1% CRIT
-5% Chance to be Surprised
Gold +1% / +1 Loot Draw Radiant - +10 DODGE
Darkest - +7.5 DODGE
Stygian & Bloodmoon - +7.5 DODGE
Curio: 25% chance of 1 bonus reward (Any Loot)
+10% Scouting Chance
-5% Chance to be Surprised
+1% CRIT
Gold +2% / +2 Loot Draws Radiant - +2.5 DODGE
+5% Stress Chance
+20% Chance to be Surprised
Curio: 50% chance of 1 bonus reward (Any Loot)
+10% Chance to be Surprised
+2.5% Scouting Chance
Gold +3% / +3 Loot Draws
+10% Stress Chance
+15% Chance to be Surprised
+15% Chance to be Surprised
+2.5% Scouting Chance
Gold +3% / +3 Loot Draws
+15% Stress Chance
+10% Chance to be Surprised
Curio: 75% chance of 1 bonus reward (Any Loot)
+20% Chance to be Surprised
+2.5% Scouting Chance
Gold +4% / +4 Loot Draws
+25% Stress Chance
+10% Chance to be Surprised
+20% Chance to be Surprised
+2.5% Scouting Chance
Gold +4% / +4 Loot Draws
+30% Stress Chance
+5% Chance to be Surprised
Curio: 90% chance of 1 bonus reward (Any Loot)
+35% Chance to be Surprised
+2.5% Scouting Chance
Gold +5% / +5 Loot Draws
+35% Stress Chance
+5% Chance to be Surprised
+35% Chance to be Surprised
+2.5% Scouting Chance
Gold +5% / +5 Loot Draws
+40% Stress Chance
+5% Chance to be Surprised
Curio: 99% chance of 1 bonus reward (Any Loot)
Present in The Courtyard
-10% Bleed Resist
Encountered in The Farmstead
+10% Stress
Encountered in The Farmstead
+20% Debuff Skill Chance
+10% PROT
Encountered in The Farmstead
+10% Stress
+10 DODGE
Encountered in The Farmstead
+15% Healing Skills
+5% CRIT
Encountered in The Farmstead
+20% Stress Relief Skills
-10% Blight Resist
Encountered in The Farmstead as an Endgame Condition
-33% Stress Relief Skills
Encountered in The Farmstead as an Endgame Condition
+20% Stress Relief Skills
+25% Stun Resist
+25% Debuff Resist
Encountered in The Farmstead as an Endgame Condition
+3 SPD
Encountered in The Farmstead as an Endgame Condition
-20% Healing
+25% DMG
Heroes Surprised Base Chance: 10%
Scouting Base Chance: 25%













Provision costs change by -50%
Lets You Resurrect One of Three Random Heroes.
The Chosen Hero keeps their Resolve Level but their Skills & Equipment are Reset to Level 1.
Provision Quantities change by -50%
Cloister is Free
Transept is Free
Penance Hall is Free
Buff Expires if not utilized this Week
Buff Party in Ruins:
+33% Resolve XP // +15% DMG
All Sanitarium Services are Free
Buff Expires if not utilized this Week
Buff Party in Weald:
+33% Resolve XP // +15% DMG
Supply costs change by -100%
Provision costs change by -100%
Buff Expires if not utilized this Week
Buff Party in Warrens:
+33% Resolve XP // +15% DMG
1 Free Weapon Upgrade this Week
Buff Expires if not utilized this Week
Buff Party in Cove:
+33% Resolve XP // +15% DMG
Triggers a Plot Quest to face the Shrieker and reclaim the stolen Trinkets.
(Your Party only needs to survive the encounter to reclaim the stolen Trinkets)
You may face the Shrieker to gain one of its Signature Trinkets.
(Your Party only needs to survive the encounter to be rewarded with the Trinket)
Ignoring the Quest leads to 3 of your Building Upgrades being destroyed.
Attempting the Quest will prevent the destruction of any buildings regardless of your success, and if failed, the Quest will reappear later.
Cloister costs change by -50%
Penance Hall costs change by -50%
Cloister costs change by -50%
Transept costs change by -50%
Bar costs change by -50%
Brothel costs change by -50%
Gambling Hall costs change by -50%
Brothel costs change by -50%
Gambling Hall costs change by -50%
Bar costs change by -50%
Gambling Hall is Free
Brothel is Free
Transept costs change by -50%
Penance Hall costs change by -50%
This does not include any Trinkets sold by the Jeweler
Idle Musketeers gain 1 Resolve Level
This Event can only appear once.
This Event usually appears between Week 7 and 10.
The Flagellant can now be found in the Stage Coach.
This Event only appears once on Week 5.
This Event appears on Week 3 and only once.
All Stress Relief Facilities are 30% Less Effective
This Event only occurs after beating the Baron, Viscount or Countess.
The Countess Version of the Event lets you treat the Crimson Curse using the Sanitarium
20% Chance with 2 Heroes, 33% Chance with 3 Heroes, 75% chance with 4 Heroes.
All Stress Relief Facilities are 10% Less Effective
Causes the Infestation Level of the Hamlet to appear and start increasing.
Shieldbreakers may now spawn in the Stagecoach.
This Event can only appears once.